

Add Connection
Set up an SFTP import into Braze User Attributes or Catalogs
Add SFTP Connection
To add a new SFTP connection, click the + Add SFTP button. Give your import a name.

Next, provide your SFTP credentials (username and password), SFTP server URL/endpoint, port (default is 22), file path, file name and delimiter (comma, pipe or tab). You can use an explicit file name (e.g., myfile.csv) or a wildcard (e.g., contacts*) for a .CSV file. Click the Test Connection button to confirm access. If the test fails, double-check your credentials and firewall settings.
Click Save.
Field Mapping
To import data from the file, map your file's header fields to Braze fields. First, specify a file on your SFTP location so the app can read its header fields. Then choose the Braze target you want to import into:
- User Attributes: imports your rows as Braze users.
- Catalog: imports your rows as items in one of your Braze Catalogs. Select the catalog after you choose this target.
Braze TargetsThe SFTP Importer app for Braze supports importing User Attributes and Catalogs. If your use case needs other Braze targets, such as Purchases or Custom Events, submit a ticket in our support portal and our team will prioritize adding the functionality.
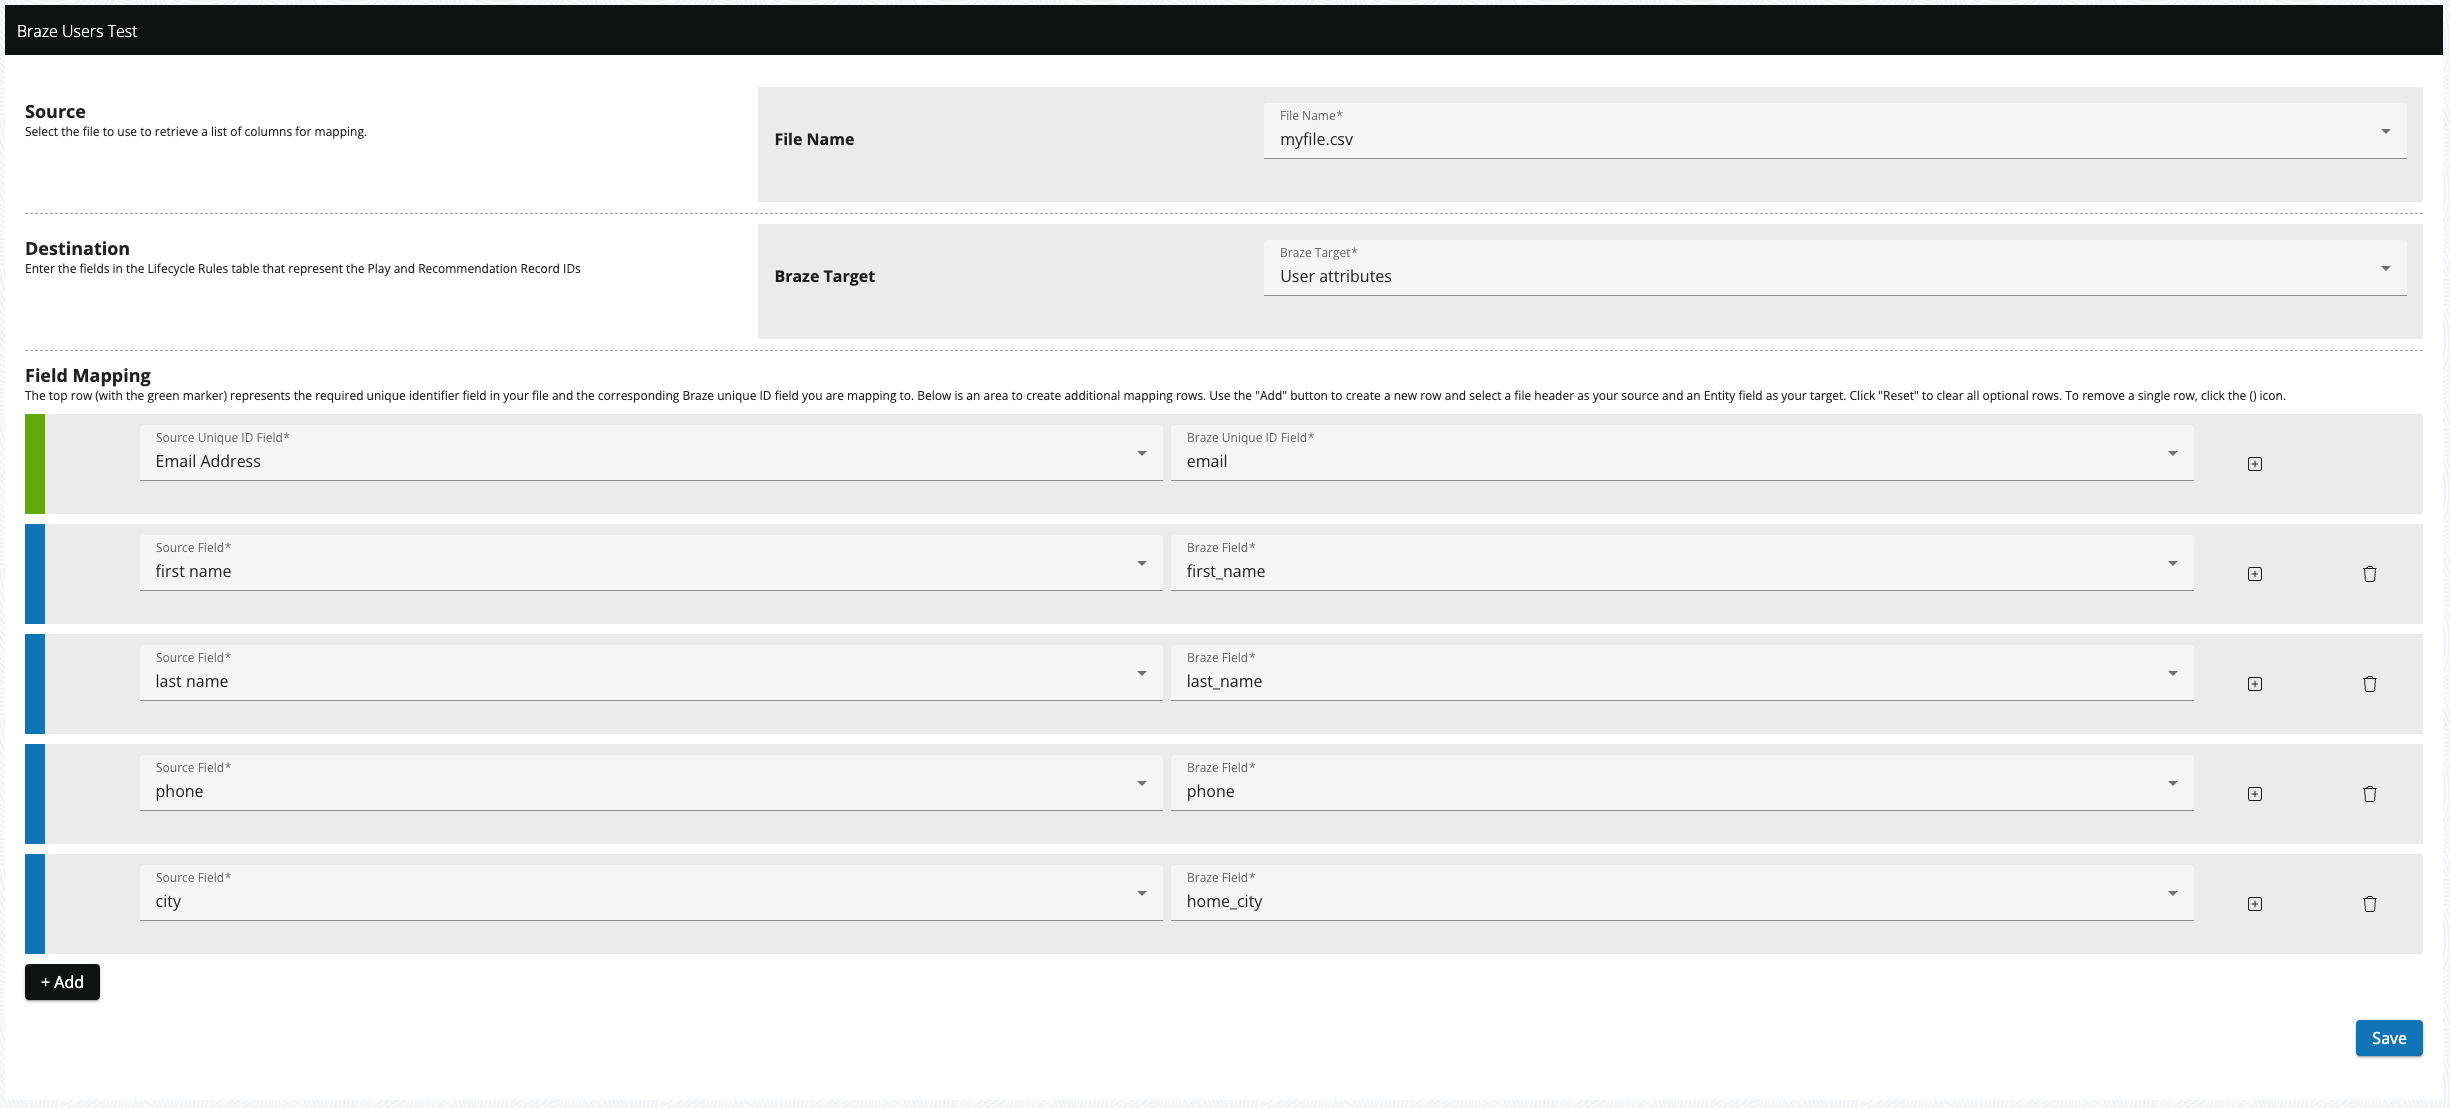
Next, map the fields from your SFTP file to the right fields in Braze. Click Add to map more fields. When you're done, click Save.
- User Attributes: You must map the unique identifier (the green row) at a minimum. You can map any standard or custom user attribute, but nested attributes are not supported. The app pulls your custom user attributes from Braze so you can choose them in the mapping.
- Catalog: The catalog's
idfield is preselected as the first mapping row and is required. Map the CSV column that holds each item's ID to it, then map the remaining columns to your catalog's fields.
You can map the same source (CSV) field to one or more Braze fields, but once a Braze field is mapped it is no longer available for additional mapping. To remove a mapping, click the icon.
Schedule Settings
You can run your import on demand by clicking Run Now, or you can set up a scheduled import. For scheduled imports, set the import frequency, days of the week, start time/end time and offset.
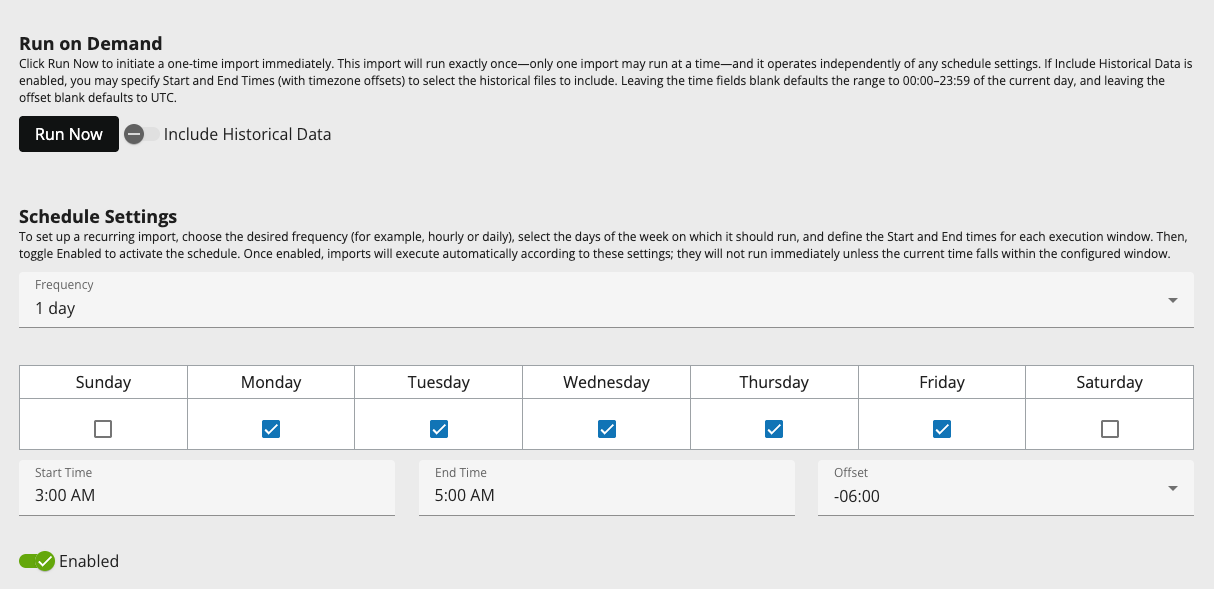
Allowed frequencies include:
- Every 5 minutes
- Every 10 minutes
- Every 30 minutes
- Every 1 hour
- Every 2 hours
- Every 4 hours
- Every 8 hours
- Every 12 hours
- Every 1 day
- Every 1 week
- Every 1 month
Click the Enable toggle to enable your scheduled import.
Notification Settings
Optionally, you can have one or more email addresses notified when an import succeeds or fails. Use the toggles to turn success and failure notifications on or off, and enter the email addresses, separated by commas.

Click Save to save your import settings.
Reporting
Each import has its own reporting, for both User Attribute and Catalog imports. Open it from the imports list.
- Chart: shows records Imported and Failed per hour for the selected day. Use the date picker or the Prev/Next buttons to move between days.
- Runs: each run is listed below the chart. Expand a run to see its execution details. If Braze rejected records, use the Braze Errors link to see why.
- Retention: run results are kept for at least 90 days.
The imports list also shows who created and who last updated each import.
Managing Imports
To delete an import you no longer need, use the delete option on the imports list. If you delete an import by mistake, contact Relationship One Support and we can restore it.
Updated 17 days ago