Admin Tools - Connections
Oracle Marketing Cloud - Eloqua Data Cloud
The Data Cloud Admin Tools lets you manage your Data Cloud data sources (tables and fields, picklists, and table relationships), manage data connections, and access global reports and dashboards. Click on the Manage Connections link in the menu to add or edit your Data Cloud connections.
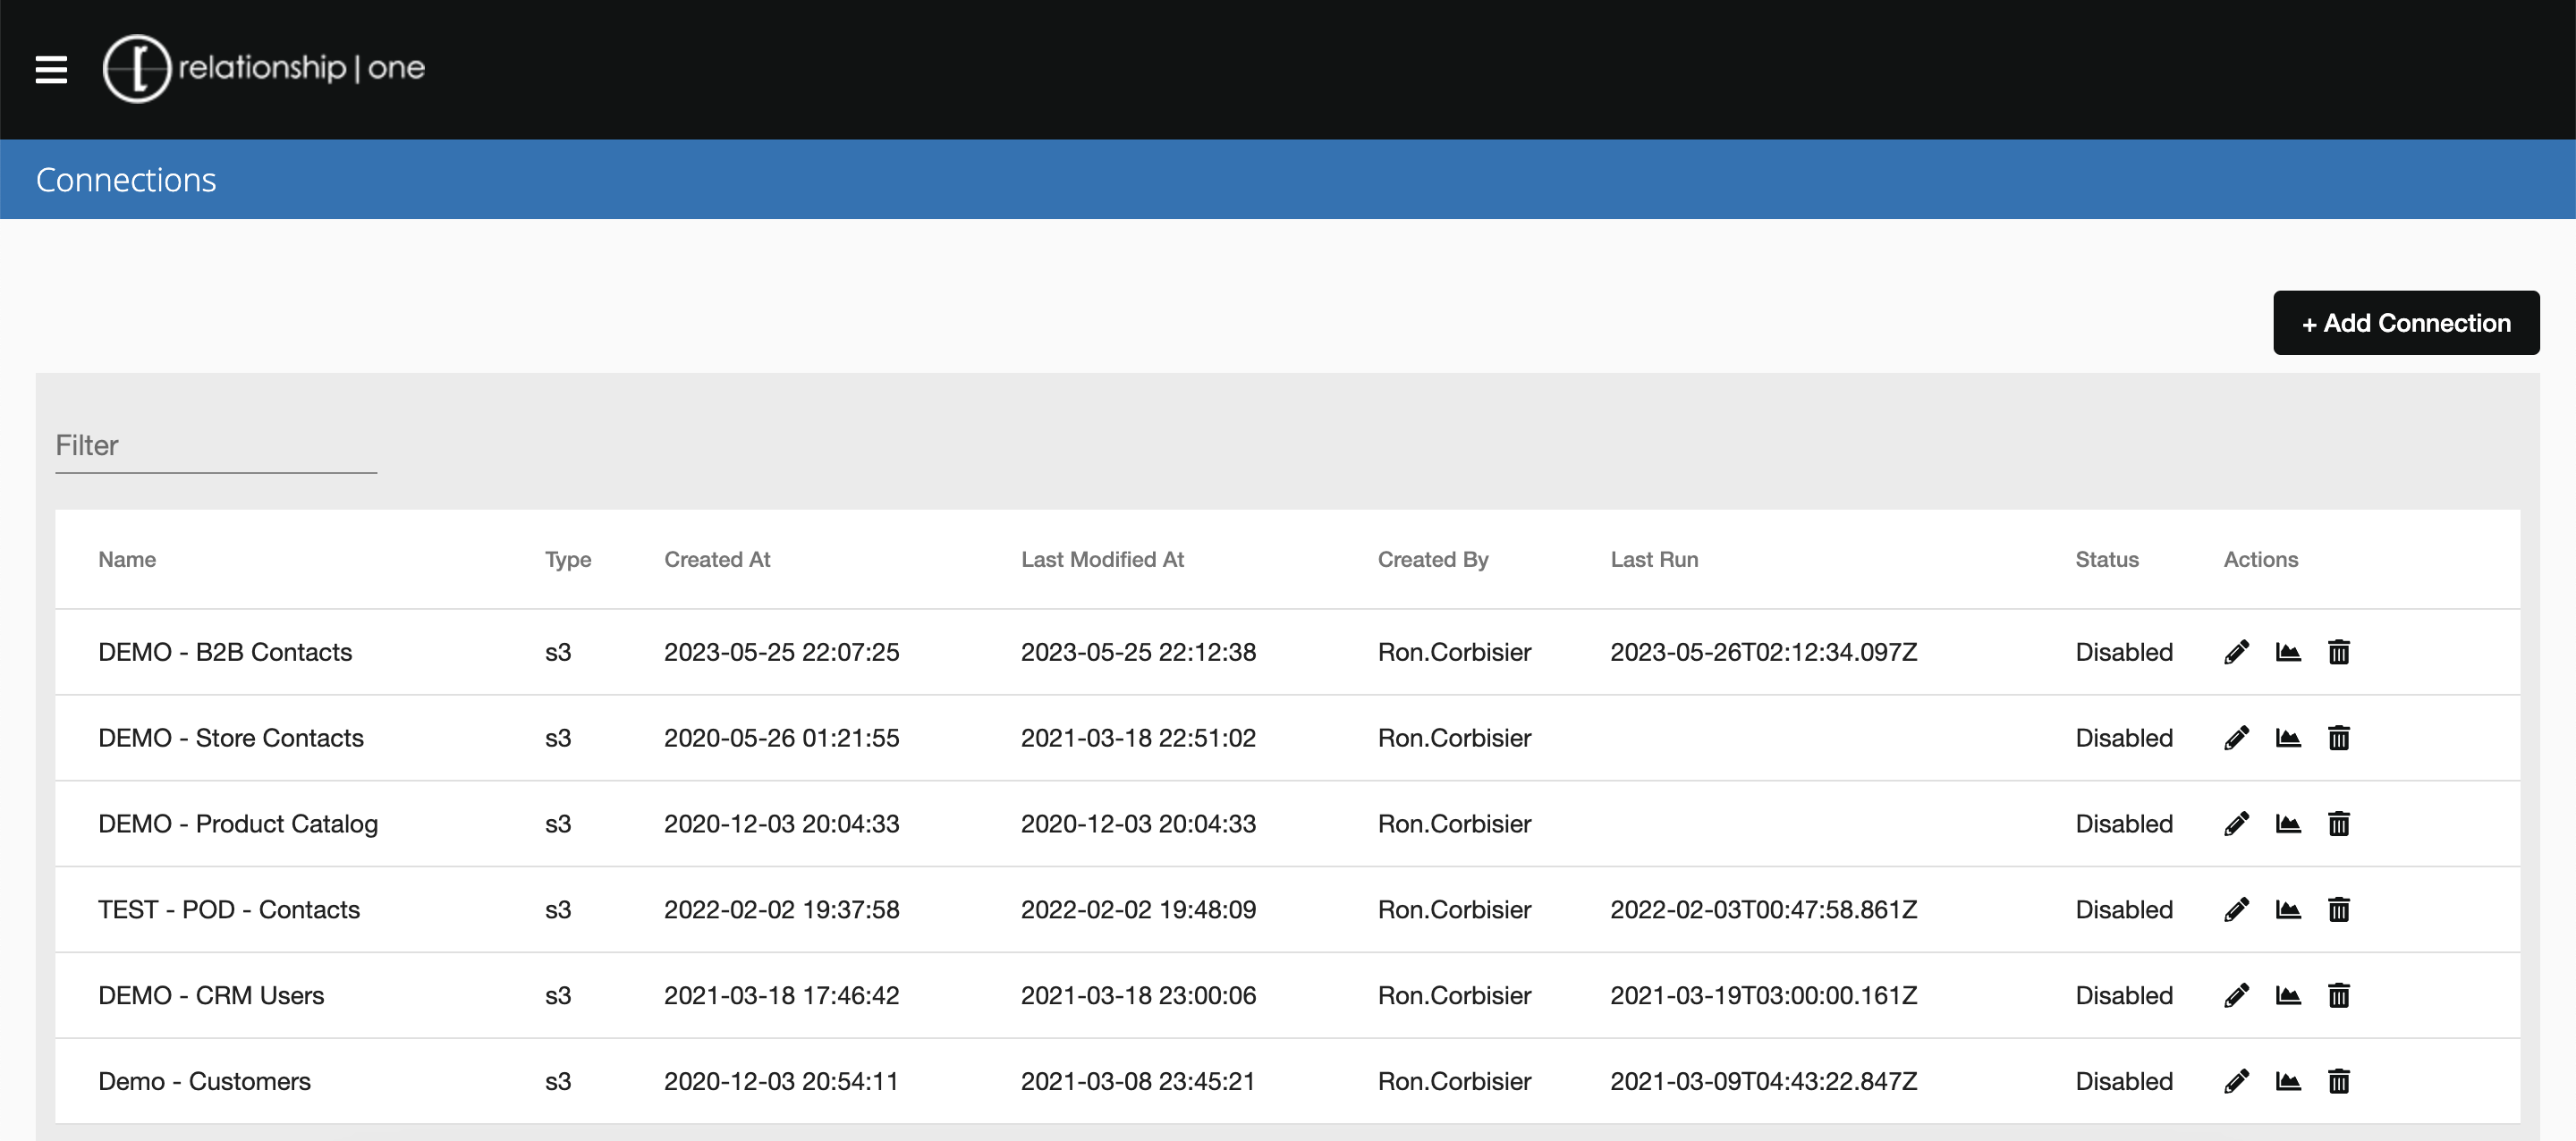
Skip to adding an S3 connection
Skip to adding a database connection
Add An S3 Connection
To add a new AWS S3 connection, click the + Add Connection button and select S3 from the dropdown. Give your connection a name and select an Action Type. Your data connection can either Upsert data into your Data Cloud table or Delete records from your Data Cloud table.

Next, provide your AWS S3 credentials, region, bucket, and folder/path information and file name. Please note, you can use an explicit filename (e.g., myfile.csv) or a wildcard (e.g., contacts*) for either a .CSV or .TXT file type.

Click the Test Connection button to confirm access. Please note, if your AWS user does not have view list rights on your AWS bucket, you may get a connection error. Continue on to the next step to confirm. If you still get a connection error, contact your AWS administrator to ensure you have the correct user permissions.
Next, to import data from the file, you'll need to map your file field headers to your desired table columns. To get started, specify a file in your S3 file location and click on the Get Fields button to get the header fields of your file.
To continue adding an S3 Connection, skip to the Field Mapping section in this user guide.
Add A Database Connection
To add a new database connection, click the + Add Connection button and select Database from the dropdown. Give your connection a name and select an Action Type. Your data connection can either Upsert data into your Data Cloud table or Delete records from your Data Cloud table.
Next, provide your database credentials, server name or URL, port, and database name. You can also optionally enable the use of SSL.
Click the Test Connection button to confirm access. Continue on to the next step to confirm.
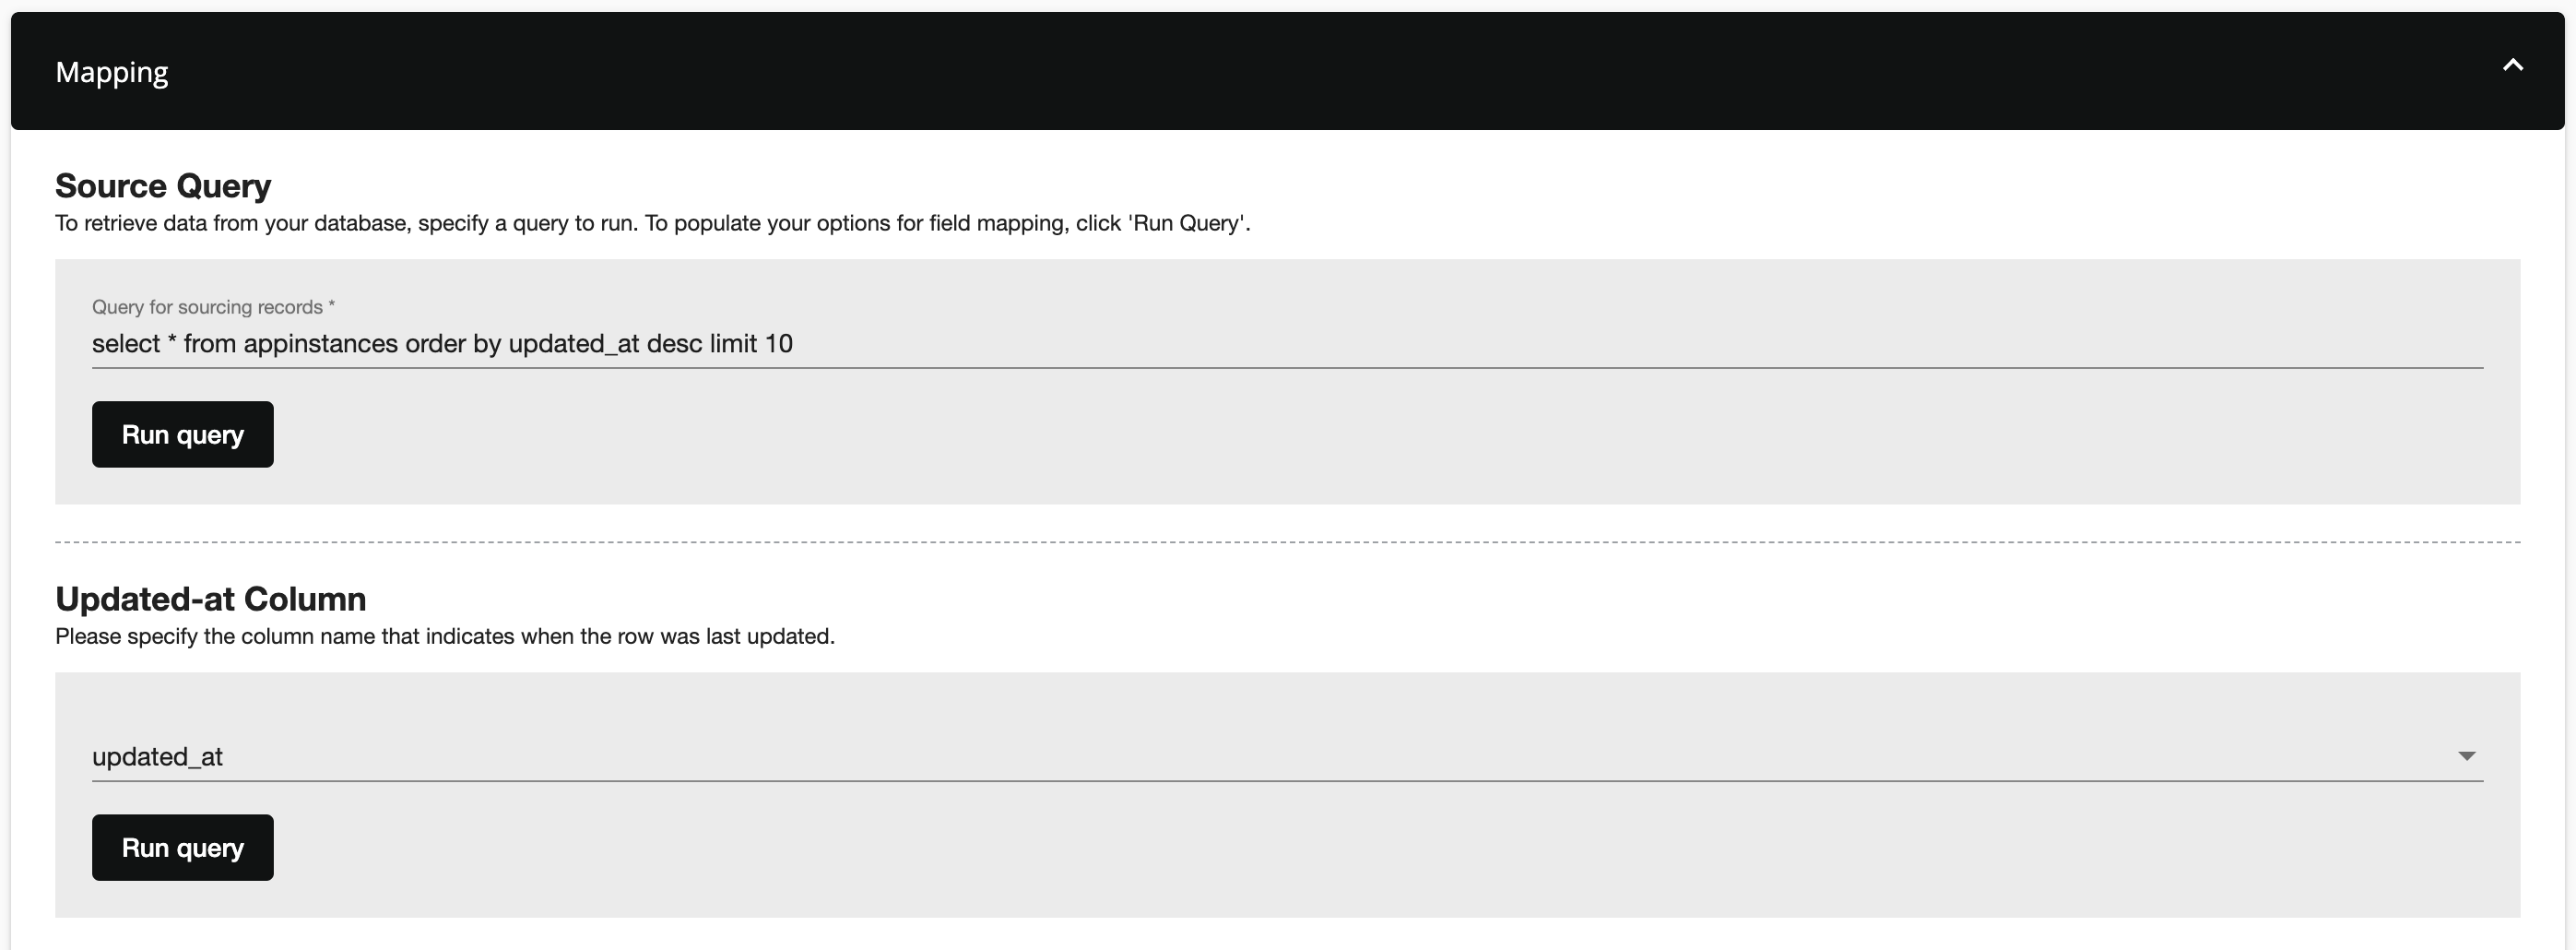
Prior to field mapping, enter the desired query for sourcing records and click Run Query. Then, select the column the indicates when the last row was updated.
To continue adding a database connection, skip to the Field Mapping section in this user guide.
Field Mapping
Specify the table you would like to import data into. Please note, once you have specified the import table and save your connection settings, you can not change the target table.
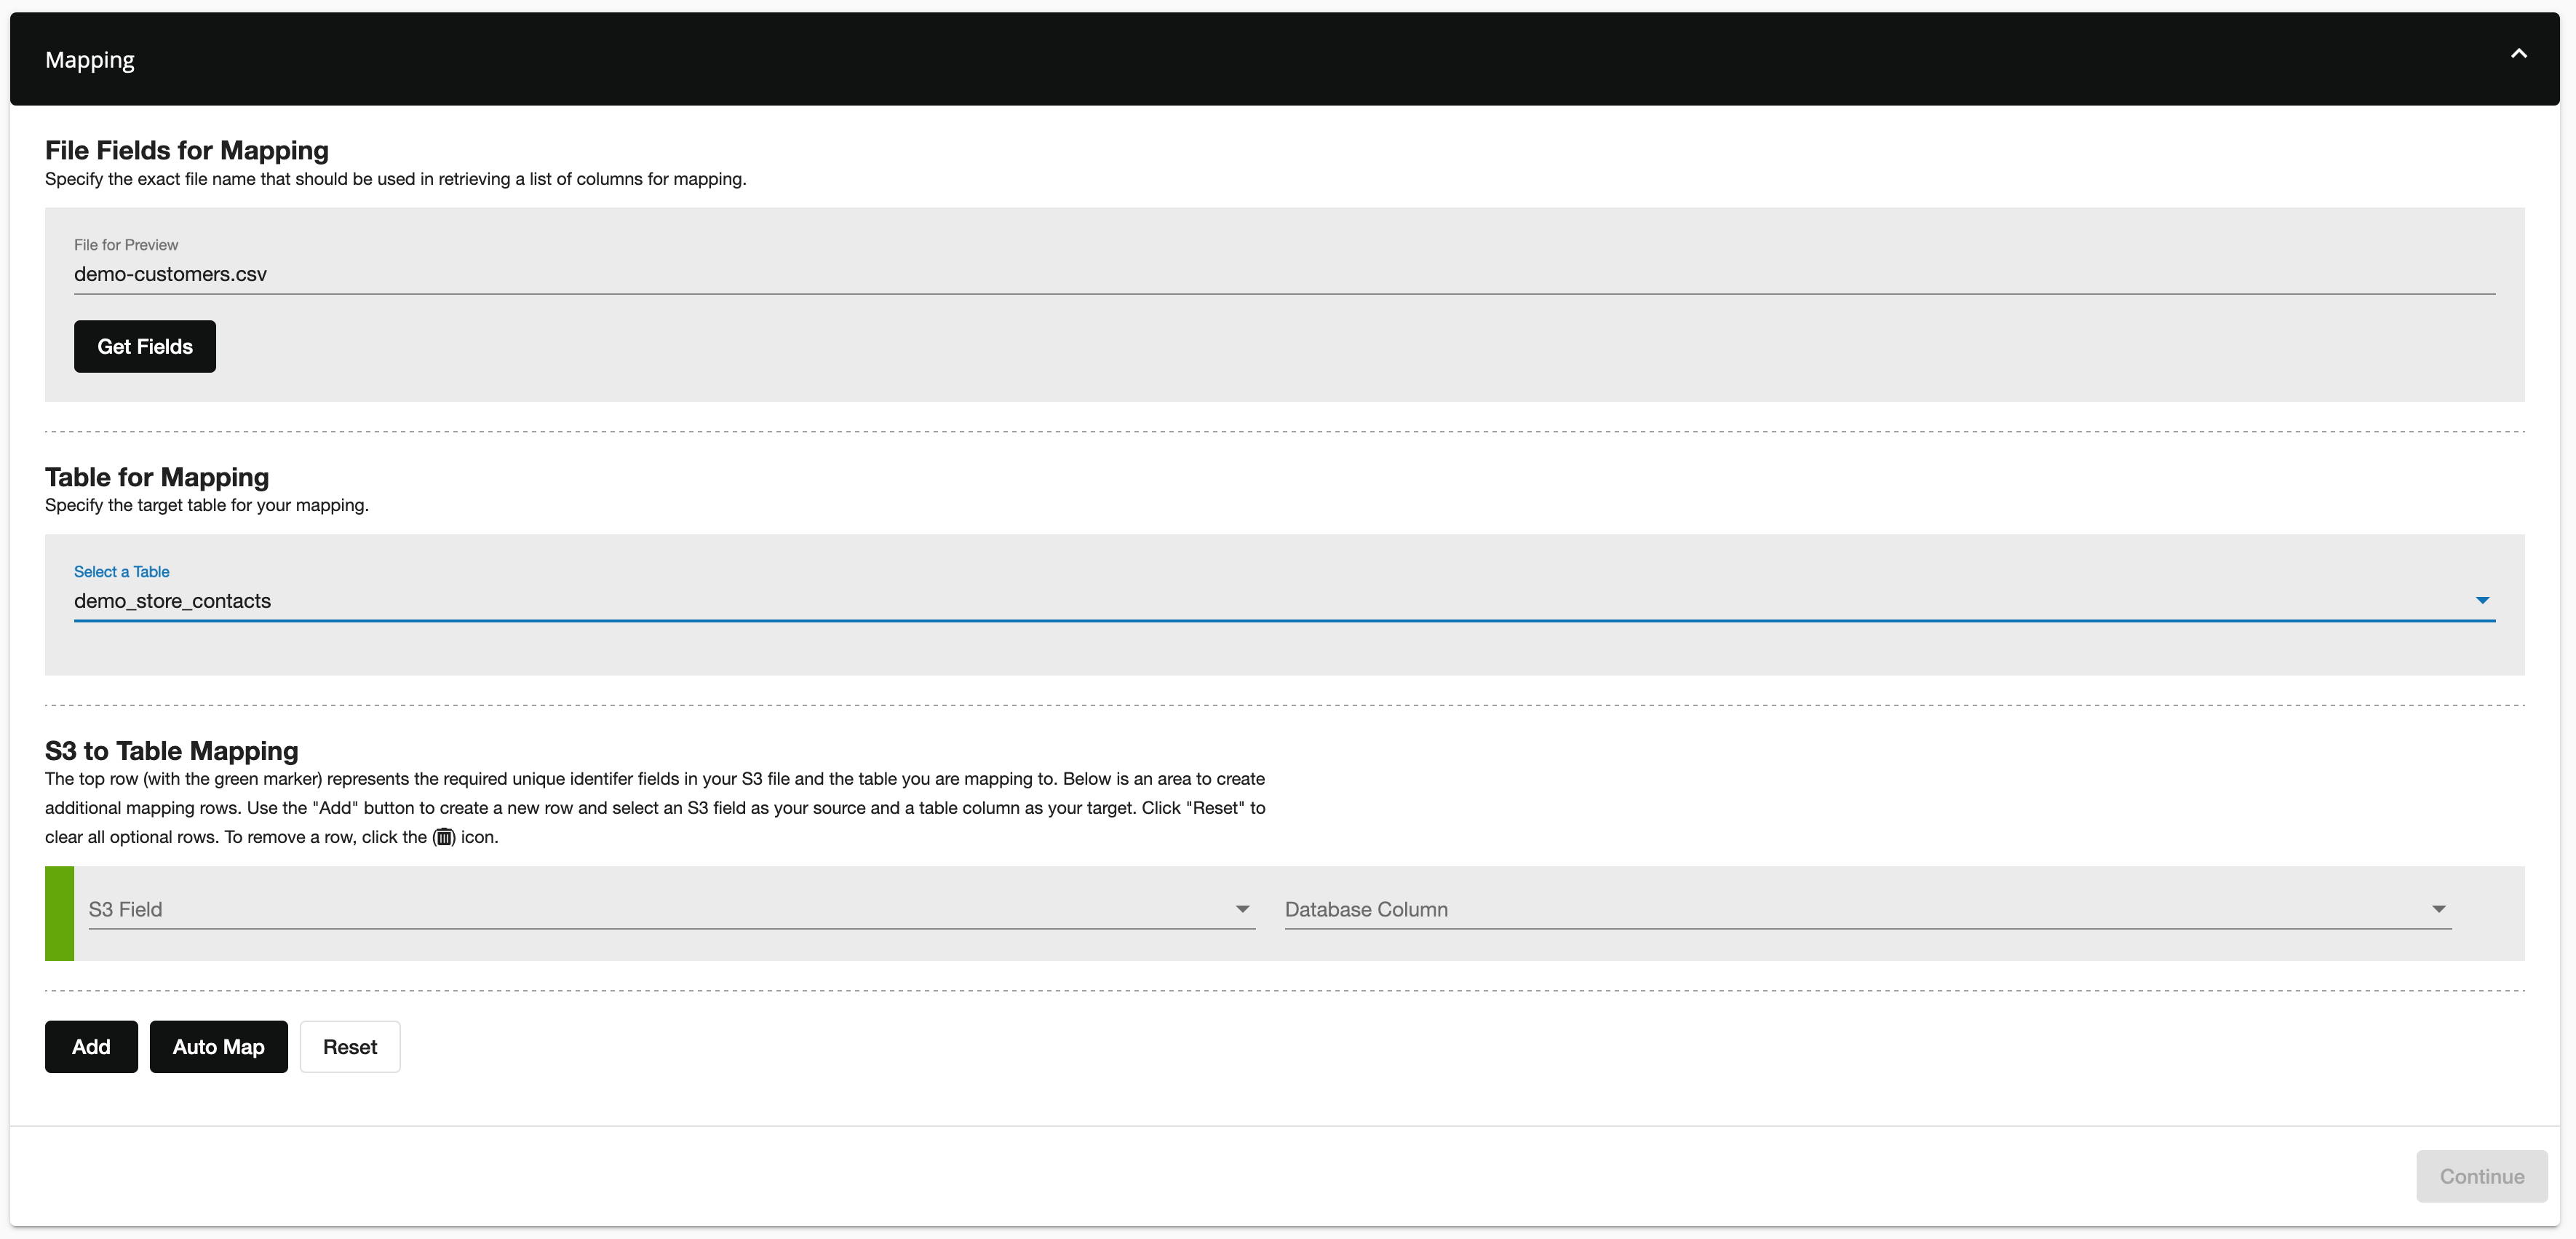
Next, map the desired fields from the S3 file to the appropriate Data Cloud table column. At a minimum, you must map the unique identifier (the green row). Click the Add button to add additional mappings. You can also click on the Auto Map button to add all fields from your CSV file. The app will attempt to map your source CSV field to the table column.
Please note, you can map the same source (CSV) field to one or more Data Cloud columns but once a Data Cloud column has been mapped it will no longer be available for additional mapping. To remove a mapping, click on the .
Schedule Settings
You can run your import on demand by clicking the Run Now button or you can set up a scheduled import. For scheduled imports, set the import frequency, days of the week, start time/end time, and offset.

Allowed frequencies include:
- Every 5 minutes
- Every 10 minutes
- Every 20 minutes
- Every 1 hour
- Every 2 hours
- Every 4 hours
- Every 6 hours
- Every 8 hours
- Every 12 hours
- Every 1 day
- Every 1 week
- Every 1 month
Click the Enable toggle to enable your scheduled import.
Notification Settings
Optionally, you can specify one or more email addresses (comma separated) to receive a notification on import success or import failure. Use the toggle to enable or disable notifications. You can add one or more email addresses, separated by a comma, to receive notifications.
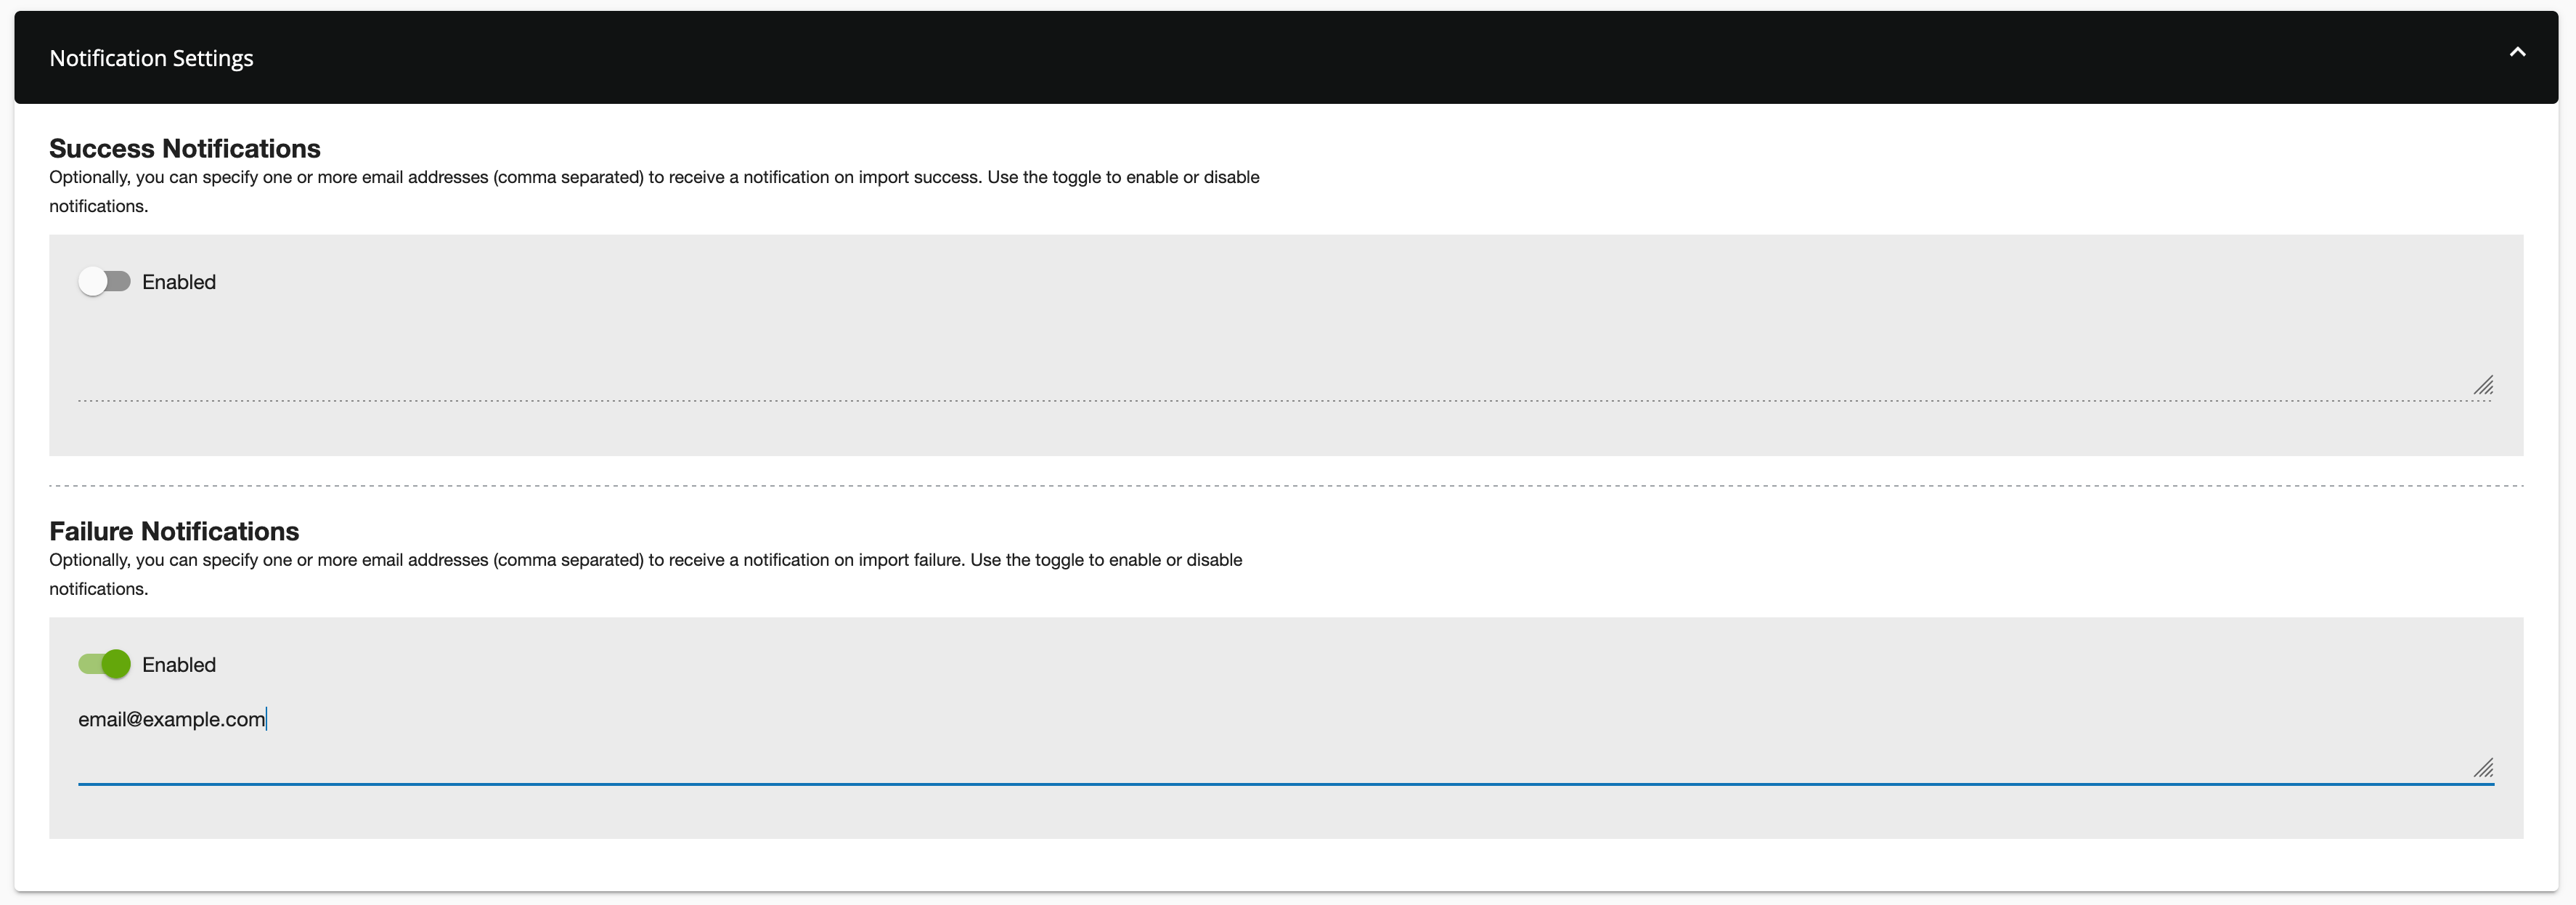
Click Done to save your connection settings.
Import Reports
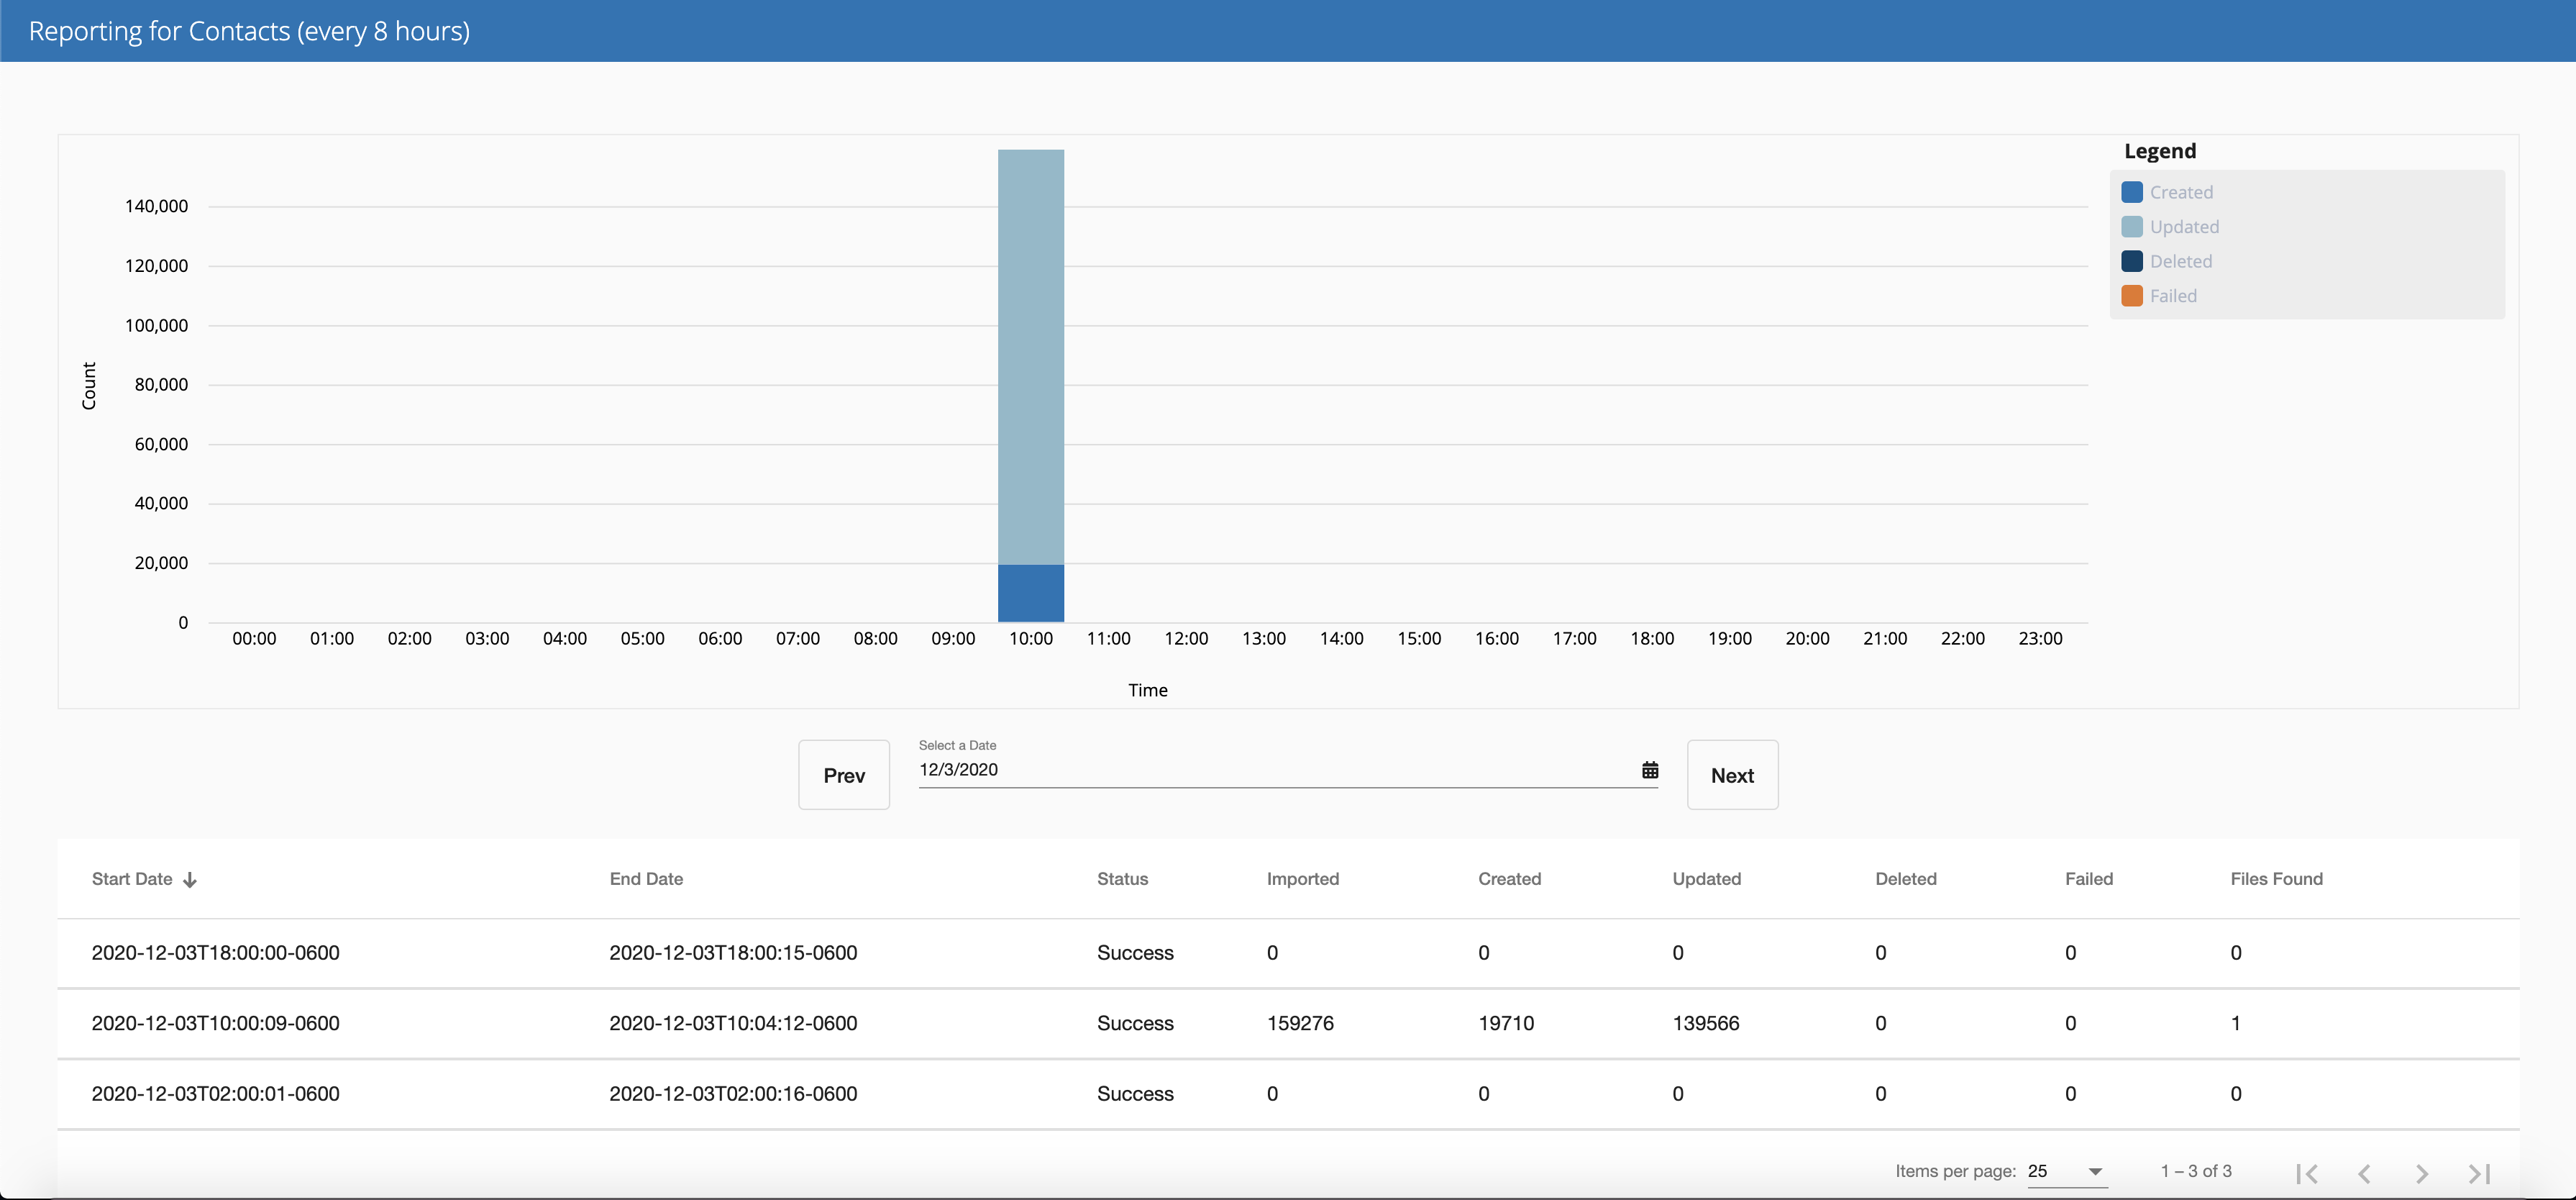
Once an import has completed, either by clicking the Run Now button or via a scheduled import, on the connection, click the icon to open a connection report. Click the Prev or Next button to move back or forward day-by-day or select the desired date. Click on an import event for more information.
Updated about 1 year ago
