
Create an Action
Oracle Marketing Cloud - Eloqua
NetSuite CRM Connector App Feature
Step 1: Add an Action
Actions are used on the Eloqua Program canvas to create or update records within Netsuite. To create a new action, go to the Actions panel and click on +Add Action. Provide an Action Name (please note, this name will be used in the Program Canvas Cloud Action), choose a NetSuite Connection, the NetSuite Entity, and select your desired Action Type.
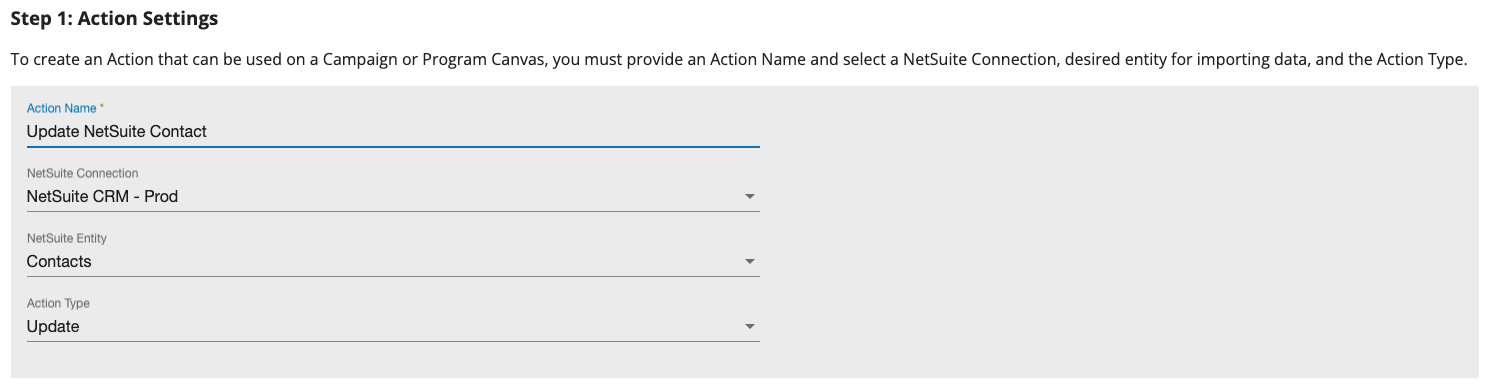
Currently, the app supports the following NetSuite objects and associated actions:
- NetSuite Customers - Create or Update
- NetSuite Contacts - Create or Update
- NetSuite Opportunties - Create or Update
- NetSuite Estimates - Create or Update
- NetSuite Tasks - Create
- NetSuite Campaign Responses - Create
If you require an alternate NetSuite entity, please let us know by submitting a support request.
Step 2: Set Eloqua Settings
Specify the source of Eloqua data that will be used to update NetSuite, either Eloqua Contact or Eloqua Custom Object records. When creating new NetSuite records, you can choose to store the NetSuite field ID. When updating existing NetSuite records, you will need to specify the unique identifier that should be used to match an Eloqua record to a NetSuite record.

Set the field to store a NetSuite record ID when creating new records or the unique ID when updating records.

Specify the Eloqua Custom Object that that should be used.
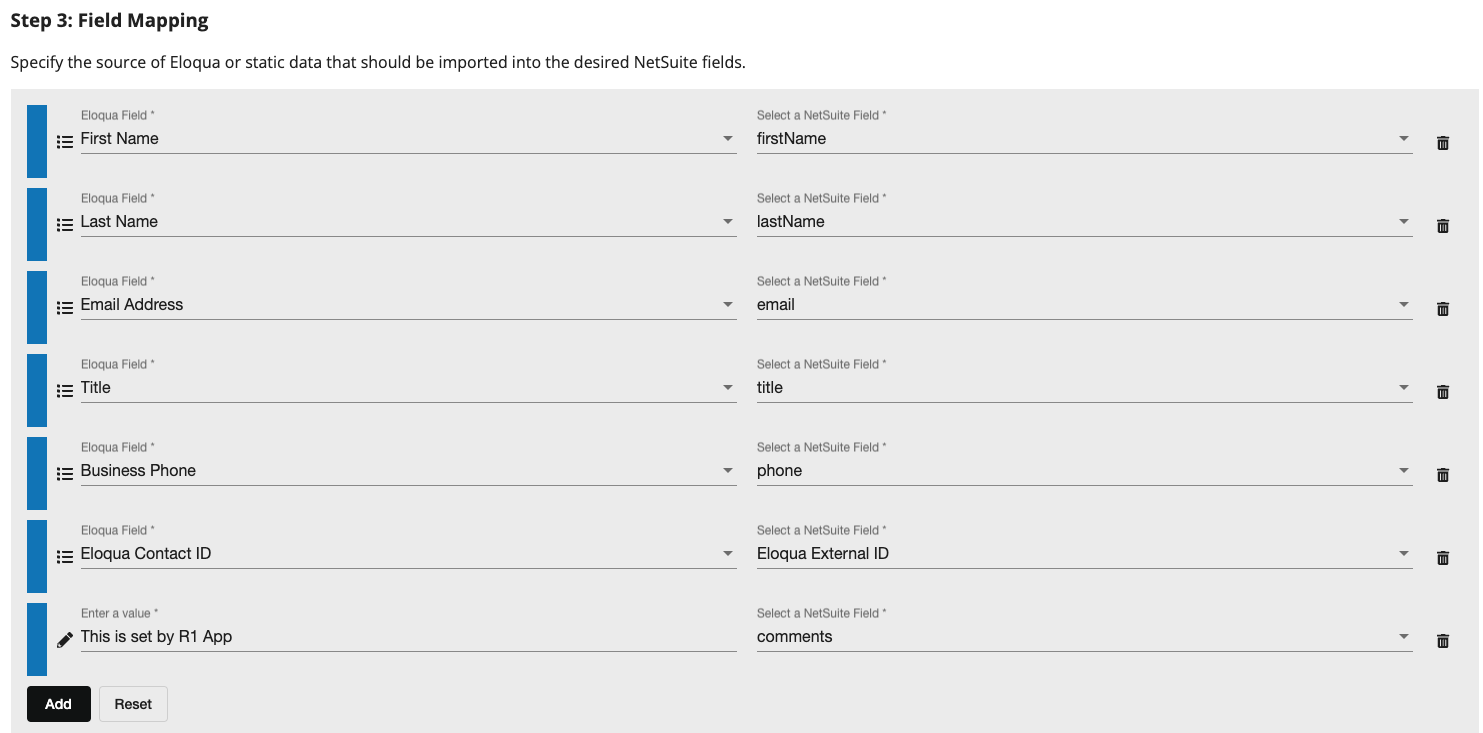
Step 3: Define Your Action Field Mapping
Next, specify at least one Eloqua and mapped NetSuite field when creating or updating a NetSuite record. Click the +Add Fields button to add more Eloqua fields and specify the appropriate NetSuite mapped field. To delete a mapping, click the trashcan icon. By default, the available Eloqua Contact or Custom Object fields are displayed. Click the icon to the left of the Eloqua field dropdown list to change to use a static text field (indicated by the icon). Click it again to go back to the Eloqua fields list.
Step 4: Enable Your Action
You need to Enable your Action to make it available as a Cloud Action within Program Canvas. Please note, if you disable an Action that is used within a Canvas Cloud Action step, your Campaign or Program members will be set to an "Error" condition.

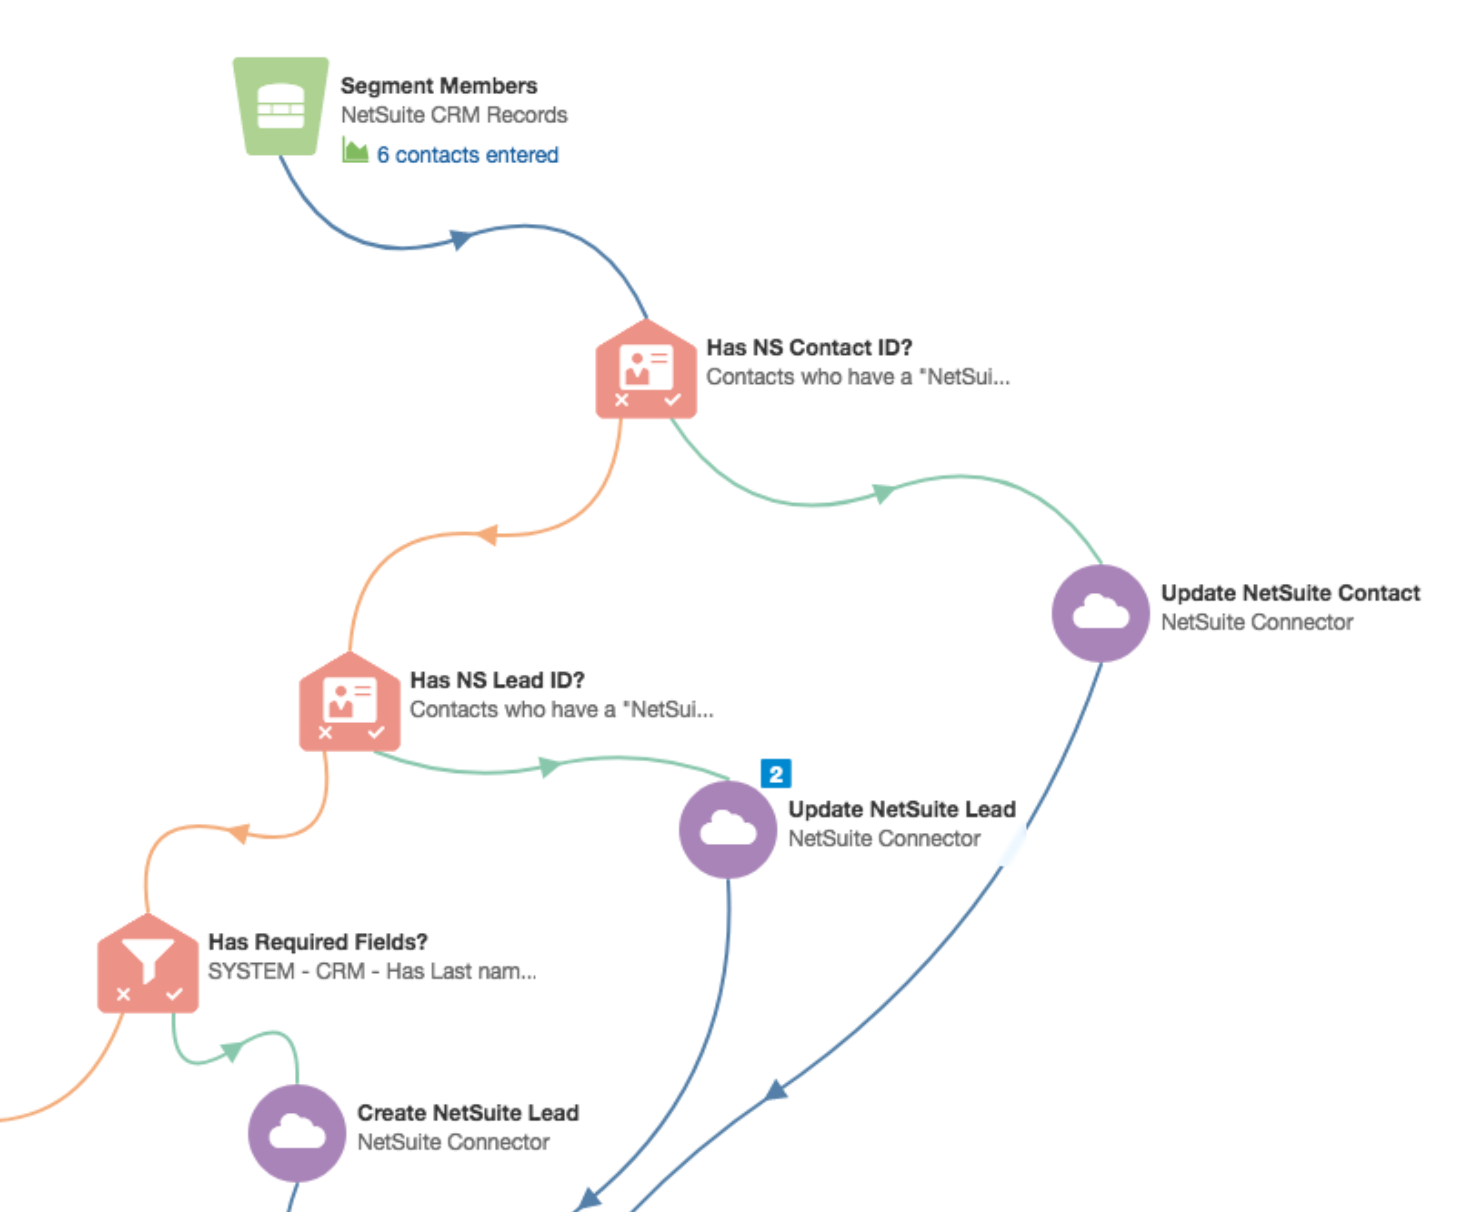
Adding The Cloud Action
Within the Eloqua Program Canvas, find the NetSuite Connector Cloud Action in the Actions menu area. Double-click on or drag the NetSuite Connector Cloud Action onto your canvas workspace.
Select the NetSuite Action from the list of enabled Actions you have created. There is no further configuration necessary.
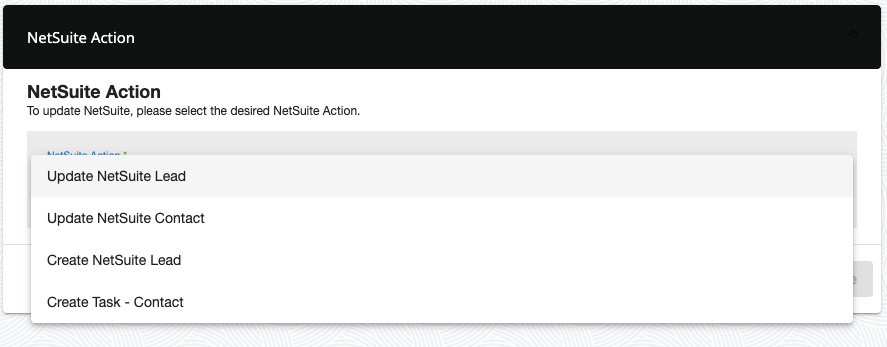
The Cloud Action will automatically enable when you activate the Program.