
Embedding Eloqua Profiler
Oracle Marketing Cloud - Eloqua
NetSuite CRM Connector App Feature
The users that can see Eloqua Profiler in your NetSuite CRM system is dependent on the fields/forms you have set up in your CRM system, permission to those fields/forms, and an Eloqua Profiler user license.
There are three main steps you must follow to embed Eloqua Profiler in NetSuite CRM:
- Create a custom Subtab to embed Profiler on record form layout.
- Create a custom Entity Field & set Access privileges for Eloqua Profiler.
- Provision Eloqua Profiler user licenses for your CRM/sales team members.
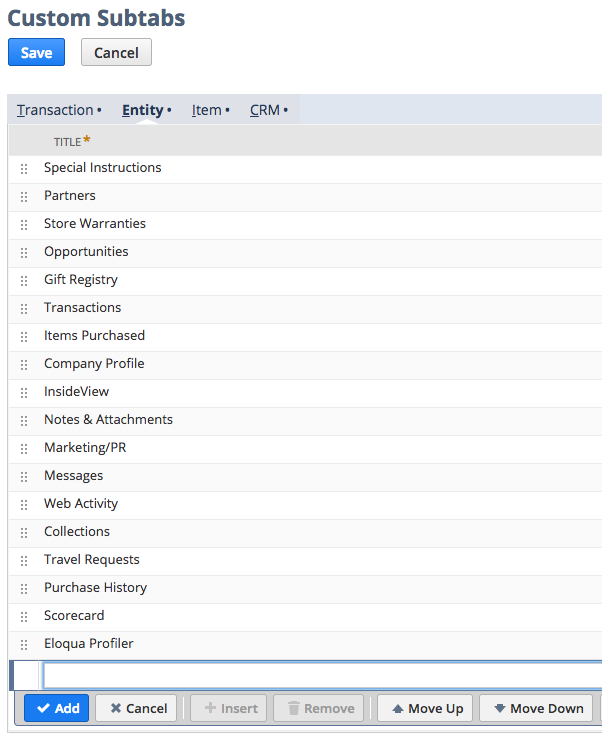
Step 1: Create a Custom Subtab
Log into your NetSuite account using your administrator credentials, then navigate to Customization > Forms > Subtabs.
Click on Entity.
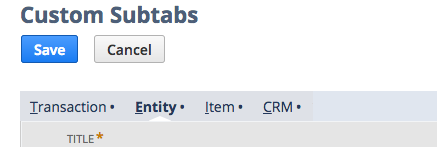
Add a new Subtab element, in your desired location, called "Eloqua Profiler".
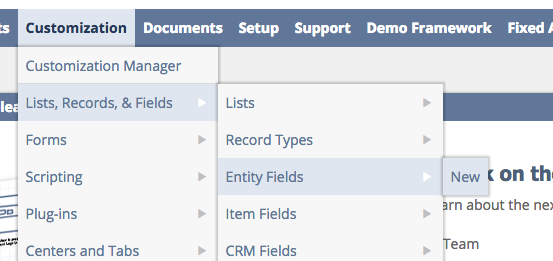
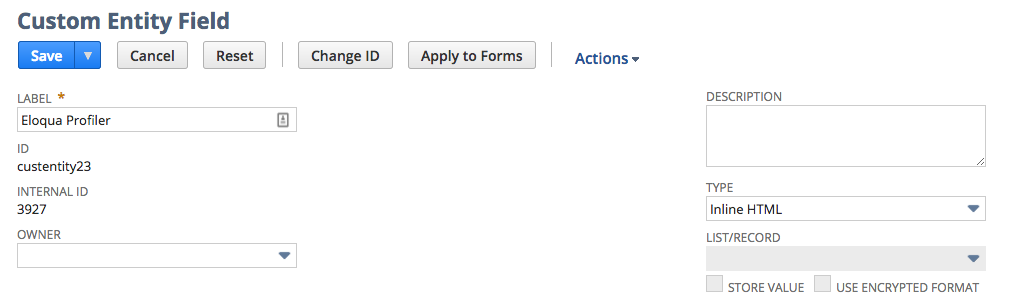
Step 2: Create a Custom Entity Field
Navigate to Customization > Lists, Records & Fields > Entity Fields > New to create a new Entity Field.
Call the new Entity Field Label to "Eloqua Profiler" and set the Type to "Inline HTML".
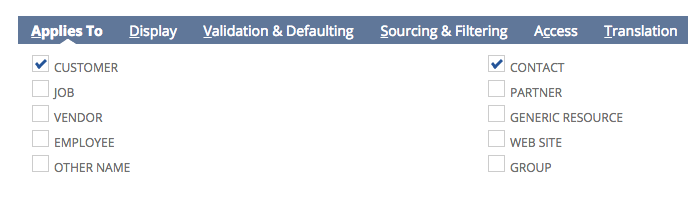
Under the "Applies To" settings, allow this Subtab to be viewed for Customer and Contact records.
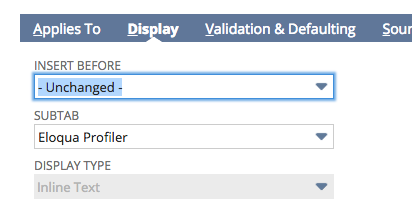
Under "Display" settings, select your newly created Eloqua Profiler Subtab.
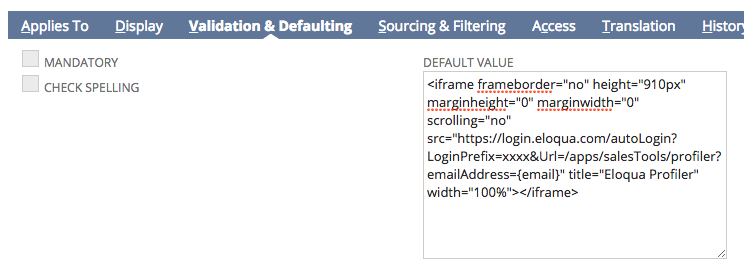
Under "Validation & Defaulting" settings, copy and paste the code that corresponds with your choice of login options into the Default Value field:
Direct Login
<iframe frameborder="no" height="910px" marginheight="0" marginwidth="0"
scrolling="no" src="https://login.eloqua.com/apps/salesTools/profiler?
emailAddress={email}" title="Eloqua Profiler" width="100%"></iframe>
Auto-login
<iframe frameborder="no" height="910px" marginheight="0" marginwidth="0"
scrolling="no" src="https://login.eloqua.com/autoLogin?
LoginPrefix=XXXX&Url=/apps/salesTools/profiler?emailAddress={email}"
title="Eloqua Profiler" width="100%"></iframe>
Note change the XXXX value for LoginPrefix=XXXX to your Eloqua instance Login Prefix value which can be found within Eloqua under Settings > Company Defaults. Be sure that the Formula field is deselected before saving your settings.
Under "Access" settings, add your desired security access restrictions as appropriate.
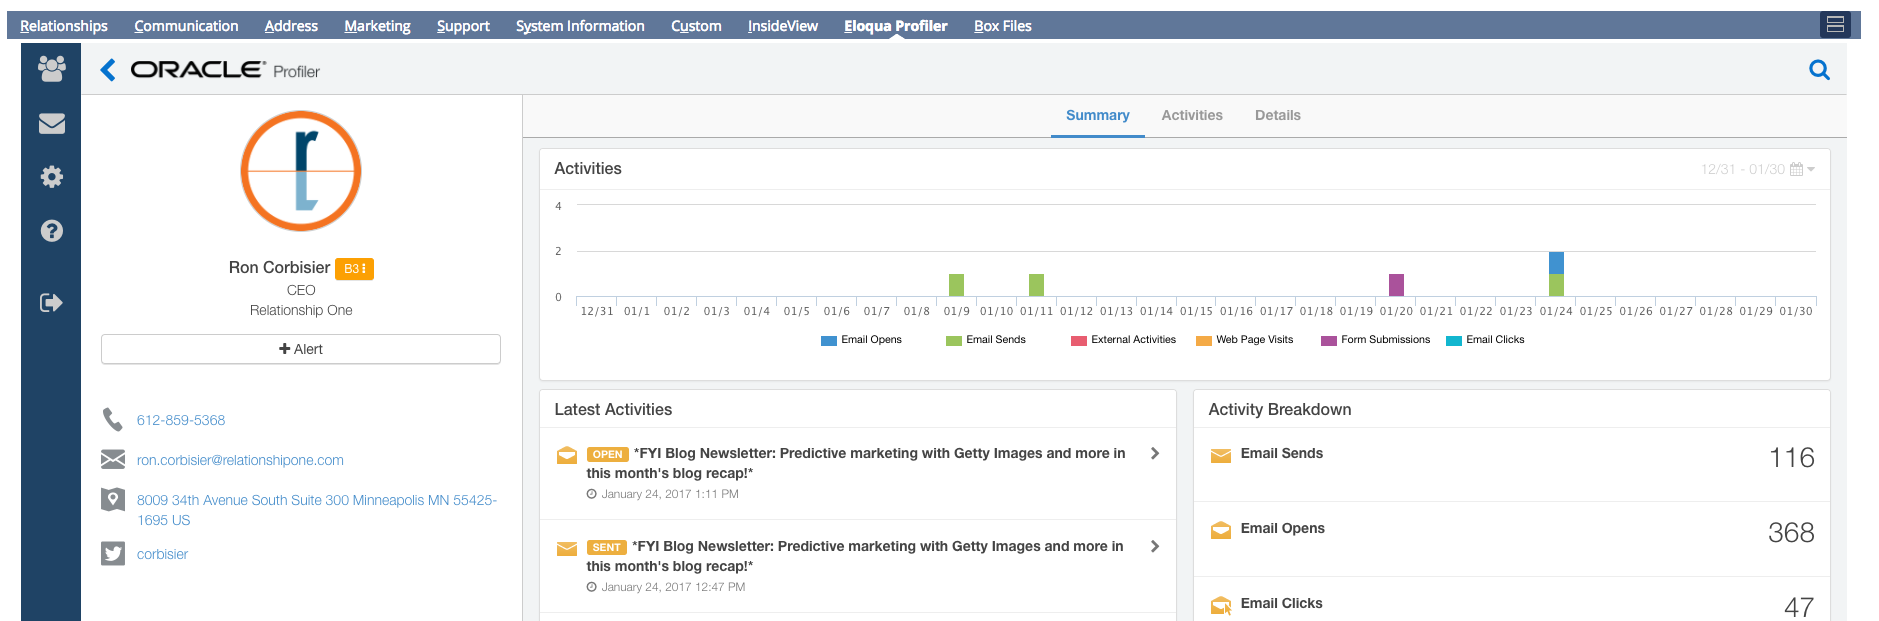
To test your Eloqua Profiler integration, view a NetSuite Customer (Individual) and/or Contact record that contains an Email address.
Step 3: Provision Your Eloqua Profiler Licenses
Within Eloqua, make sure you have provisioned Eloqua Profiler licenses for your sales team users. They will need to sign-in the first time for Profiler to become active and can check the "Remember Me" option so they can bypass this in the future.
Updated over 1 year ago