
Twilio SMS Pro
Oracle Marketing Cloud - Eloqua
Channel App
Subscription RequiredThe Twilio SMS Pro app is a premium app and requires a subscription. To see subscription options or to start a trial, visit our AppCloud. If you don't have an AppCloud account, you'll need to create one first...but no worries, this app may require a subscription but you can create an AppCloud account for free!
App Overview
With this advanced Twilio SMS Pro Cloud Action, create and manage high volume SMS campaigns within Oracle Eloqua. With the Pro Cloud Action, you can:
- Push or schedule an SMS message through the campaign canvas or program canvas
- Send SMS messages from multiple phone numbers or short codes to maximize delivery speed
- Personalize your message using data from the recipient’s Contact record
- Configure an automatic message to be sent to replies
- Setup keyword for opt-out management
App Installation
To install the Relationship One Twilio SMS Pro Cloud Action:
- Click on the install URL below:
IP AllowlistingIf you have Eloqua IP allowlisting enabled, please add AppCloud IPs to your allowlist - 44.236.213.84 and 44.238.209.213.
Please note, the installation process must be done by a user with Eloqua Customer Administrator rights.
-
Log into Eloqua with your Eloqua Credentials, if required.
-
Click Accept and Install to add the app to your Eloqua instance.
-
Click Authenticate Me to grant permission for the app to communicate with Eloqua on your behalf.

-
Click Accept or switch users to allow Eloqua to access the app.
-
Provide your Twilio Account SID and Account Token. If your Twilio account has sub-accounts, you will be able to select the desired account. Please note, the app will not let you select a Twilio account if it is already being used in another Eloqua instance. If you do not have a Twilio account, click on the Get Started button to sign up.

If you don't have your Twilio account credentials handy, just log into Twilio and you will find them on your Dashboard in the Project Info area.

Opt-out Management (optional)
- Optionally, with the Twilio Pro Cloud Action, you can set up custom opt-out settings. To configure the opt-out settings, click on Opt-Out Management during the installation process. Click On to enable opt-out management.

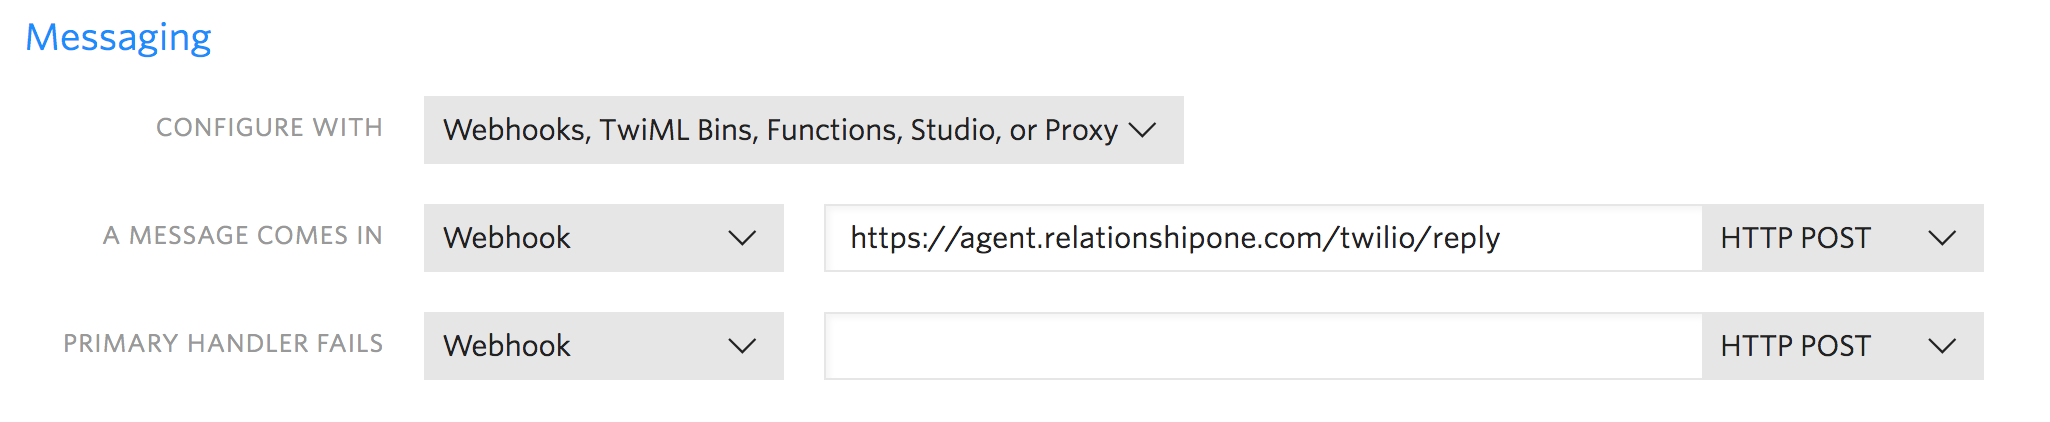
You may receive an error message if you have not set up a phone number or short code in your Twilio account or if you have not set up your Twilio account to use a webhook for when a message comes in. To set up a webhook for a Phone Number or Short Code in Twilio, log in to Twilio and navigate to “Manage Numbers.” Input https://agent.relationshipone.com/twilio/reply as the Webhook post.
- Once opt-out management is turned on without an error message, continue with the configuration settings. Select the Eloqua Contact field that the app should update for an opt-out response and the value that should be set to this field if a recipient opt-outs.

- Enter keywords that you would like the app to monitor for opt-out requests. Type a keyword and press enter to add a new keyword. To remove simply click the x.

- Finally, if desired, you may send a custom reply text message (up to 1600 words) for any opt-out request.

Note: Please remember to click Save to ensure your configuration changes are saved and the app is marked as configured within Eloqua.
You will now see the Relationship One Twilio SMS Pro app in the App Catalog inside of your Eloqua instance.
The Relationship One Twilio SMS Pro app is now installed in the App Catalog inside of your Eloqua instance which can be found by clicking on Apps under the Settings menu in the Platform Extensions section. You can select the app to view the app description, modify the configuration settings, reinstall, or uninstall it. You can also check its status and dependencies.
Updated 3 months ago