
Program Notifier for SFTP
Oracle Marketing Cloud - Eloqua
Campaign Enhancer
The Program Notifier for SFTP Cloud Action allows you to create an export of all Program Canvas members, including Contact, Campaign, and Static field values, to an SFTP server. This app is a part of our SFTP Tools app package which includes a notifier for campaign canvas and a notifier for program canvas.
App Configuration
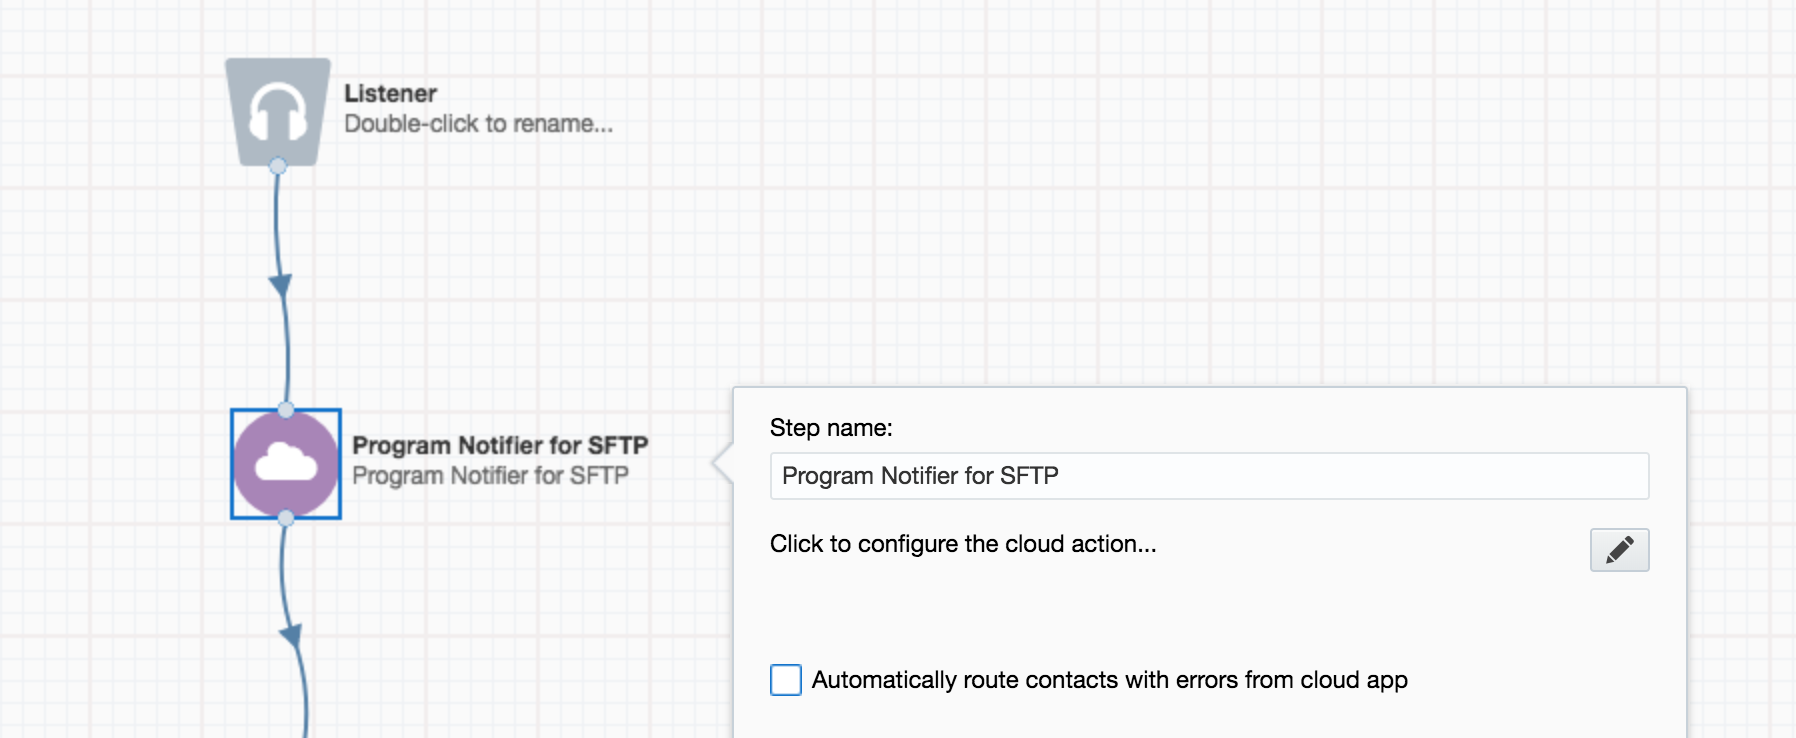
Step 1: Add the Cloud Action
Within the Eloqua Program Canvas, find the Program Notifier for SFTP Cloud Action in the Actions menu area. Double-click on or drag the Program Notifier for SFTP Cloud Action onto your canvas workspace.
Step 2: Provide SFTP Credentials
Set up a connection to your SFTP server. You will need to provide:
- The SFTP Hostname or IP Address
- Port Number (Port 22 is set as the default SFTP port)
- SFTP User Name
- SFTP Password
- The directory path (folder) where the file should be created (note, you can have the app create the folder if it does not exist)
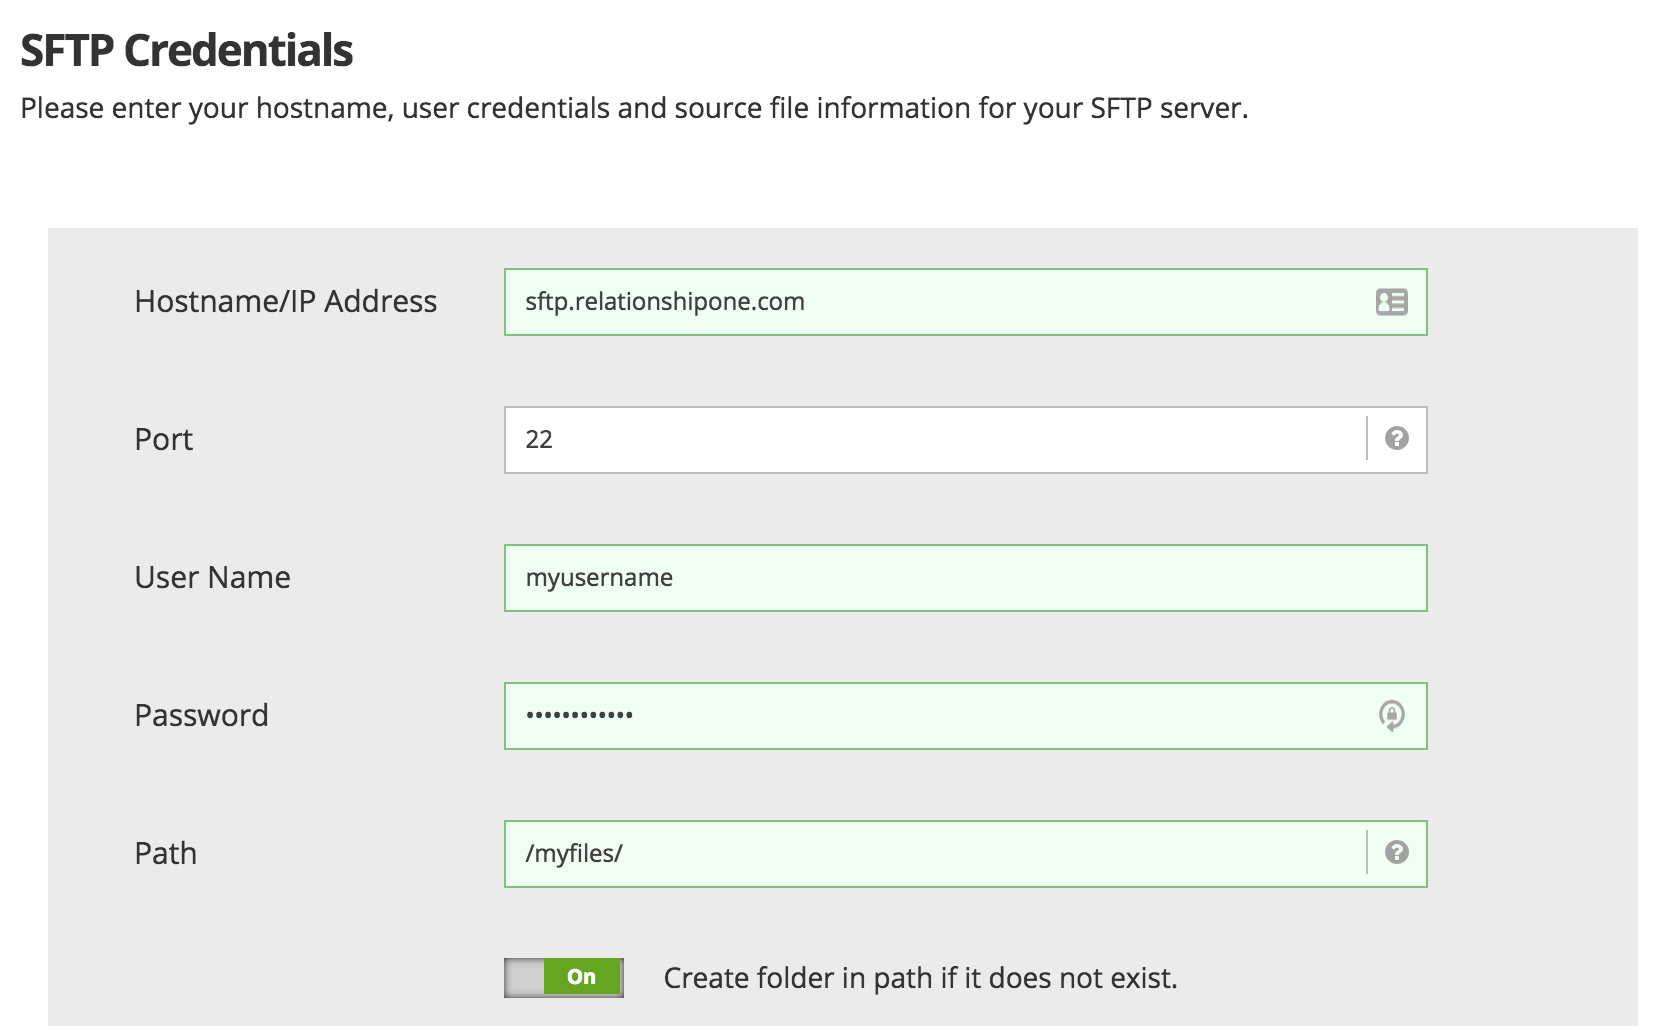
Click Test Connection to verify your settings.
Next, provide the desired export file name. When a new file is exported, it may overwrite a file with the same name on your SFTP server. Optionally, you can append a timestamp to make sure your export file name is unique.
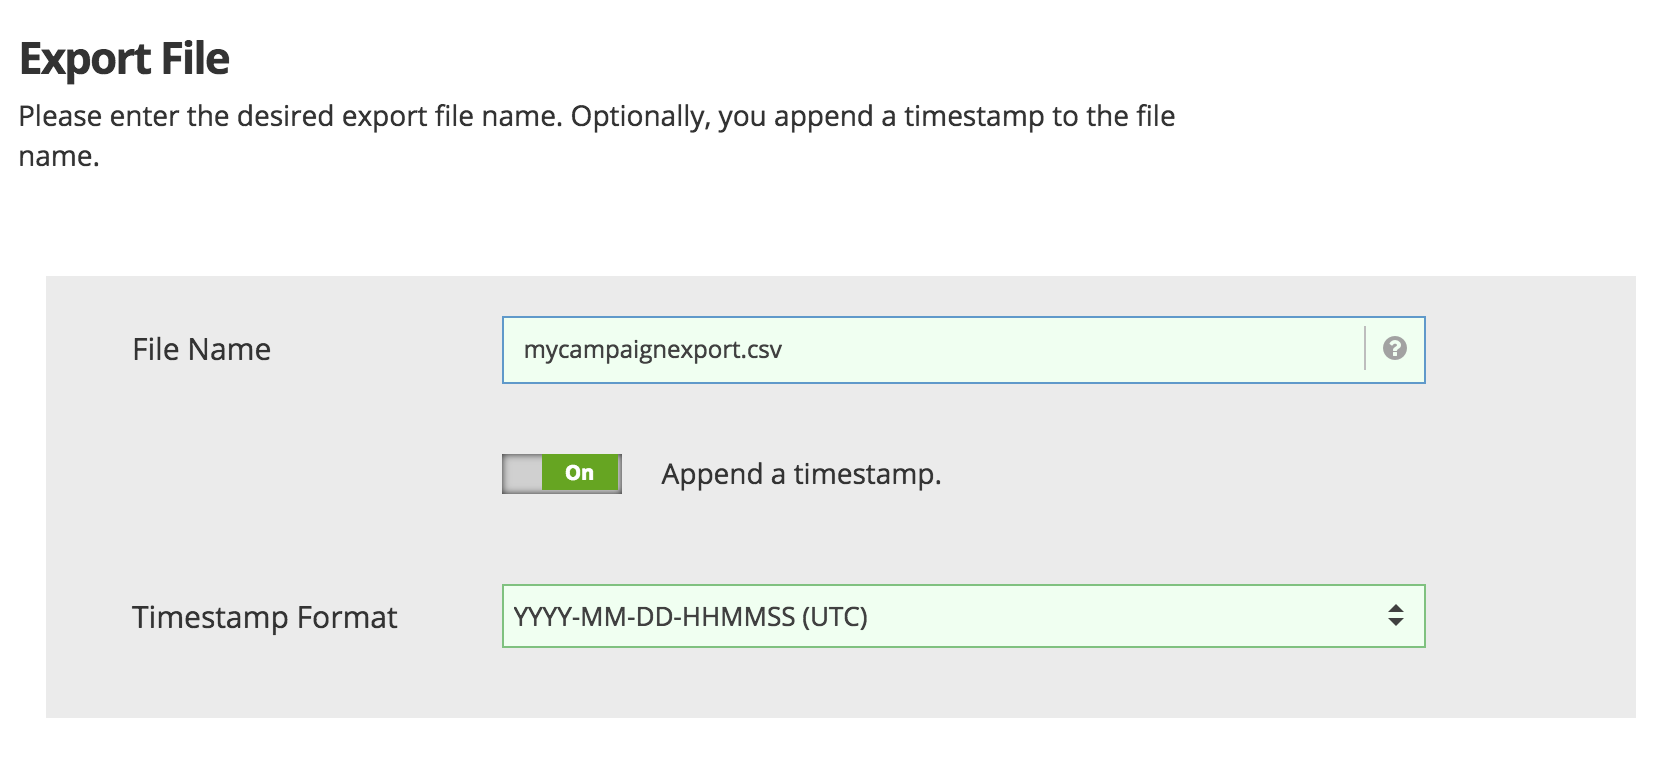
Click Continue to move onto the next step.
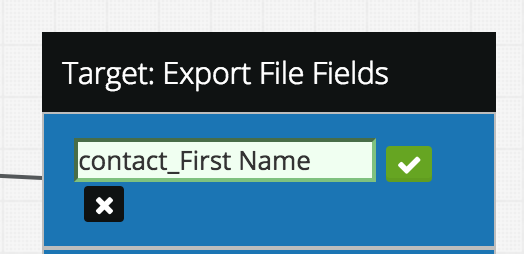
Step 3: Define Field Mapping
To map your source Eloqua Contact or static fields to the export file, simply drag the desired source field to its target. Remove a mapping by dragging a mapped target field to the left or by clicking the X icon.

Expand or collapse a field list (Contact, Campaign, or Static fields) by clicking on the toggle button shown. Then scroll to find the field to map.
Optionally, you can edit the export field name by double-clicking the field name. Click the green check icon to save your changes. You can also reorder the fields by dragging them up and down.
By default, the configuration will run as objects pass through it, or you can utilize a schedule to run at specific dates and times.

To do so, from the Schedule panel, click to enable the schedules.
Set up schedules based on time and day (note: timezone used is UTC), and click "Add" for additional scheduled times.
Click Continue to complete your app configuration. The Cloud Action will automatically enable when you activate the Campaign.
Updated over 1 year ago