
Account-to-Object Data Appender
Oracle Marketing Cloud - Eloqua
Data Appender
Subscription RequiredThe Account-to-Object Data Appender app is a premium app and requires a subscription. To see subscription options or to start a trial, visit our AppCloud. If you don't have an AppCloud account, you'll need to create one first...but no worries, this app may require a subscription but you can create an AppCloud account for free!
App Overview
The Account-to-Object Data Appender allows you to append Eloqua Custom Object records with Account information. Simply select a Custom Object to be updated, define your match rule, and add all of the fields you want to append to a matched (the Target) Eloqua Custom Object record.
App Installation
To install the Relationship One Account-to-Object Data Appender app:
- Click on the install URL below:
IP AllowlistingIf you have Eloqua IP allowlisting enabled, please add AppCloud IPs to your allowlist - 44.236.213.84 and 44.238.209.213.
Please note, the installation process must be done by a user with Eloqua Customer Administrator rights.
-
Log into Eloqua with your Eloqua Credentials, if required.
-
Click Accept and Install to add the app to your Eloqua instance.
-
Click Authenticate Me to grant permission for the app to communicate with Eloqua on your behalf.

-
Click Accept or switch users to allow Eloqua to access the app.
-
Click Save to finish the app installation process.
You will now see the Relationship One Account-to-Object Data Appender app in the App Catalog inside of your Eloqua instance.
The Relationship One Account-to-Object Data Appender app is now installed in the App Catalog inside of your Eloqua instance which can be found by clicking on Apps under the Settings menu in the Platform Extensions section. You can select the app to view the app description, modify the configuration settings, reinstall, or uninstall it. You can also check its status and dependencies.
App Configuration
Step 1: Add the Cloud Action
Within Program Canvas, find the Account-to-Object Data Appender Cloud Action in the Actions menu area. Double-click on or drag the Account-to-Object Data Appender Cloud Action onto your canvas workspace.
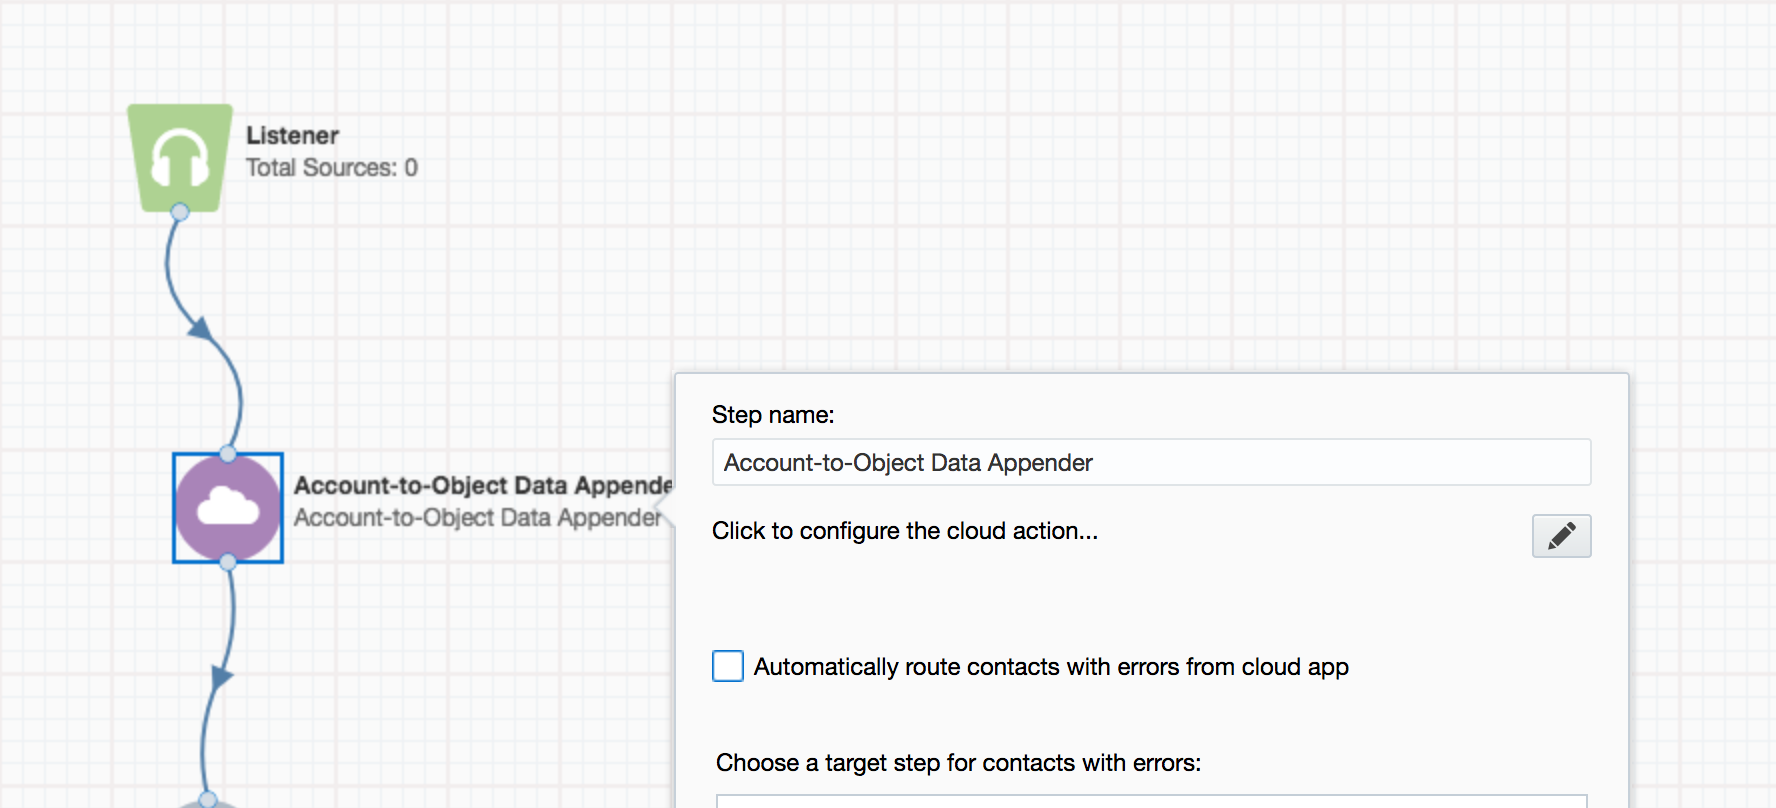
Double click on the cloud action and click the configure button. You will need to save your Program before moving onto Step 2.
Step 2: Set The Match Criteria
Select the “Program Custom Object Match Field” that will be used to match your Eloqua Custom Object records to an Eloqua Account. Next, select the "Account Match Field" you will use to match against.

You will need to set a "Sort Rule" which will determine which record should be matched if there is more than one that meets your criteria. This can be the earliest or last record based on create date or modified date.

Optionally, you can enable a case-sensitive match. Click the Continue button to save your settings.
Step 3: Complete The Field Mapping
To map the source Account fields to the target Custom Object fields, drag the desired source field to its target field. Remove a mapping by dragging a mapped target field to the left. Once you have mapped all of the fields that you want to append, click the Continue button to save your settings.
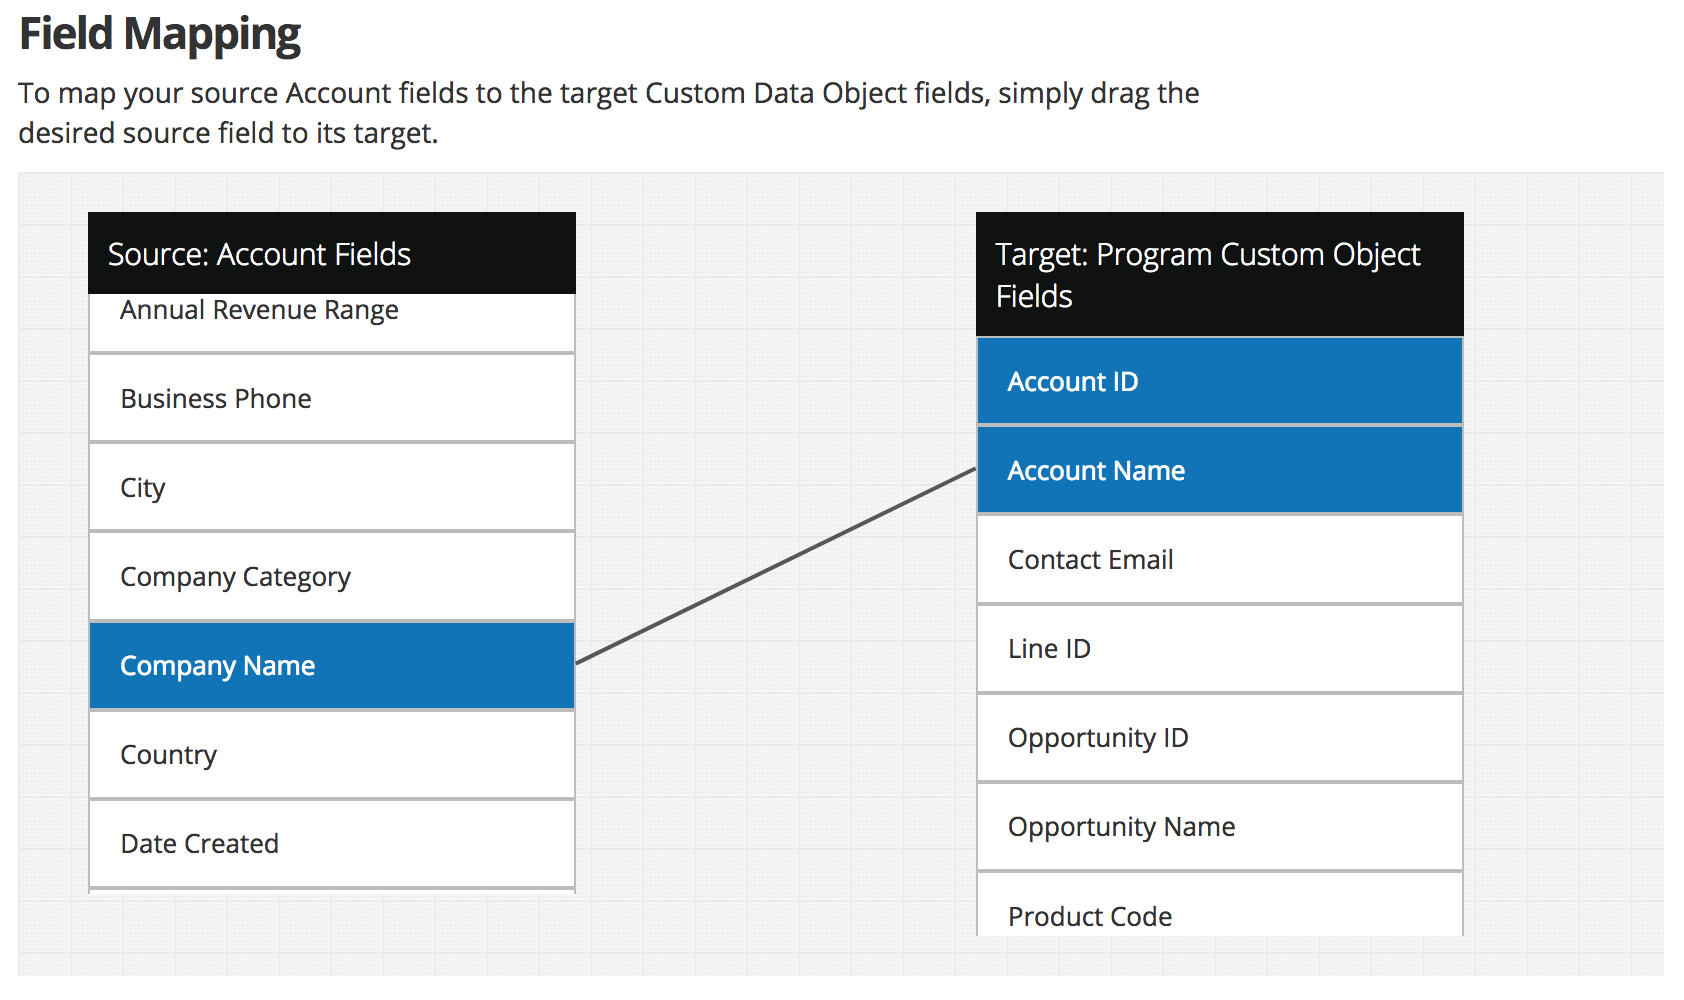
Please keep in mind, if you change your mapping, the app will need to restart the export process which may cause a delay as records enter the cloud action step. This is only a temporary delay.
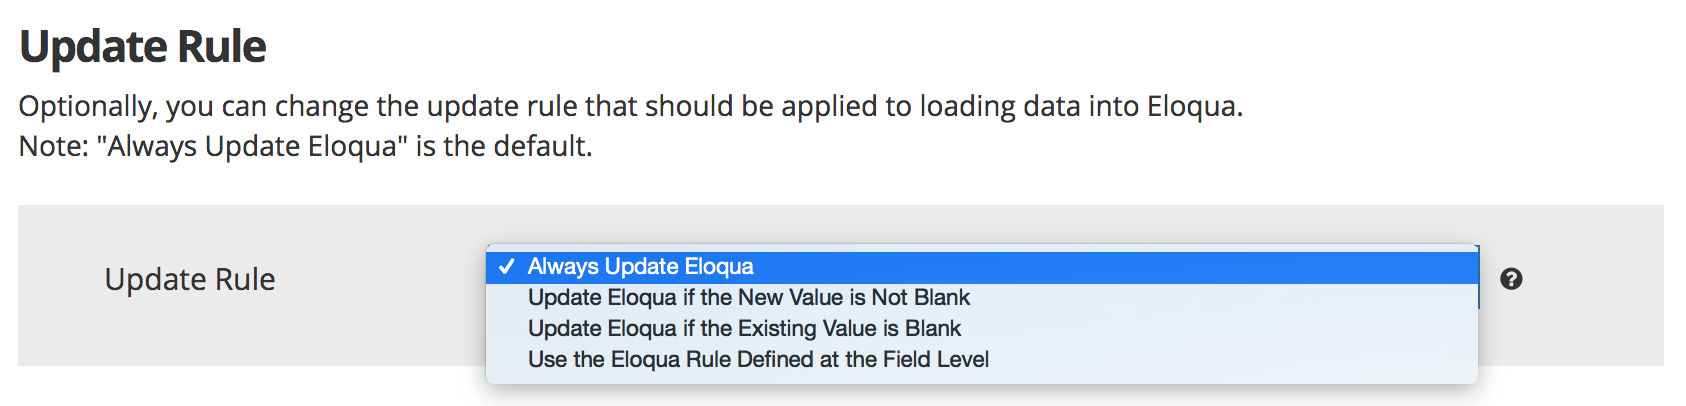
Optionally, you can change the default update rule that should be used when updating an Eloqua Custom Object record with data. By default, mapped Custom Object fields will always be updated, but you may rather only update when the new value is not blank, if the existing Eloqua Custom Object field value is blank, or update fields based on the fields individual settings.
The Account-to-Object Data Appender app is designed to process and update large volumes of records. Key to this feature, for both speed and scale, is using a caching database where your mapped custom object data fields are stored. If you periodically delete Account records, you want to make sure they also get purged from this cache. The "True Up Frequency" lets you indicate how often this purge should occur - daily, weekly, or monthly. If you do not delete Account records, you do not have to set this or may choose a monthly frequency as a best practice.

Your Cloud Action has now been configured and is ready for use. You can close the app configuration window by clicking the X in the upper right corner or you can click Back to modify your settings.
The Cloud Action will automatically enable when you activate the Program. Remember, there may be a slight delay when processing the first records as the cache gets created.
Processing TimesThere may be a delay in processing, especially when processing the first records as the cache gets created.