
Add Inbound Webhook
Oracle Marketing Cloud - Eloqua Universal Webhook Connector App Feature
To send data to Eloqua using the Universal Webhook Connector app for Eloqua, you first need to set up and enable an Inbound Webhook including:
- Selecting an API authentication method
- Provide sample JSON that will be received from the external system
- Specify fields that should be used to update an Eloqua Contact or Custom Object
To add a new inbound webhook, navigate to the Settings area ( icon) and click on Apps under the Settings menu in the Platform Extensions section. Open the Universal Webhook Connector app and click on the Configure icon (). You may need to log in using your Relationship One AppCloud credentials.
Step 1: Add an Inbound Webhook
Under the Inbound Webhooks section, click the +Add button to add a new inbound webhook. Then, provide a name for the webhook.

Give your webhook a name

Step 2: Select a Security Method
Data can be sent from an external system (e.g., commerce platform, CRM, etc.) using either a webhook signature or basic authentication.
For a webhook signature, a unique endpoint will be generated as well as a security token required to configure your external system. You can use the system-generated token or replace it with your own if one is provided by your external system.

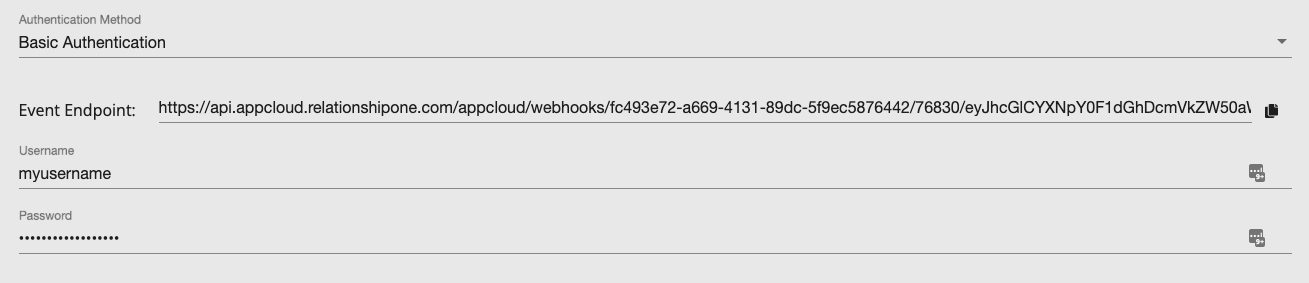
Alternatively, select Basic Authentication to use a username and password. Click the Get Webhook button to generate a unique endpoint. You can update the Username and Password values as long as the webhook is disabled.
Step 3: Provide Sample JSON
You will need to provide a sample of the JSON that will be sent via the Webhook or REST API call. For example, an order confirmation JSON might look like:
{
"id": 1090,
"parent_id": 0,
"number": "1090",
"order_key": "wc_order_n3FybzySEvpxh",
"created_via": "checkout",
"version": "4.7.0",
"status": "processing",
"currency": "USD",
"date_created": "2021-07-06T01:41:20",
"date_created_gmt": "2021-07-06T01:41:20",
"date_modified": "2021-07-06T01:41:21",
"date_modified_gmt": "2021-07-06T01:41:21",
"discount_total": "0.00",
"discount_tax": "0.00",
"shipping_total": "0.00",
"shipping_tax": "0.00",
"cart_tax": "0.00",
"total": "91.45",
"total_tax": "0.00",
"prices_include_tax": false,
"customer_note": "",
"billing": {
"first_name": "Tx",
"last_name": "Demo",
"company": "",
"address_1": "333 N Washington Ave",
"address_2": "Suite 300",
"city": "Minneapolis",
"state": "MN",
"postcode": "55401",
"country": "US",
"email": "[email protected]",
"phone": "7633551025"
}
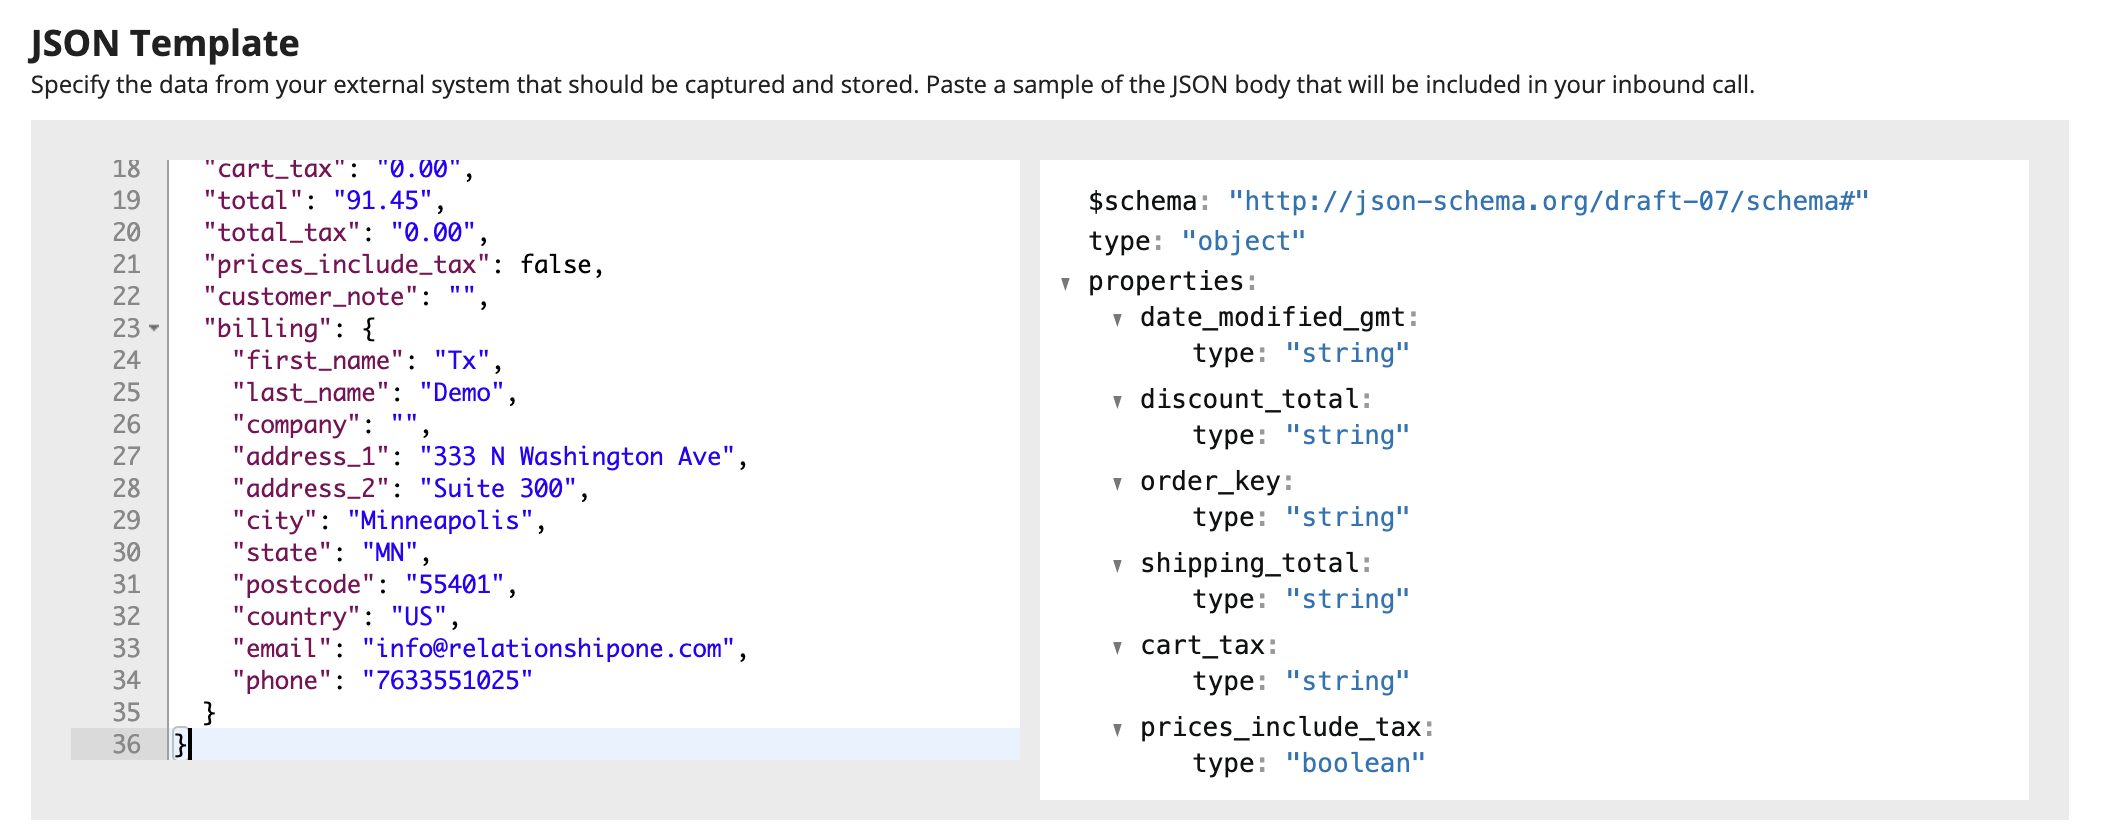
}Paste your sample JSON into the JSON Template editor. Note: Field names (ex. "id" from the example above) may include only the following characters:
- Upper and lowercase characters {A-Z} {a-z}, (accented characters not accepted)
- Numbers {0-9}
- Underscore {_}
- Hyphen {-}
- Colon {:}
- Period {.}
- Comma {,}
- Single quote {'}
- Forward slash {/}
- Space { }
- Square brackets {[]}

The app will automatically generate a schema from your JSON sample which will be used for field mapping. You can always update your JSON sample, and resulting schema, by pasting a new version. Note: Date fields must be in ISO 8601 format.
Step 4: Bulk Calls
Optionally, enable Bulk Calls to configure sending multiple records in a single API call. This allows records to be passed in as an array in the JSON rather than sending individually in separate calls. The array containing the records to be used for field mapping must then be selected from the dropdown.

Step 5: JSON Parameters
Next, identify and define the parameters from the JSON that you wish to use for mapping to Eloqua Contacts or Custom Objects (CDOs). At a minimum, you must include the field(s) which will be used as the unique identifier for any records being mapped. For each parameter, provide a display name, select the JSON parameter from the dropdown, and select the data type. Only the parameters defined in this section will be available in the mapping sections.
If your data includes an array of values (for example, an Order Confirmation JSON message may include the list of order line items including product name, product quantity, product price) you will see an array symbol [] within the JSON Parameter dropdown. When mapping array values to a single field, array values will be separated by a :: (double-colon) delimiter. Values will be truncated if they are longer than the Eloqua field data type length:
- Data Type Text and Field Type Textbox: 100 characters
- Data Type Text and Field Type Picklist: 100 characters
- Data Type Text and Field Type Multi-Select Picklist: 1000 characters
- Data Type Large Text and Field Type Textbox: 32000 characters
- Data Type Numeric and Field Type Textbox: 19 characters

Click the Add button to add additional parameter mappings.
Step 6: Field Mapping
Once your JSON parameters are defined, you can map them to the associated Eloqua Contact or one or multiple CDOs. First, click the +Add button in the Field Mapping section to create a new mapping. Toggle between Contact or CDO by clicking the icon to the far left of the mapping row. If mapping to a CDO, use the typeahead search to find and select the CDO you wish to map to.


Next, click Configure in the mapping row. In the mapping window, map the desired JSON parameters configured in step 5 to the Contact or CDO fields. Additionally, you can optionally choose to map the entire JSON payload to a field. Large text fields are highly recommended for storing JSON payloads.

CDO Mapping Required FieldsIf mapping to a CDO, you must include the CDO's unique ID and the email address if your CDO has those fields configured (see the last two fields in the screenshot below from the Custom Object Details page). Map the unique ID field in the green row 1 if it has one. The email address can be mapped anywhere in the mapping. For more on Eloqua Custom Objects, including the unique ID field, see Eloqua's documentation.

Additionally, when mapping to Custom Objects, new records can be mapped to Eloqua Contacts or Accounts by enabling the toggle 'Map New Records?'. After enabling, select the CDO to use as the unique ID, Contact or Account, and the Contact or Account field to use as the unique field. Finally, enable case-sensitive matching if desired.

Step 7: Status Callback
Optionally, status callbacks can be configured for failed or both failed and successful calls. First, select the preferred security method and associated credentials similar to step 2.
Next, select to receive callbacks for Failed Calls Only or both Failed and Successful Calls.

Finally, select any mapped parameters to be included in the status callback.

Step 9: Enable Inbound Webhook
To enable your webhook, click the Enabled toggle.

Click the Save button to save your configuration. Once saved, your webhook will be enabled to receive calls until you disabled it.
Webhook Log
When a webhook is enabled, a log of all calls is captured and available by clicking on the chart icon.
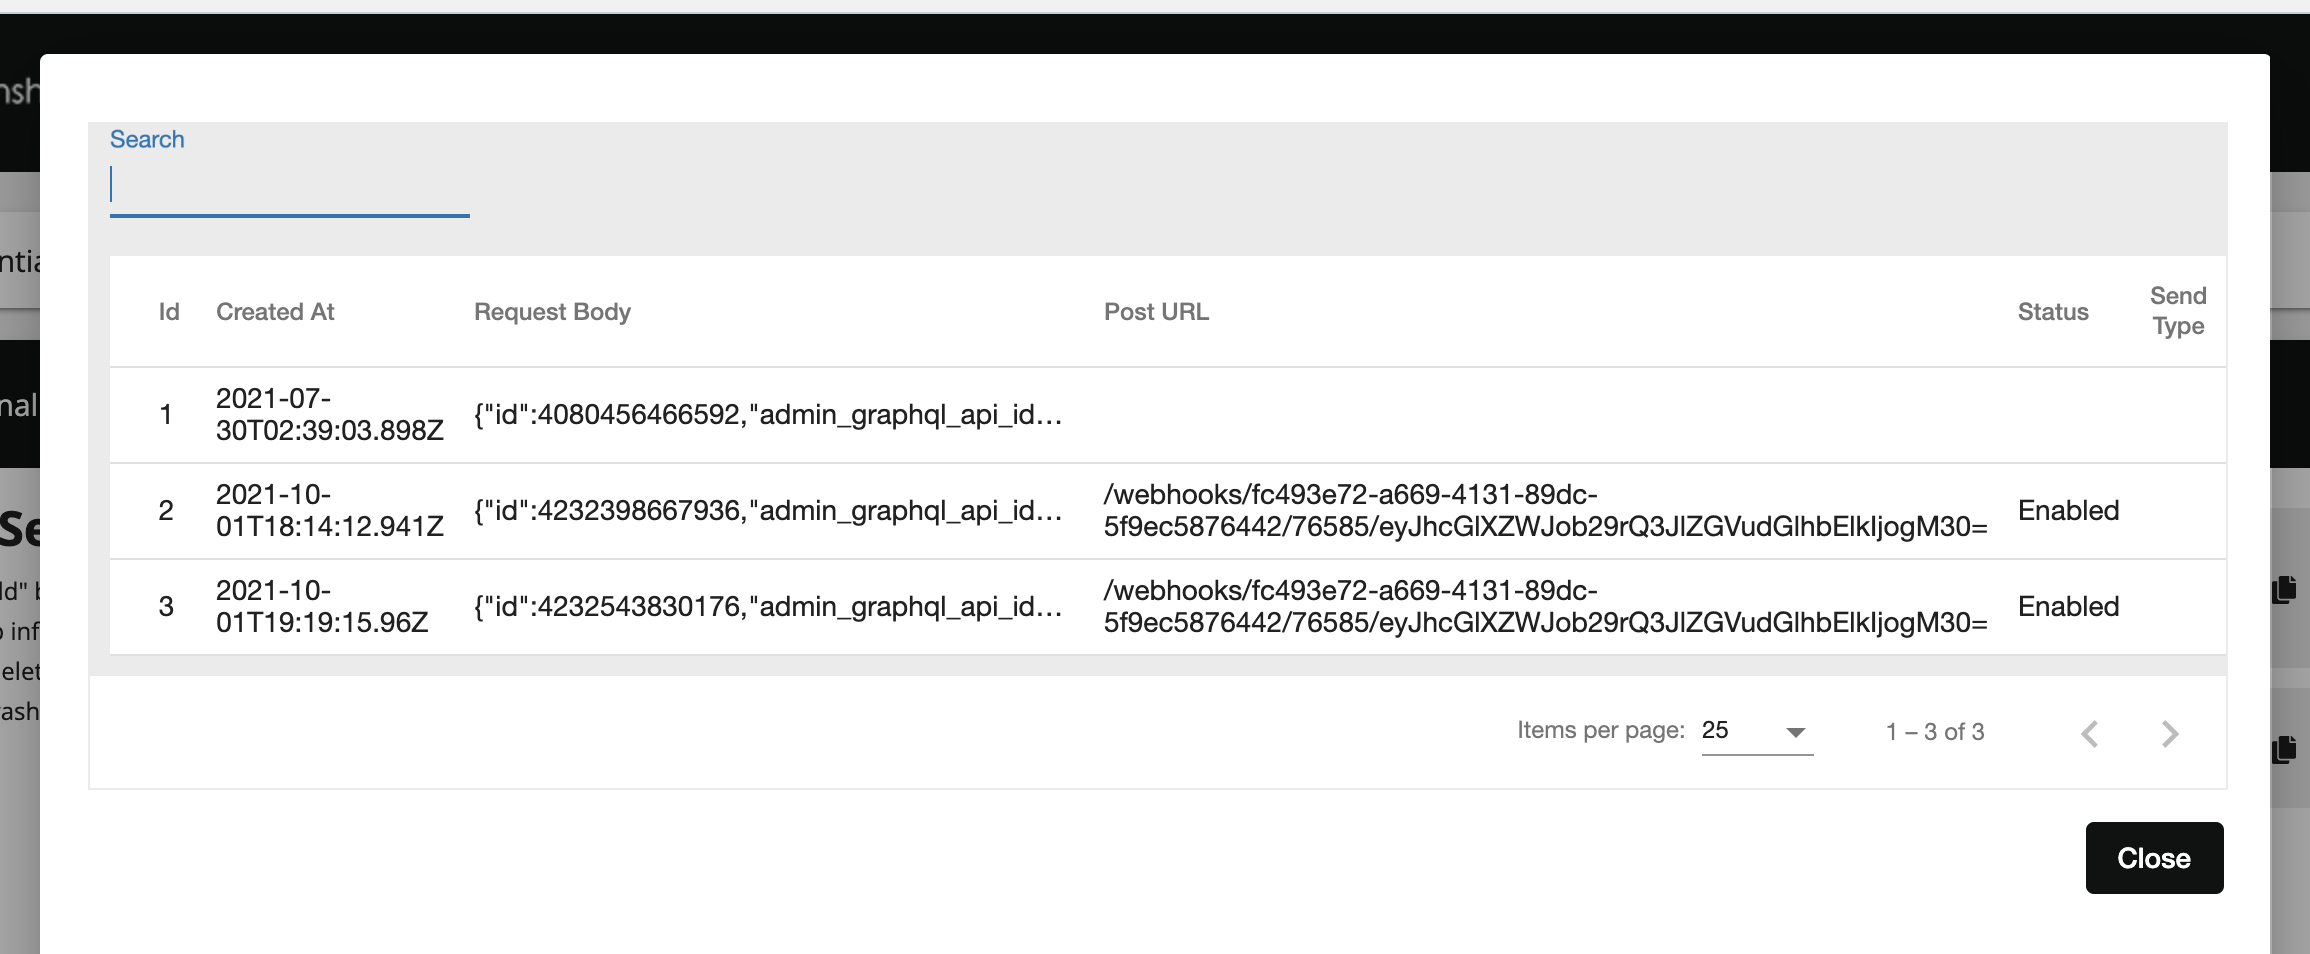
Mouse over the Request Body column to view more of the webhook body. Click on a request to view the entire request message.