
Cloud Feeder
Oracle Marketing Cloud - Eloqua
Channel App
App Configuration
Step 1: Add the Cloud Feeder
Within the Eloqua Campaign Canvas or Program Canvas, find the etouches Feeder in the Data Sources menu area. Double-click on or drag the etouches Feeder onto your canvas workspace.

Step 2: Select etouches Event
To begin configuration of the app, double-click on the app step on the canvas. When you click on the configuration button (), a new frame will open with configuration settings. Type in the name of your etouches event or keywords from the event name. A menu will pop up to help with your selection.

Next, select the desired registration status values. Hold down the control or command button to select or deselect multiple options.

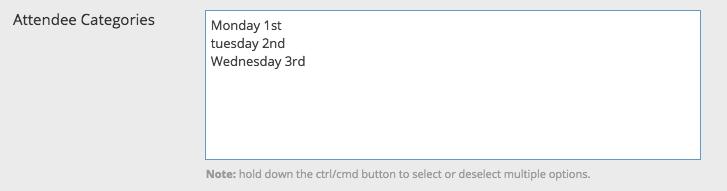
If your event has custom categories, you will also be able to select the desired category values. Similiar to registration status values, hold down the control or command button to select or deselect multiple options.
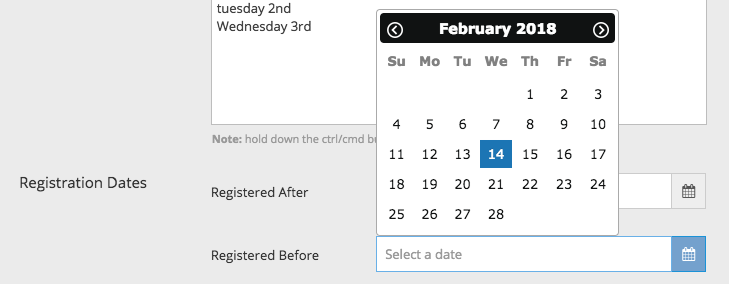
Lastly, you can optionally filter registrants based on their registration date.
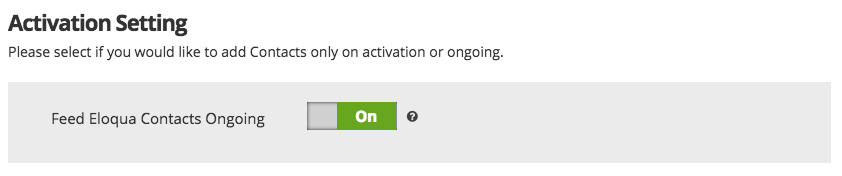
You have the option to feed data from etouches into Eloqua once or on a continuous basis. If the ongoing import setting is enabled, the app will check etouches every few minutes, for new and updated records that meet your criteria, if the Campaign or Program is active.
Step 3: Map To Your Eloqua Contact Fields
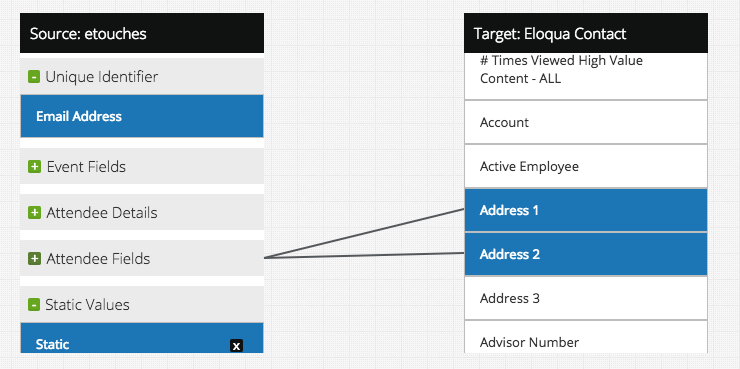
Map the standard and custom data available in etouches, as well as static fields, to your Eloqua Contact fields. Simply drag the desired source field to its target. Remove a mapping by dragging a mapped target field to the left.
Optionally, you can change the update rule to be applied when the data is imported from etouches to Eloqua.

Note: “Always Update Eloqua” is the default.
Since the same etouches attendee, by email address, can be associated an event more than once, you will need to decide which record should be imported by selecting a Dedupe Rule.

Step 4: Create Eloqua Custom Object Records (optional)
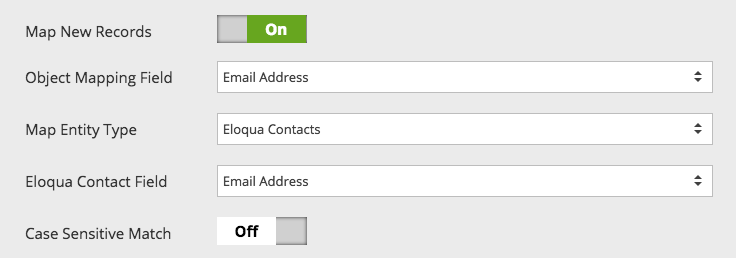
Optionally, you can import data from etouches into an Eloqua Custom Object. To do so, select your Custom Object, and the Custom Object and etouches fields that should be used for matching. This might be the attendee email address if you have one event attendee record per Eloqua Contact or the Attendee ID if you have many attendee records connected to a single Eloqua Contact.

Under “Import Settings”, set your preferences for how you would like Custom Object records to be linked to an Eloqua Contact or Account record.
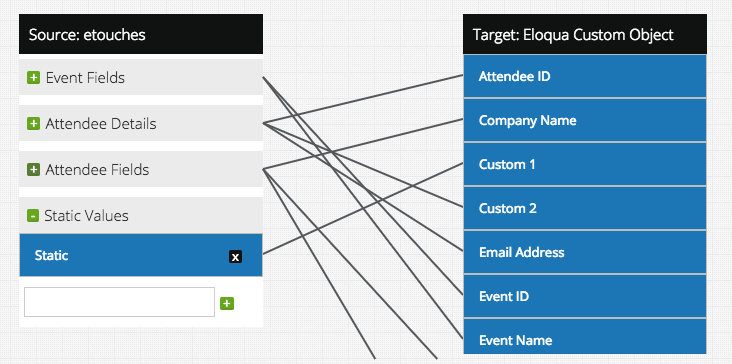
Under “Field Mapping”, map the standard and custom data available in etouches to your preferred Custom Object fields.
Lastly, select your preferred “Update Rule” to be applied to the data imported from etouches to the Custom Object.

Note: “Always Update Eloqua” is the default.
Click Continue to complete your app configuration. The Cloud Feeder will automatically enable when you activate the Campaign or Program.
Updated over 1 year ago