Contact Decision
Oracle Marketing Cloud - Eloqua Data Cloud
App Configuration
Step 1: Add the Data Cloud Decision
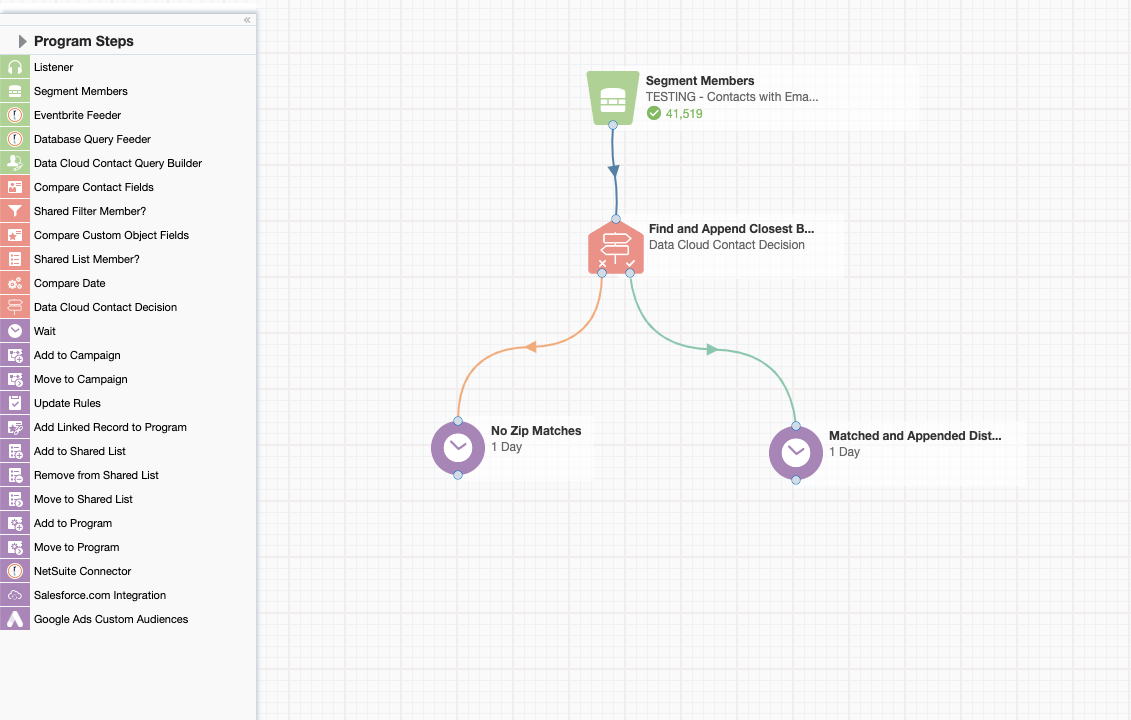
Within the Eloqua Campaign or Program Canvas, find the Data Cloud Decision in the Decision menu area (the redish-colored options). Double-click on or drag the Data Cloud Contact Decision onto your canvas workspace.

Step 2: Build a Query
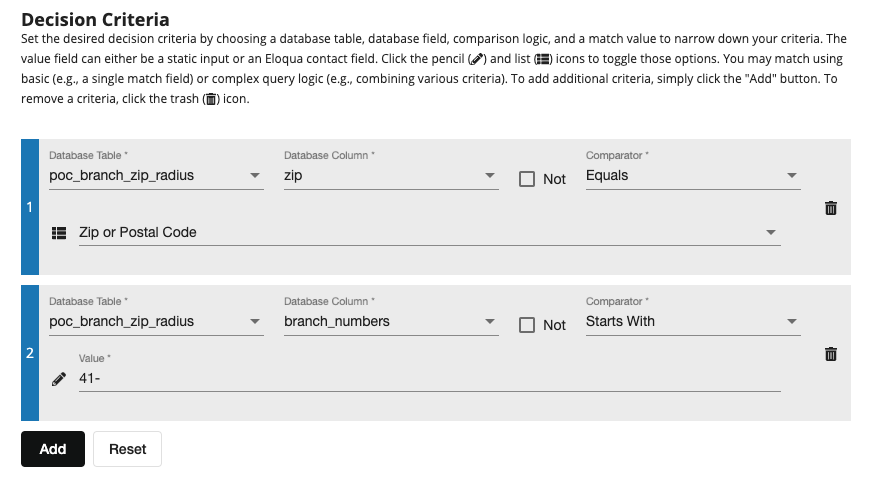
To begin the configuration of the app, double-click on the app step on the canvas. When you click on the configuration button (:fa-pencil:), a new frame will open with configuration settings. Start by adding at least one of the query criteria:
- Database Table - select the desired Data Cloud database table that should be used for the decision query criteria
- Database Column - select the desired database field
- Comparator - select the desired field comparator - the comparators available are dependent on the database field type
- Value - if relevant, provide a value/date. To provide a value/date, click the icon or toggle to the icon to select a value within an Eloqua Contact field

To add other criteria, just click on the Add button. To remove criteria, click on the trashcan (:fa-trash:) icon. To reset your query criteria and start over, click on the Reset button.
Once you have your desired criteria, set your grouping logic and click Continue.

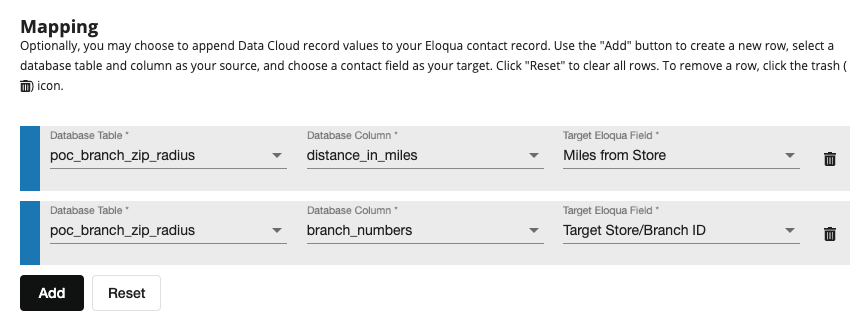
Step 3: Add Field Mapping (optional)
Optionally, for records that meet your "yes" criteria, you can import data from a Data Cloud table to an Eloqua Contact field. In the Mapping section, you may choose to append Data Cloud record values to your Eloqua contact record. To append other fields, just click on the Add button. To remove fields, click on the trashcan (:fa-trash:) icon.

You will need to select a field that should be used as the "winning record" if more than one record is returned for the same contact. Currently, you need to select the Database Table, the relevant field, and if the first matched record should be based on ascending or descending order.

Click Save to complete your app configuration. The Data Cloud Contact Decision will automatically enable when you activate the Campaign or Program.
Updated about 1 year ago
