
Create an Import
Oracle Marketing Cloud - Eloqua
NetSuite CRM Connector App Feature
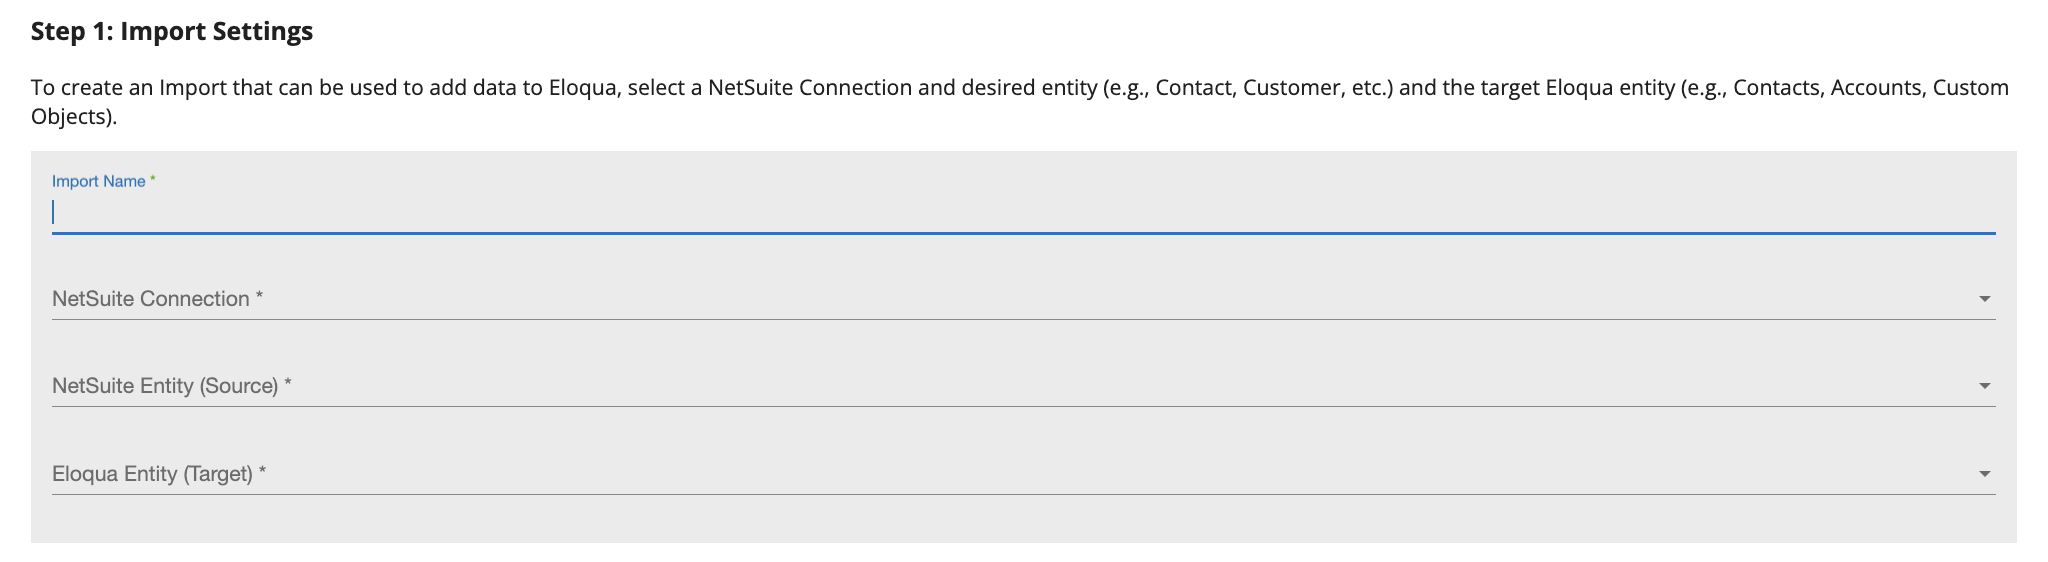
Step 1: Add an Import
To create a new import, go to the Imports panel and click on +Add Import. Provide an Import Name, choose a NetSuite Connection, the NetSuite Entity, and select your desired Eloqua object including Contacts, Accounts, or a Custom Object.
Currently, the app supports importing the following into Eloqua Accounts, Contacts and Custom Objects:
- NetSuite Customers (e.g., Customer, Prospects, and Leads)
- Contacts
- Estimates
- Opportunities
If you require an alternate NetSuite entity, please let us know by submitting a support request.
Step 2: Set Filter Logic
Once you have selected the desired NetSuite entity, move on to Step 2 to set your filter logic.
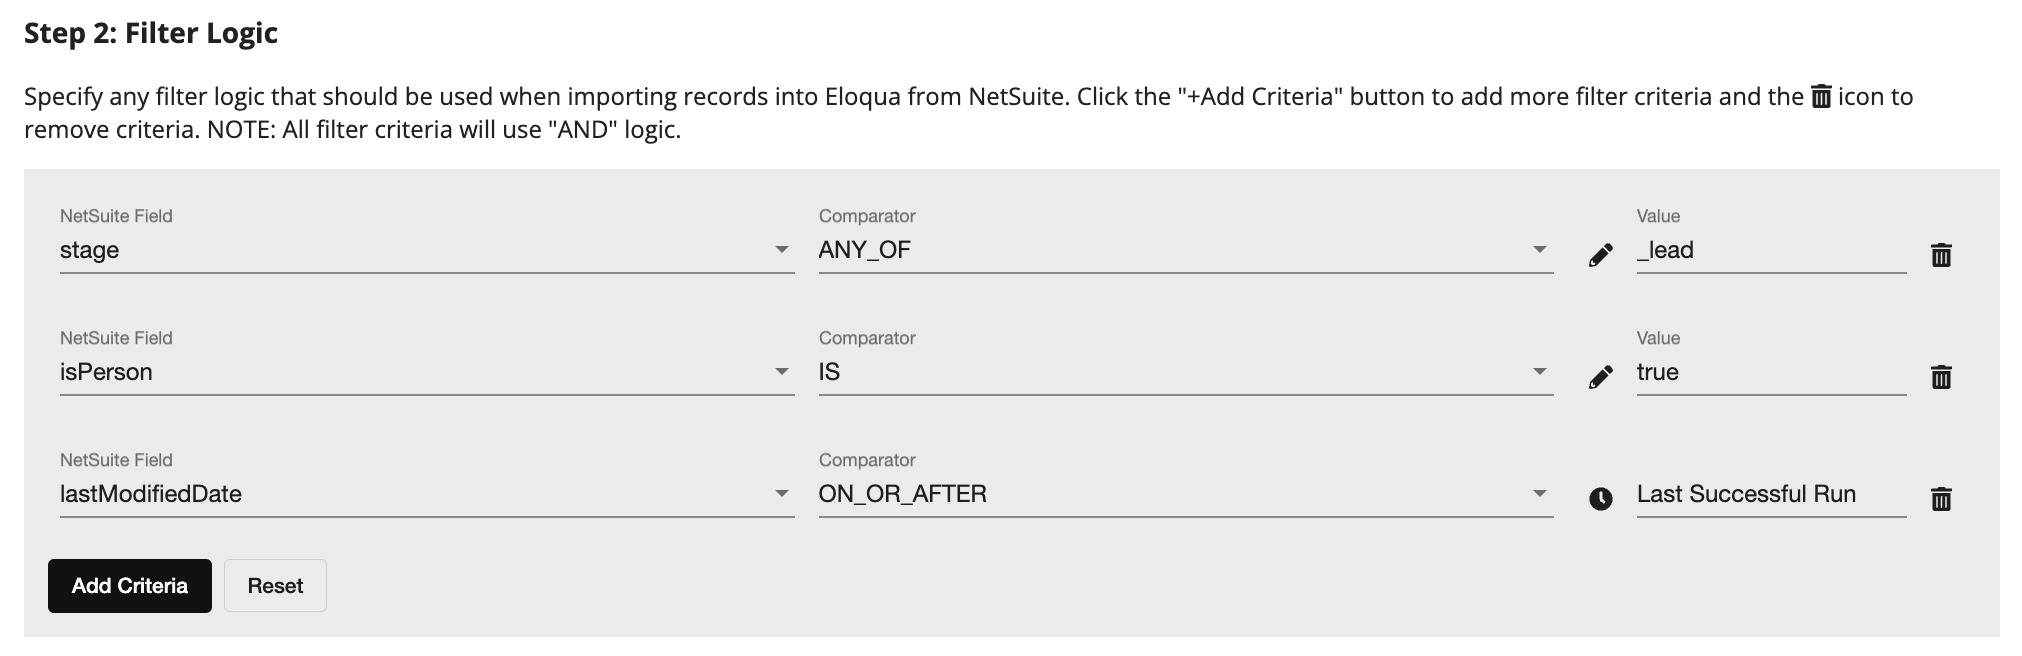
At a minimum, for Eloqua Contact related imports, make sure the record has an email address. Add additional criteria by clicking the +Add Criteria button.
To limit importing only records have been modified since the last import into Eloqua, use the NetSuite "lastModifiedDate" field, a comparator of "ON_OR_AFTER", and the last successful import timestamp which can be selected by clicking the pencil icon. Click the icon again to go back to a text box. Please note, all filter criteria uses an AND logic. Once the filter logic has been set, click Test Logic to verify the filter logic is valid.
Step 3: Define Your Import Field Mapping
Next, specify the NetSuite and mapped Eloqua field that should be used as the unique identifier when importing records. For example, for an Email Address might be used when importing Eloqua Contacts and the NetSuite Internal ID importing Accounts or Custom Objects.
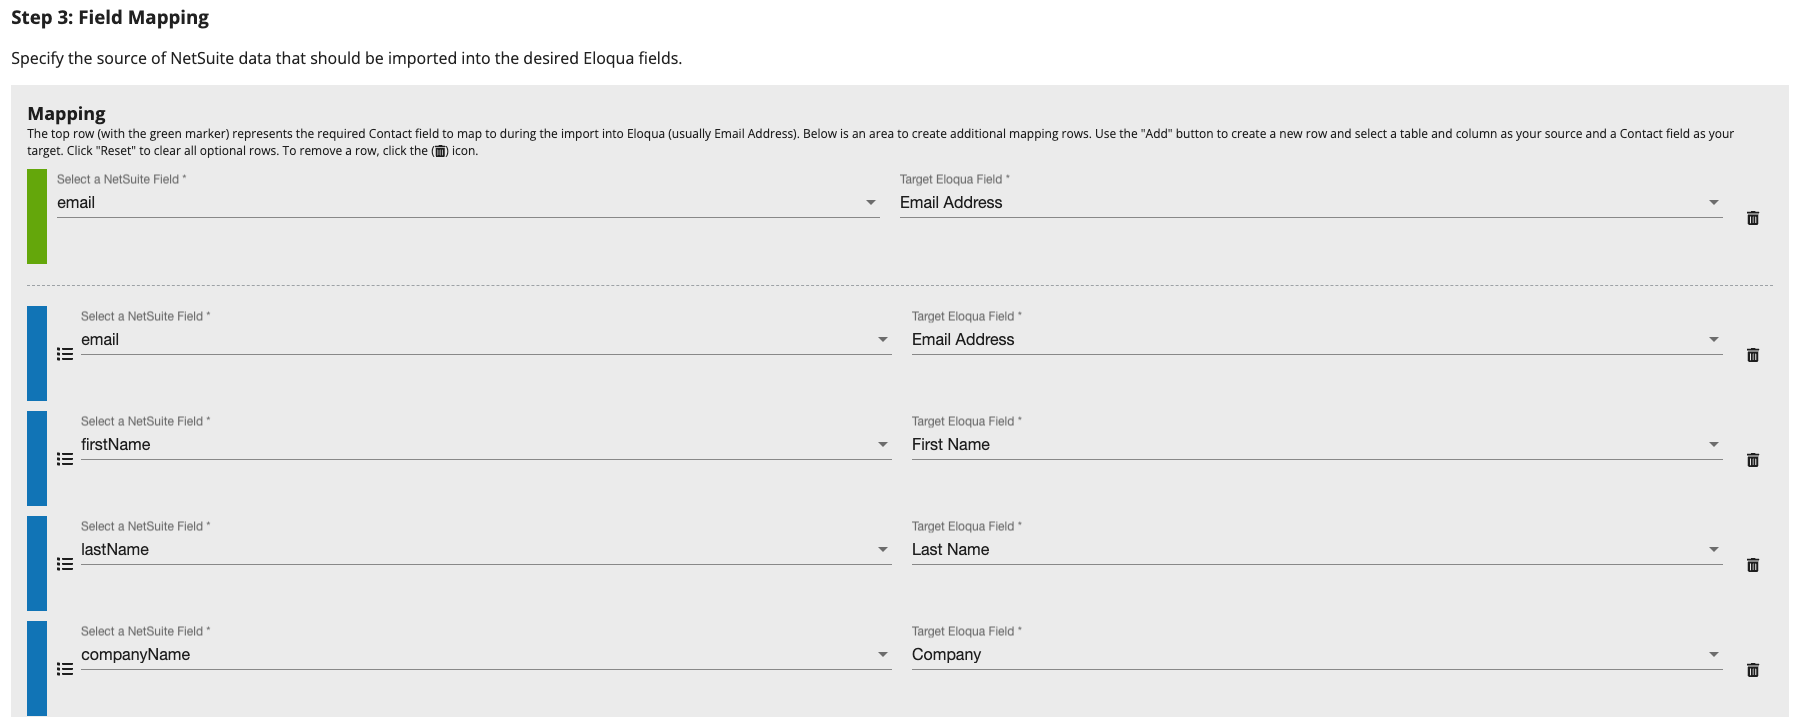
Click the +Add Fields button to add more NetSuite fields to import into Eloqua and specify the appropriate Eloqua mapped field. To delete a mapping, click the trashcan icon. By default, the available NetSuite entity fields are displayed. Click the icon to the left of the NetSuite field dropdown list to change to NetSuite Address Book fields (indicated by the icon). Click again to use a static text field (indicated by the icon).
For some fields, such as select lists or core string fields, you can choose if you would like to have the field's internal ID or value imported. When available, just click on the InternalId or Value tag under the field to select the desired option.

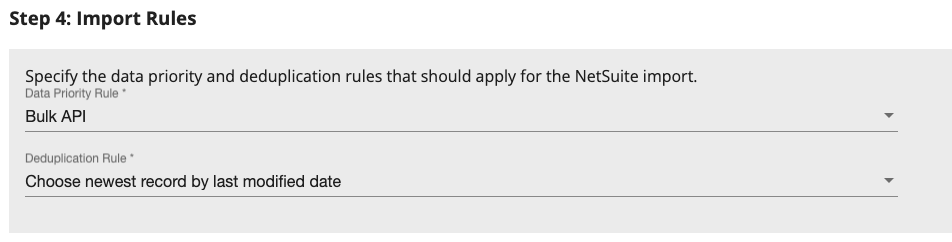
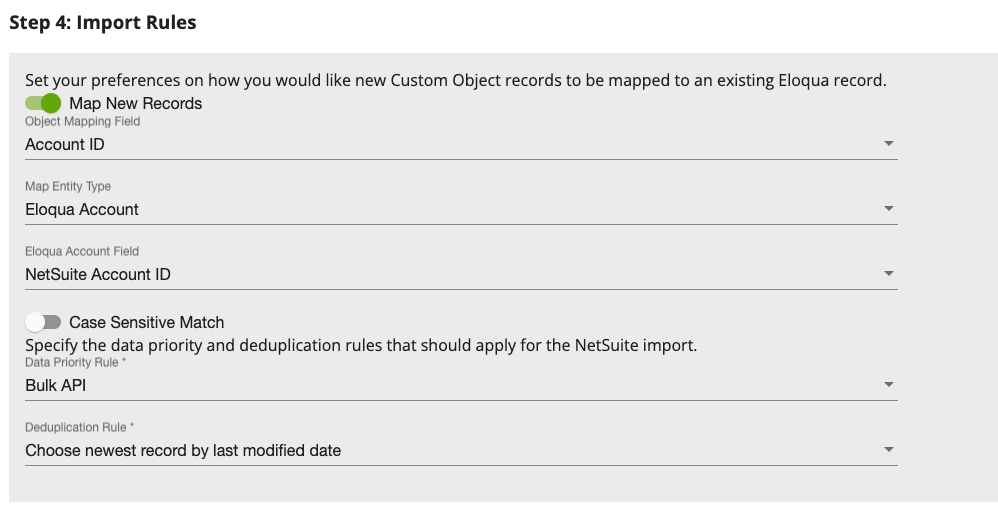
Step 4: Specify Import Rules
For Eloqua Contact and Eloqua Account Imports
The Data Priority Rule specifies which Eloqua data priority should be used when importing records. Data Priority compares new data to existing data, then determines whether to update records depending on the source.
You must specify how to handle duplicate records when importing data into Eloqua. Options include:
- Choose newest record by last modified date
- Choose oldest record by last modified date
- Choose newest record by created date
- Choose oldest record by created date
For Eloqua Custom Object Imports
Specify how you would like to import Eloqua Custom Object records including:
- If they should be mapped to an existing Eloqua record
- If mapping should be to Eloqua Contacts or Eloqua Accounts
- The fields that should be used to map a Custom Object record to an Eloqua Contact or Account and if it is case sensitive
- The data priority rule that should be used
- How to handle duplicate records when importing data into Eloqua
Step 5: Set Optional Import Actions

Updated over 1 year ago