
Content Personalization
Oracle Marketing Cloud - Eloqua
Personalization Manager
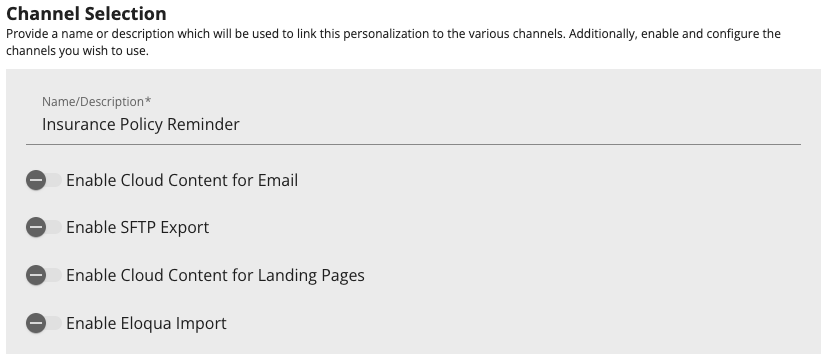
Enable Personalization
Optionally, you can choose to enable one or multiple personalization channels. First, provide a name or description which will be used to link this personalization to the various channels. Next, enable the personalization channel(s) you wish to utilize by toggling them on/off as desired and completing the additional fields for each.
Personalization - Cloud Content for Emails
For Cloud Content personalization for emails, search and select the Eloqua email you wish to use for personalization. If you have not yet created the email asset, you will need to do so before enabling Cloud Content for email.
Optionally, as part of your Cloud Content personalization for email, you may choose to enable roll-up emails which lets you include multiple mapped Eloqua Custom Object records within the same email. If enabled, you will need to specify which Custom Object field to use when including multiple records. For example, if you are creating an order confirmation message, you might choose the Order ID field to include all products for the same order within the same order confirmation email message.

For additional information related to configuring your Cloud Content for emails, see our page Email Cloud Content.
Configuration NoteLearn more about how to use Roll-ups in your Cloud Content.
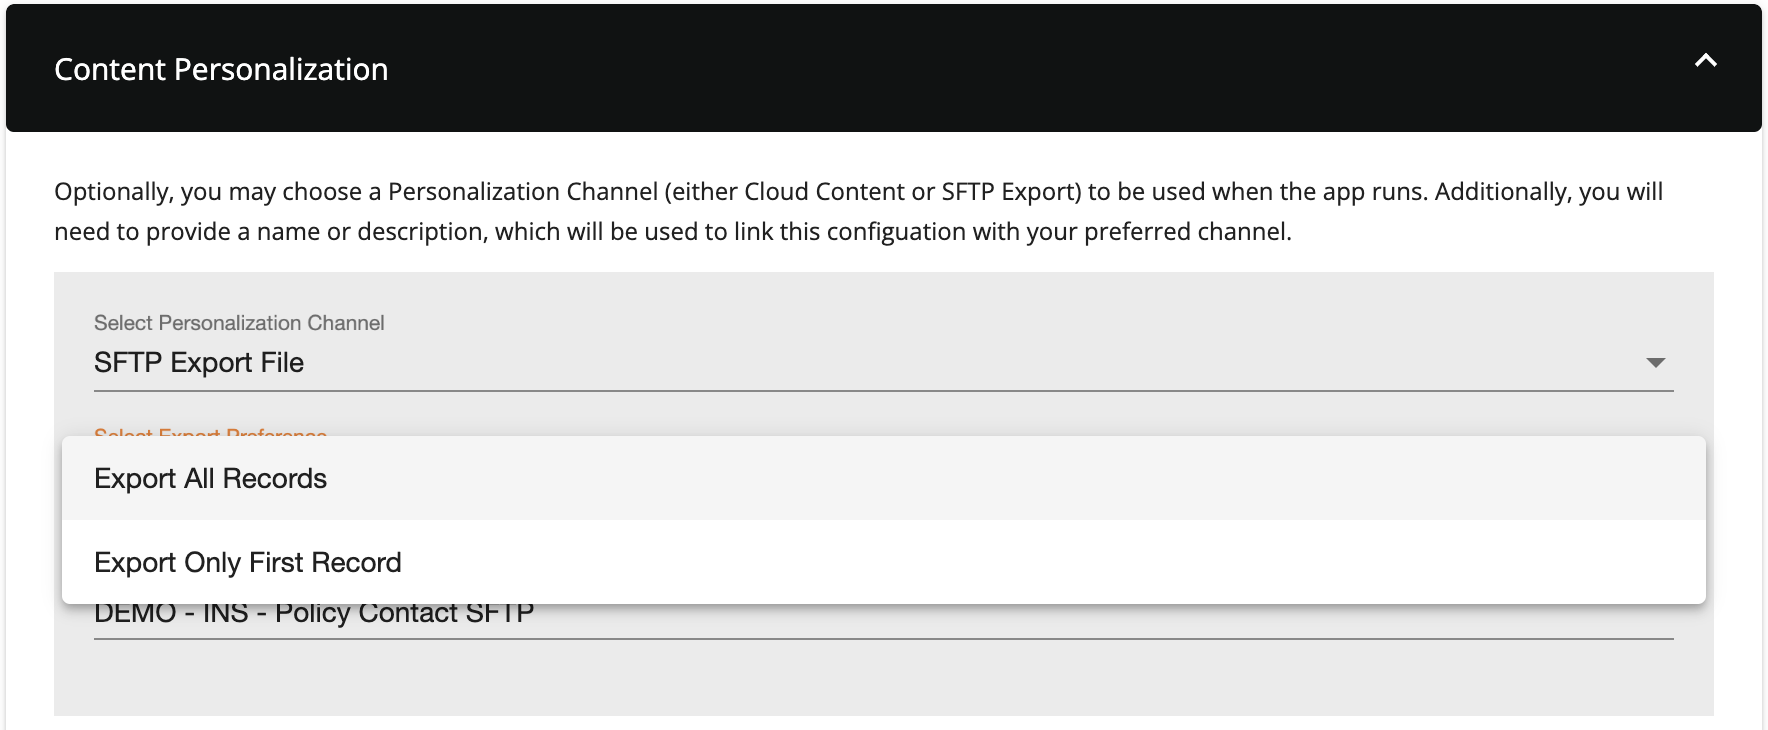
Personalization - SFTP Export File
If creating an SFTP export file, select either Export All Records or Export First Record Only. If you select First Record Only, only the first record for each Eloqua Contact will be exported, based on your Processing Order logic in step 2 of Record Selection. To complete SFTP export configuration, proceed to the instructions on the SFTP File Export page.
Personalization - Cloud Content for Landing Pages
For Cloud Content personalization for landing pages, search and select the Eloqua landing page you wish to use for personalization. If you have not yet created the landing page asset, you will need to do so before enabling Cloud Content for landing page. After selecting the landing page asset, you will see the landing page domains and vanity URL displayed as configured in the landing page. For additional information related to configuring your Cloud Content for landing pages, see our page Landing Page Cloud Content.
Editing Landing Page Domains or Vanity URLsIn order to for Cloud Action to receive updates made to your landing page domains or vanity URLs, you must return to the Personalization Manager Cloud Action and click the 'Refresh List' button in the Content Personalization section.
Personalization - Eloqua Import (enables use with Eloqua SMS)
Importing into a new Eloqua Custom Object may seem counterintuitive given the source data is an Eloqua Custom Object. However, the nature of the Personalization Manager's processing restructures the data in a way which may be useful for reuse in Eloqua, particularly to leverage Eloqua SMS to send text messages with similar personalization as Cloud Content for Email. The new Custom Object acts as a transient store or staging area for further orchestration in the campaign.
When Eloqua Import is enabled, a new 'Eloqua Import' section displays below Content Personalization. First, select the target Custom Object to write data into that will act as the transient store. If 'roll-up' is enabled, select a delimiter to be used to separate roll-up values. For example, assume you have 3 roll-up values from your source Custom Object (apply, banana, and orange) and you wish to display them as a comma-separated list in a text message. Enter a delimiter of a comma followed by a space (", ") would store them in a single field in the target Custom Object as below:
apple, orange, watermelon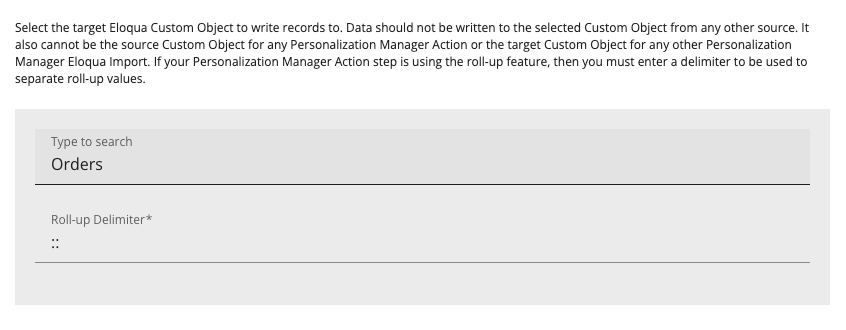
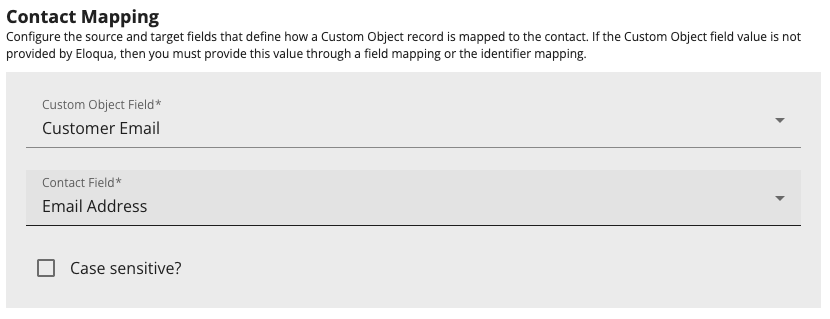
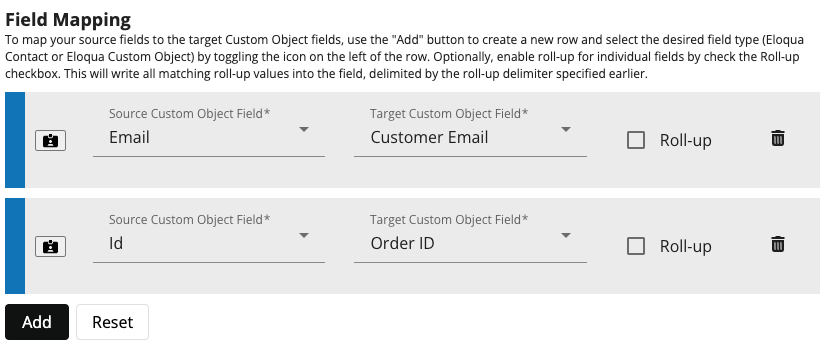
Next, configure contact mapping to map your target Custom Object records to the appropriate Eloqua Contact by selecting the mapping field on each object.
Optionally, enable identifier mapping to first attempt to update an existing record and only create new records if one does not exist. To implement, map either a Contact or source Custom Object field to a target Custom Object field to be used for matching. Note: By default, Eloqua SMS will select the most recent record so it is not necessary to use Identifier Mapping.
Finally, map the remainder of the desired fields from Eloqua Contacts or the source Custom Object to fields on the target Custom Object.
For additional information related to configuring your Eloqua Import, see our page Eloqua Import
Dynamic Links
In this section, you can create dynamic links to be used in any of the 3 personalization channels. Dynamic links enable the use of field merges to create unique links for each record. To create a dynamic link, click the "+Add" button and give your link a name to reference later in your personalization channels. Then, build your link - type the static portions or the link and drag-and-drop the field merges and landing page PURLs as desired. A full preview of the URL will display below the input box. When finished, click the "Save" button. Your dynamic links will then be available to add to your Cloud Content just like field merges.
Formula Fields
In this section, you can create simple mathematical formulas to be calculated on your CDO record values. The formula builder supports simple addition, subtraction, multiplication, and division of one or multiple CDO record values and one or more static values at the individual CDO record level (row). Example:
- .07*{{Unit Price}} - this formula would multiply the static value of .07 (fixed sales tax amount) and the unit price values to result in a tax amount for each CDO record that matches your selection criteria.
Additionally, you can use two formulas across all of the values of a single field (column). Example:
- sum({{Price}}) - this formula would sum the values of the price field for all CDO records that matches your selection criteria to result in a single subtotal value.
- ifBlank({{Price}},0) - this formula would substitute any blank values (null or empty strings) in the Price field and replace them with the numeric value of 0. Similarly, ifBlank({{Product Name}},"Product name missing.") would replace blank product names with the string 'Product name missing.'
To add a formula, click the +Add button. Provide a contextual display name for the formula for later use in your Cloud Content. Build your formula by typing or clicking on the math operators and dragging/dropping your field merges into the formula area. Once done, click the Validate button. If you receive an error, review your formula to ensure proper formatting following typical math equation formatting. Once finished, save the formula by clicking Save. Your formulas will then be available to add to Cloud Content just like field merges or dynamic links.
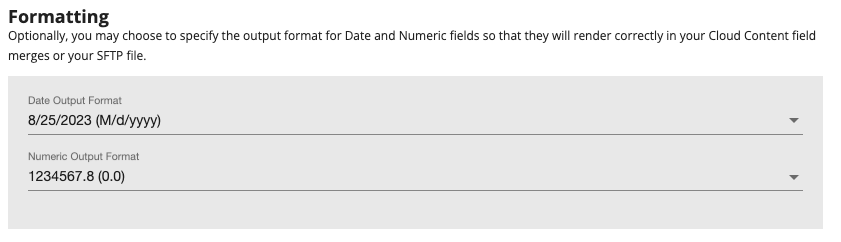
Date/Time and Numeric Output Format
Optionally, for either Cloud Content or an SFTP Export File, you can specify how date/time and numeric fields should be formatted. This selection will apply to all fields of that type. To modify the format of an individual field merge, do so in the Cloud Content. If formats are chosen in both the Action and the Cloud Content, the format selected in the Action will act as the default, while the individual formats selected in the Cloud Content will override for any specific field merges modified.
Click Continue to complete your app configuration. The Cloud Action will automatically enable when you activate the Campaign or Program.
Updated over 1 year ago