
Custom Object Record Splitter
Oracle Marketing Cloud - Eloqua
Data Appenders
Subscription RequiredThe Custom Object Record Spliiter app is a premium app and requires a subscription. To see subscription options or to start a trial, visit our AppCloud. If you don't have an AppCloud account, you'll need to create one first...but no worries, this app may require a subscription but you can create an AppCloud account for free!
App Overview
Ever need to carve up a single Custom Data Object (CDO) record into a bunch of individual records? Maybe you want to append a lead record with a territory and channel information and then generation individual notification "child" lead records? Or, maybe you have data in a custom object that is restricted from view and you want to create a copy of CDO records with unrestricted data. With the Custom Object Record Splitter app, you can parse a single CDO record to create one or multiple new "child" records.
App Installation
To install the Relationship One Custom Object Record Splitter app:
- Click on the install URL below:
IP AllowlistingIf you have Eloqua IP allowlisting enabled, please add AppCloud IPs to your allowlist - 44.236.213.84 and 44.238.209.213.
Please note, the installation process must be done by a user with Eloqua Customer Administrator rights.
-
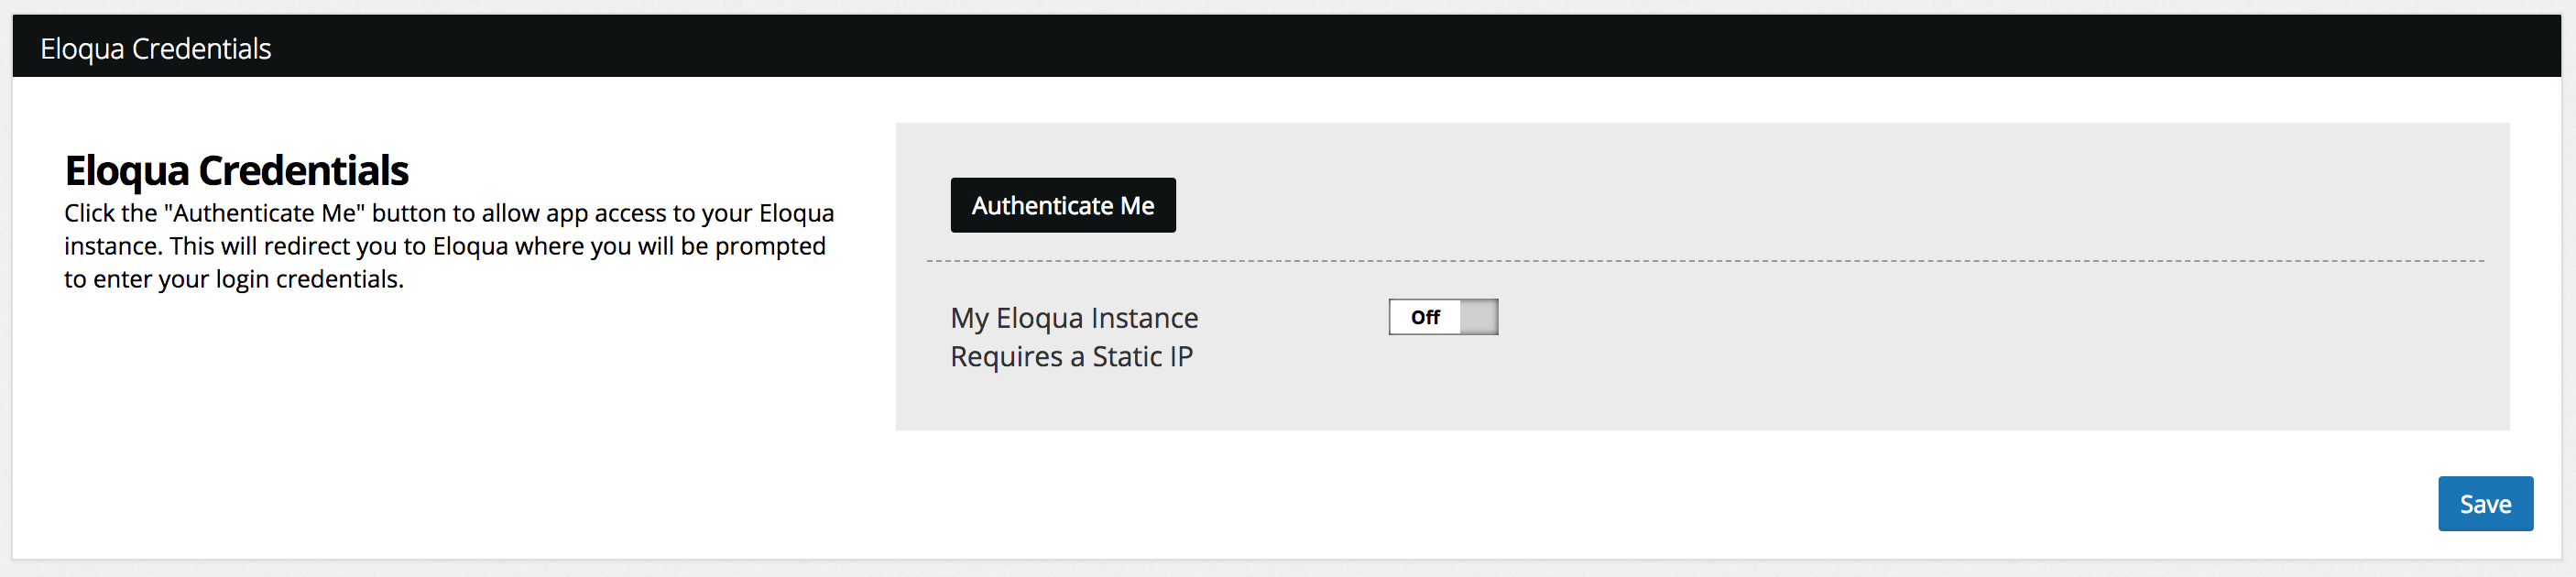
Log into Eloqua with your Eloqua Credentials, if required.
-
Click Accept and Install to add the app to your Eloqua instance.
-
Click Authenticate Me to grant permission for the app to communicate with Eloqua on your behalf.
-
Click Accept or switch users to allow Eloqua to access the app.
-
Click Save to finish the app installation process.
The Relationship One Custom Object Record Splitter app is now installed in the App Catalog inside of your Eloqua instance which can be found by clicking on Apps under the Settings menu in the Platform Extensions section. You can select the app to view the app description, modify the configuration settings, reinstall, or uninstall it. You can also check its status and dependencies.
App Configuration
Step 1: Add the Cloud Action
Within Program Canvas, find the Custom Object Record Splitter Cloud Action in the Actions menu area. Double-click on or drag the Custome Object Record Splitter Cloud Action onto your canvas workspace.
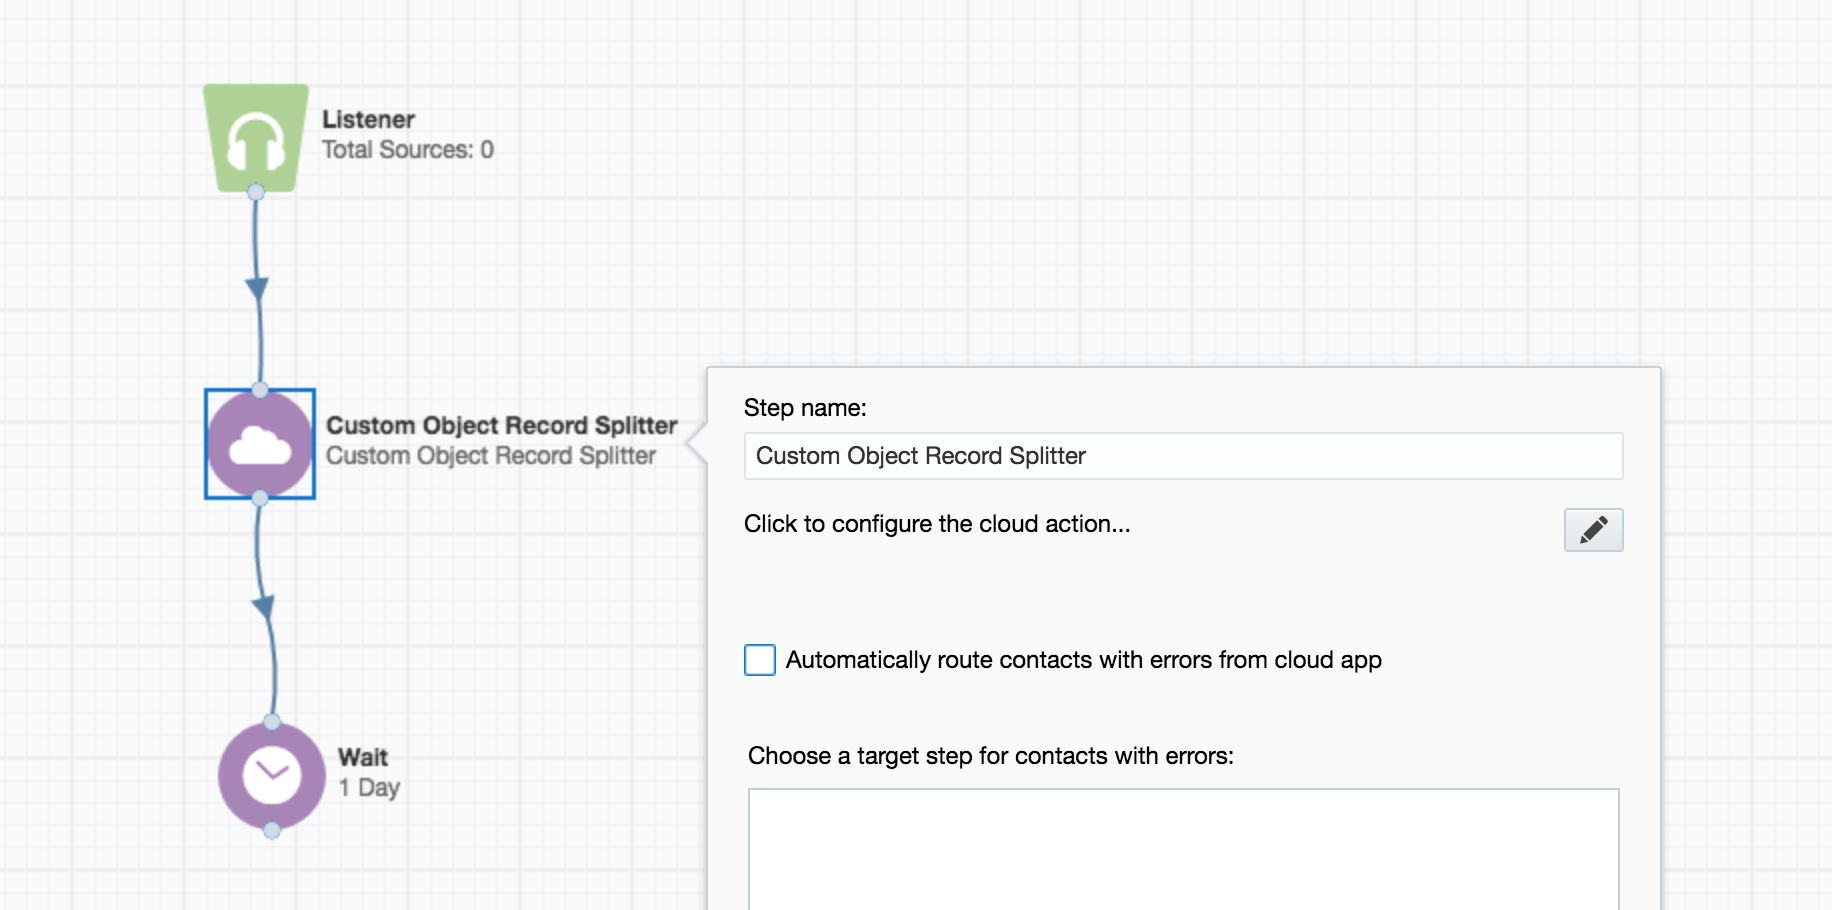
Double click on the cloud action and click the configure button. You will need to save your Program before moving onto Step 2.
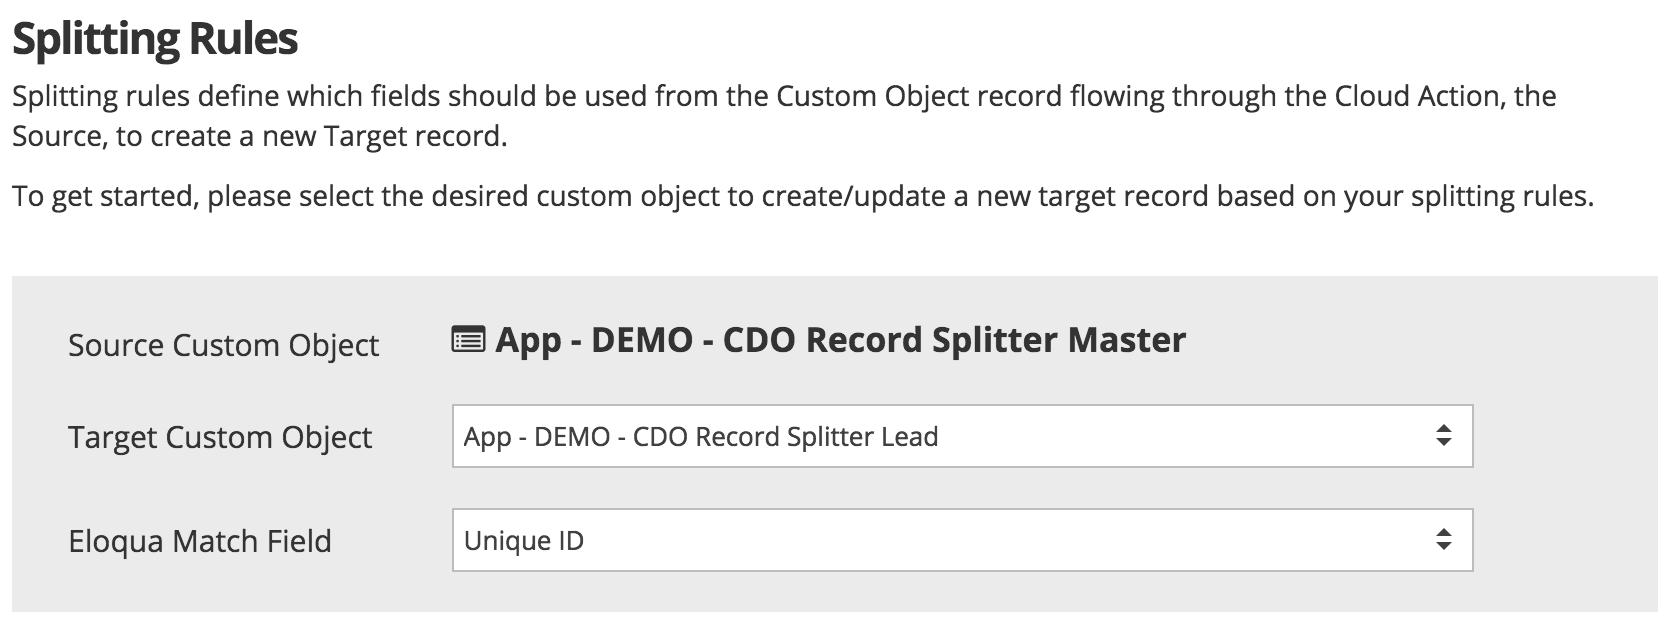
Step 2: Select Target Custom Object
Select the "Target Custom Object" Custom Data Object that should be used to store the resulting "child" records. You will also need to specify the Custom Data Object field that should be used to match newly created records by the app with existing records. Typically, this is a unique ID field or email address field.
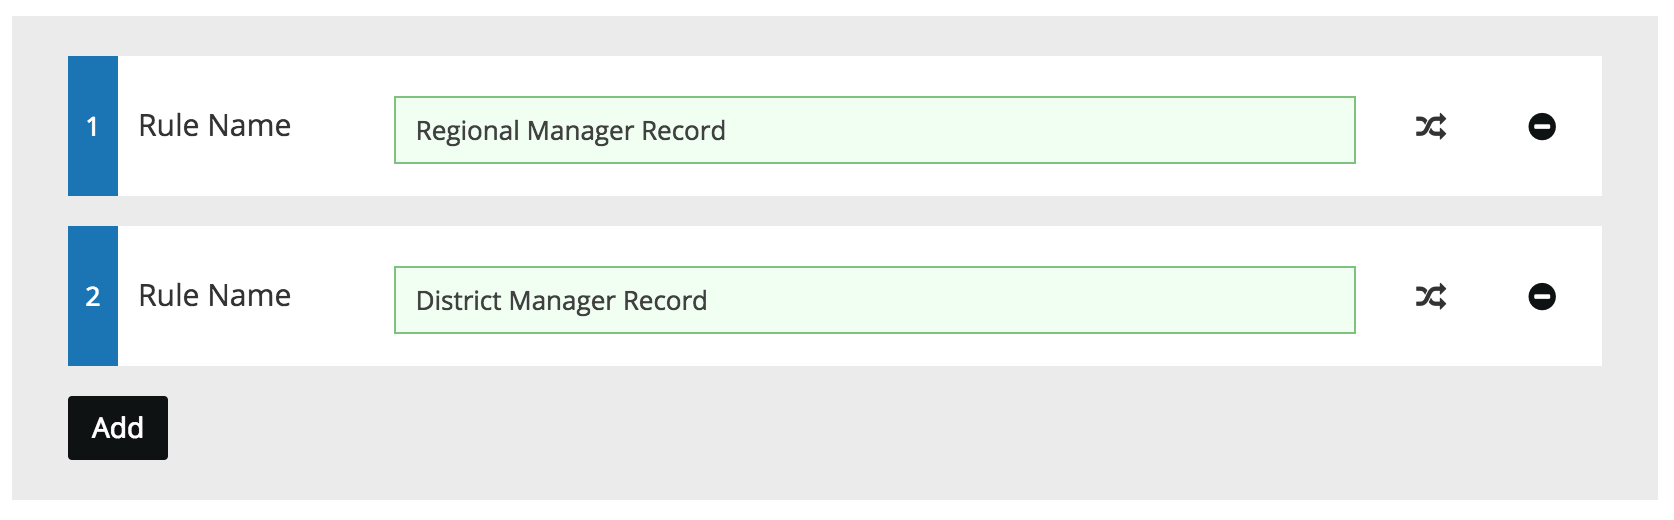
Step 3: Add Splitting Rules
Splitting rules specify which fields from the source or "parent" Custom Data Object record should be used when creating a new target or "child" record. Click the Add button to add a new splitting rule and provide a rule name or description. You can have as many splitting rules as you'd like. Each rule will generate a new unique "child" record.
Once you have added a new rule, click on the mapping icon () to specify the fields to be included in the "child" record. At a minimum, you will need to map the field that should be used as the new record unique identifier. This can be either a source Custom Data Object field or a system generated unique identifier. Be sure to click on the "Unique Id" tag under the field which will also make this field required.
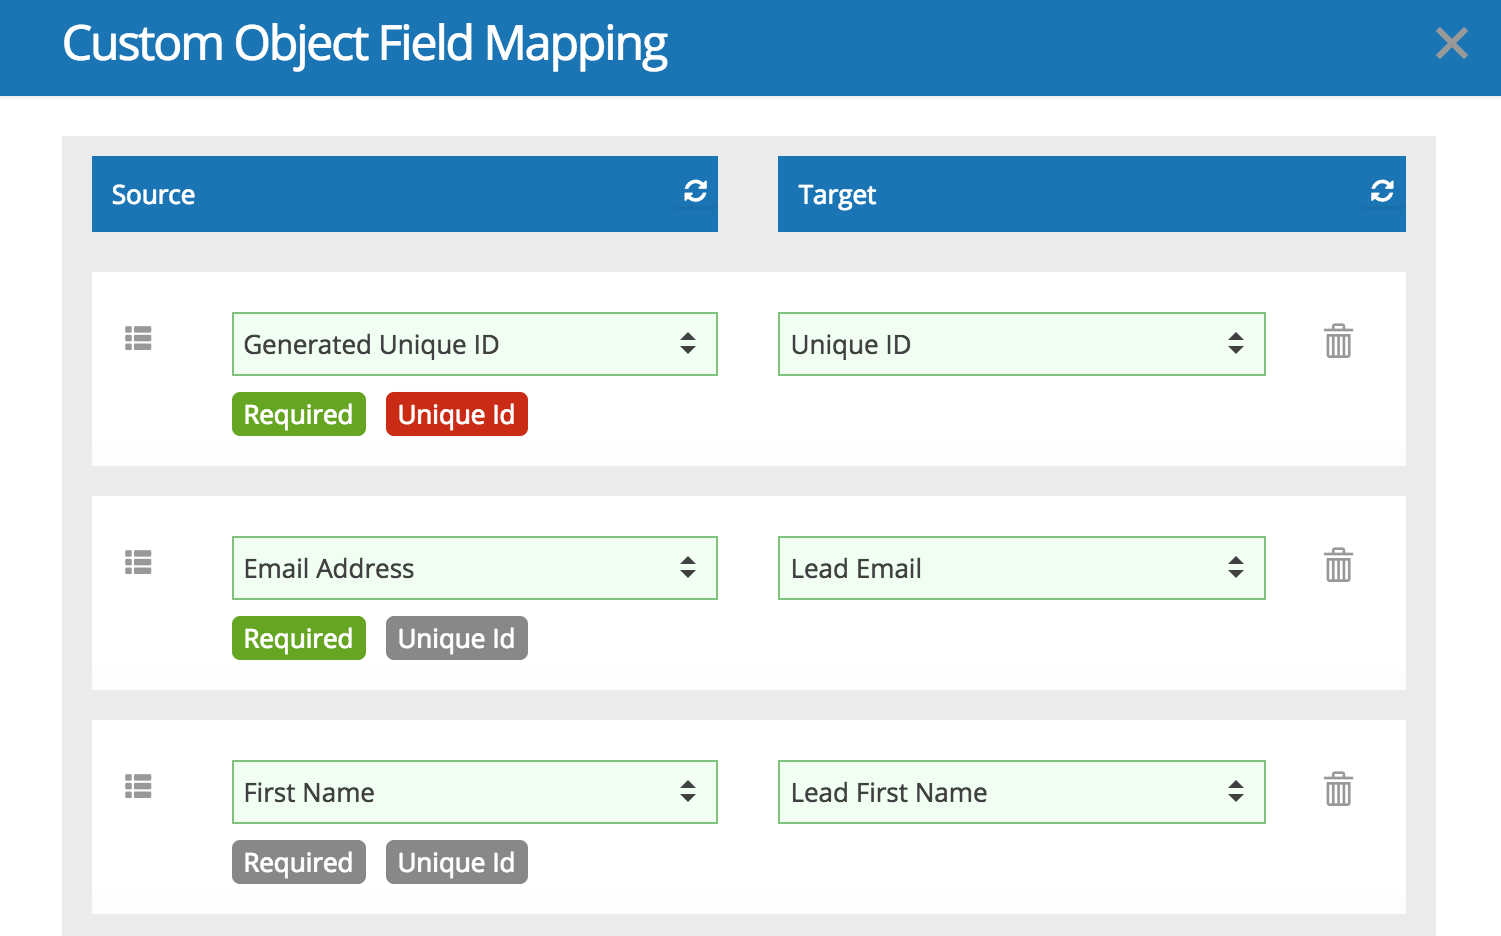
Click the +Add Field button to add more fields that should be used from the source/parent record when creating a new target/child record. If a source/parent field must have a value in order to create a new target/record, click on the Required tag under the field. The app will not create a new child record if any required field does not have a value. This prevents accidentally creating children with undesired blank fields. To remove a mapping, click on the trashcan icon ().
Click the icon to the left of the source field dropdown list to use a static text field (indicated by the icon).
Click Save to save your field mapping setting for the rule. If desired, click the Add button to add another splitting rule and repeat the field mapping process above. To remove a rule and its associated field mapping settings, click the minus icon ().
Once you have added your splitting rules, click Save to continue.
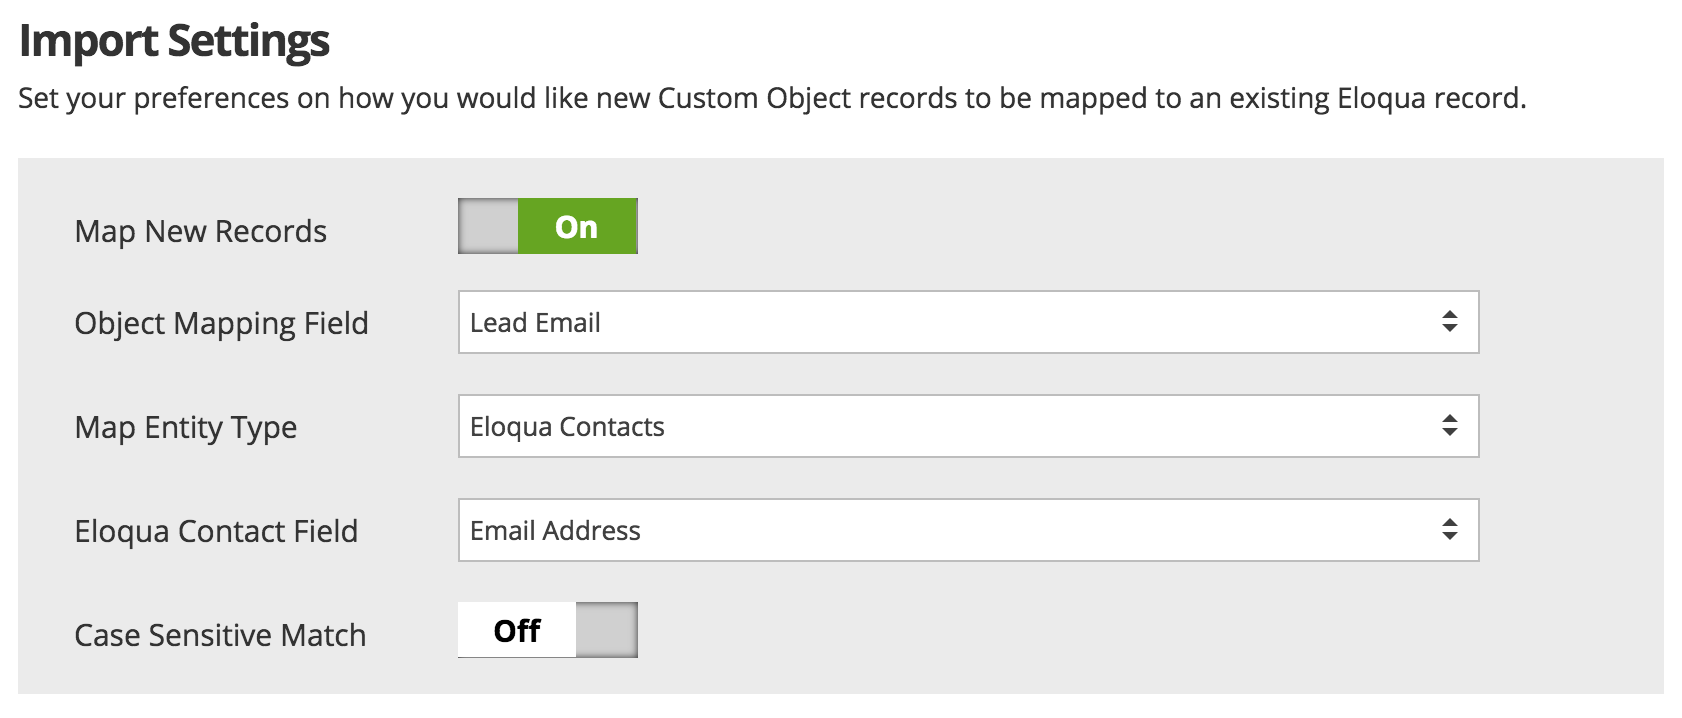
Step 4: Specify Import Settings
Set your preference on how new Custom Object records should be connected (mapped) to an existing Eloqua Contact or Account record. Typically, this is the email address for mapping a record to an Eloqua Contact and an Account ID for Account connections.
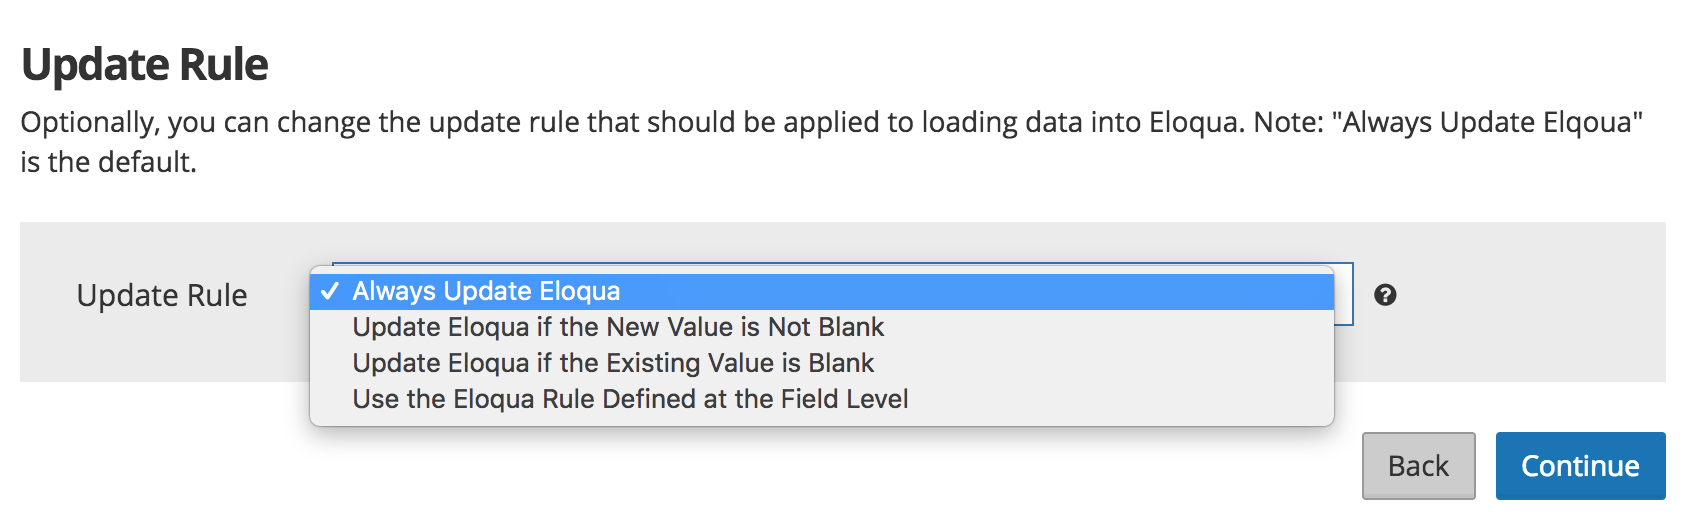
Optionally, you can change the default update rule that should be used when updating an Eloqua Custom Object record with data. By default, mapped Custom Object fields will always be updated, but you may rather only update when the new value is not blank, if the existing Eloqua Custom Object field value is blank, or update fields based on the fields individual settings.
Your Cloud Action has now been configured and is ready for use. You can close the app configuration window by clicking the X in the upper right corner or you can click Back to modify your settings.
The Cloud Action will automatically enable when you activate the Program.
Updated over 1 year ago