Asset Purger for Email Campaigns
Oracle Marketing Cloud - Eloqua Campaign Enhancer
Subscription RequiredThe Asset Purger for Email Campaigns app is a premium app and requires a subscription. To see subscription options or to start a trial, visit our AppCloud. If you don't have an AppCloud account, you'll need to create one first...but no worries, this app may require a subscription but you can create an AppCloud account for free!
App Overview
The Asset Purger for Email Campaigns app allows users (with permission) to remove completed campaigns with email assets that are no longer in use to alleviate the number of campaigns and email assets within an Eloqua instance.
App Installation
To install the Asset Purger for Email Campaigns app:
- Click on the install URL below:
IP AllowlistingIf you have Eloqua IP allowlisting enabled, please add AppCloud IPs to your allowlist - 44.236.213.84 and 44.238.209.213.
Please note, the installation process must be done by a user with Eloqua Customer Administrator rights.
-
Log into Eloqua with your Eloqua Credentials, if required.
-
Click Accept and Install to add the app to your Eloqua instance.
-
Click Authenticate Me to grant permission for the app to communicate with Eloqua on your behalf.

-
Click Accept or switch users to allow Eloqua to access the app.
-
Click Save to advance to the User Authorization page
-
Enter the Eloqua user names to provide access to the Asset Purger app

- Click Save to finish the app installation process.
The Relationship One Asset Purger for Email Campaigns app is now installed in the App Catalog inside of your Eloqua instance which can be found by clicking on Apps under the Settings menu in the Platform Extensions section. You can select the app to view the app description, modify the configuration settings, reinstall, or uninstall it. You can also check its status and dependencies.
App Configuration
To use the Asset Purger for Email Campaigns app, within the "My Eloqua" or "Campaign" areas, click on the cloud menu icon to open the menu tray.
Note, if you do not have the necessary access, you will be unable to access the Asset Purger for Email Campaigns application.

Step 1: Search for Campaigns
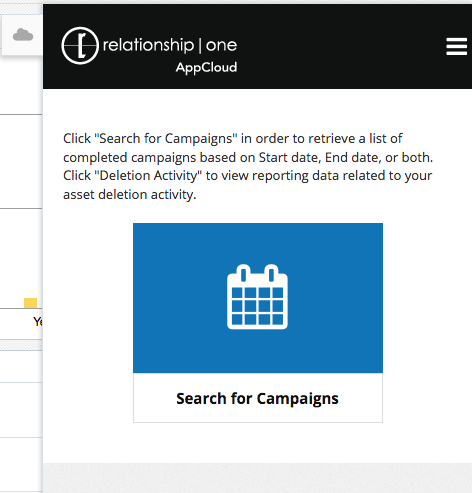
Users will be able to select a date range of the Completion of campaigns they wish to delete.
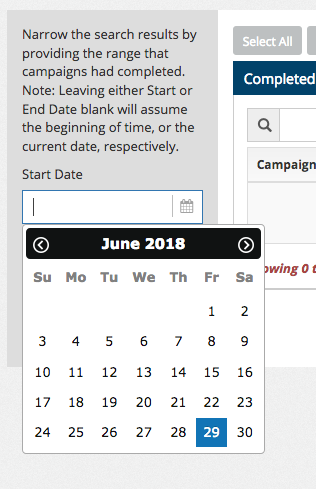
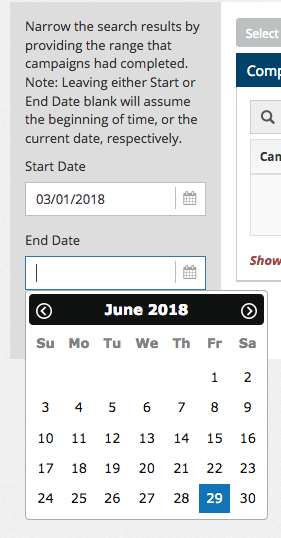
Optionally, selecting no dates will search for campaigns since the beginning of the instance to the current date and time.
Note: Campaigns that contain email assets only will appear in the search results. If a campaign includes a Form or Landing Page asset, it will not be included in the search results.
Step 2: Select Campaigns to Purge
Click on the rows containing the campaigns you wish to purge. You can select multiple rows at once to purge more than one campaign and its assets.
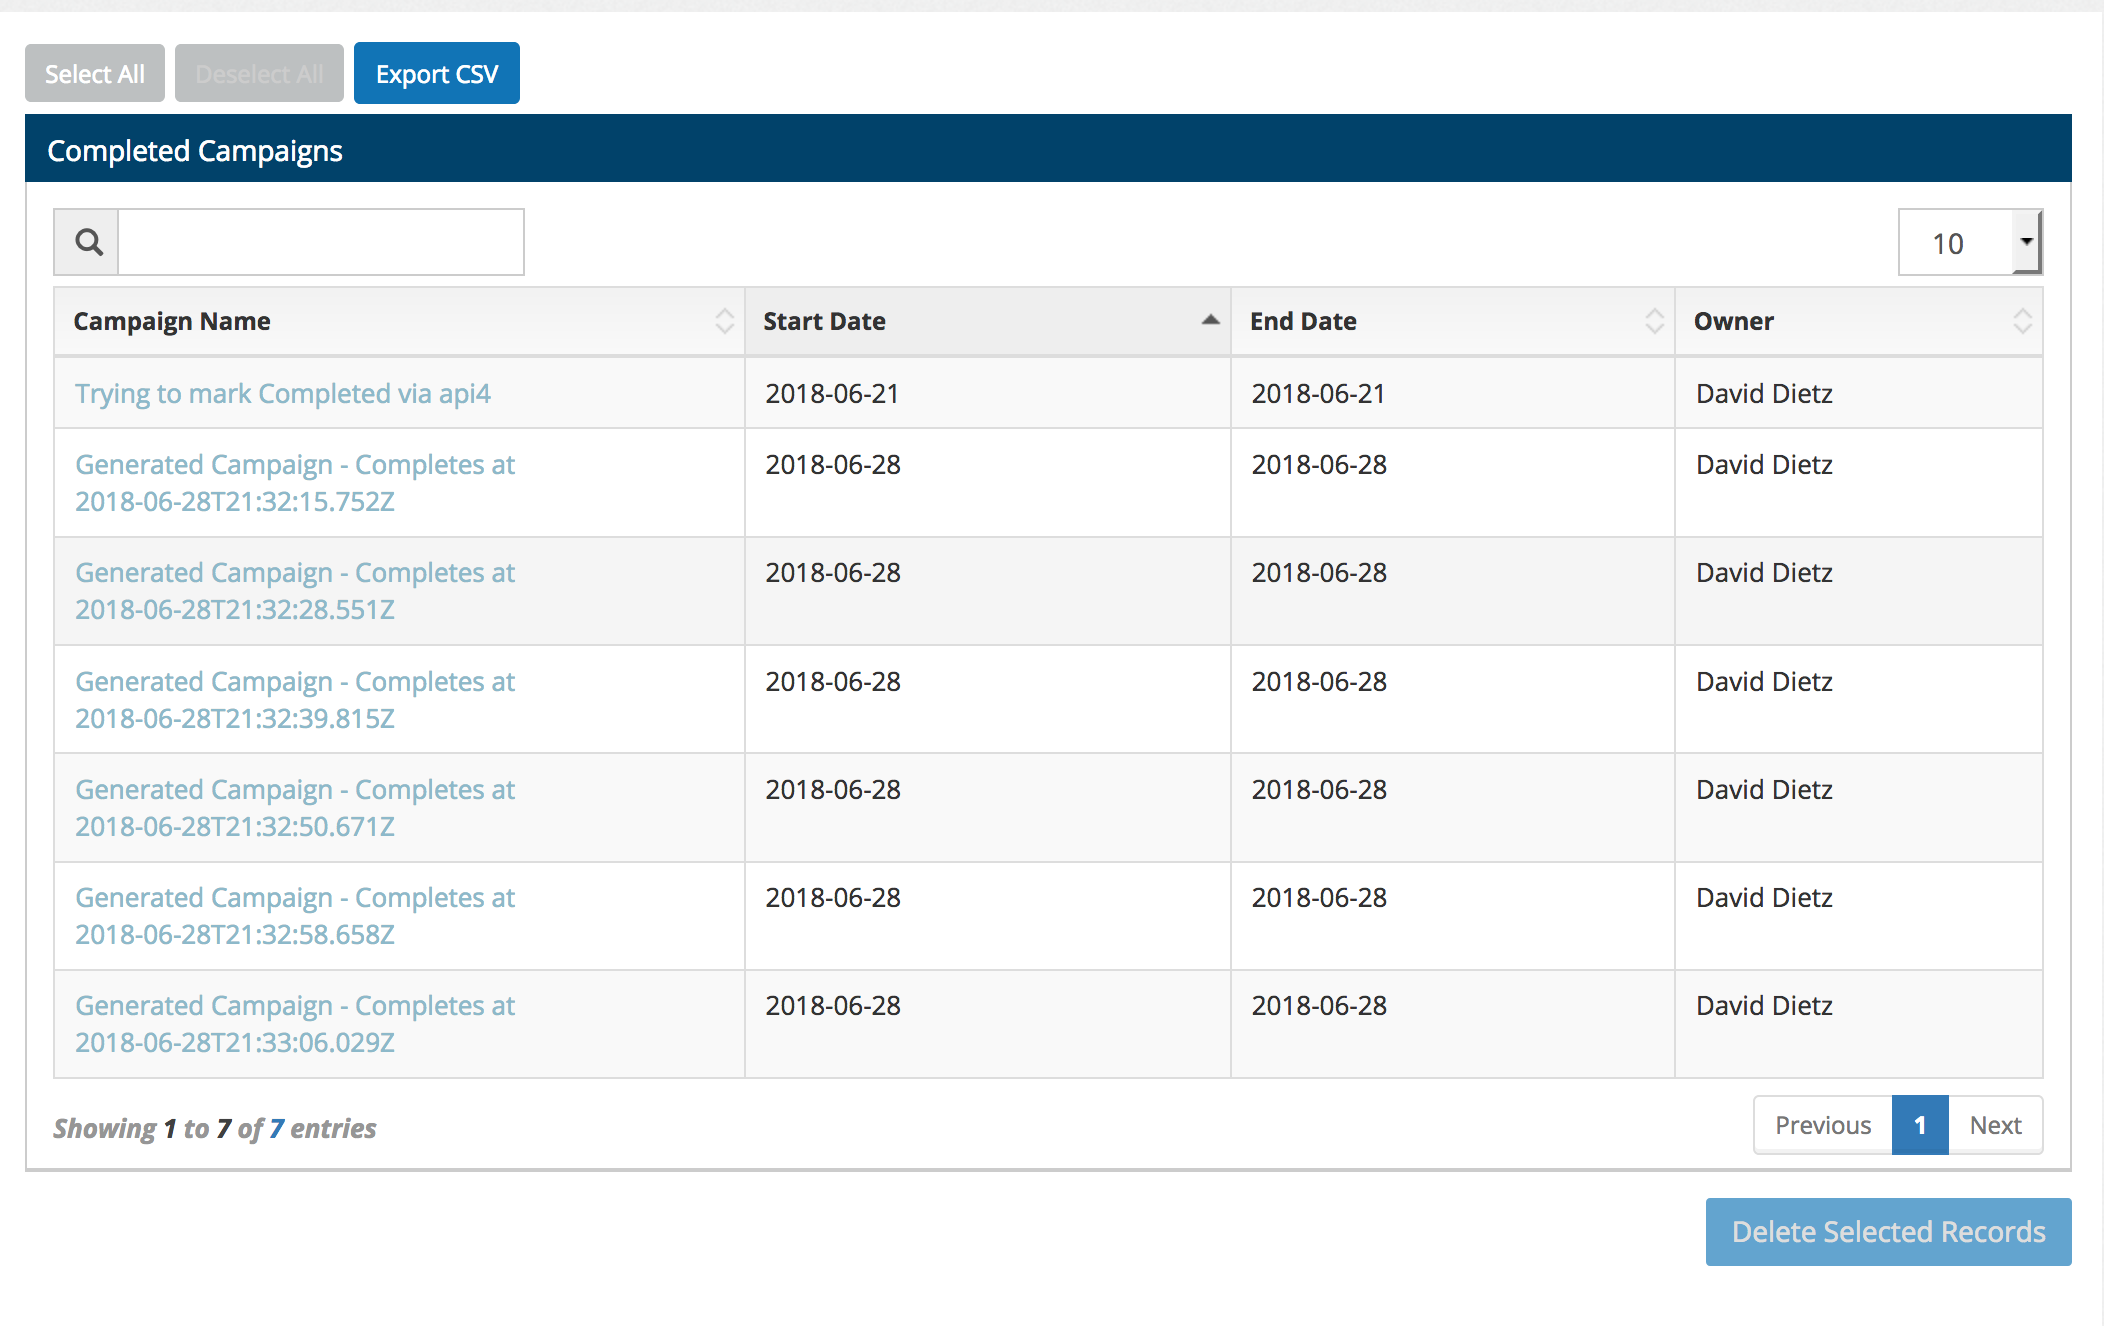
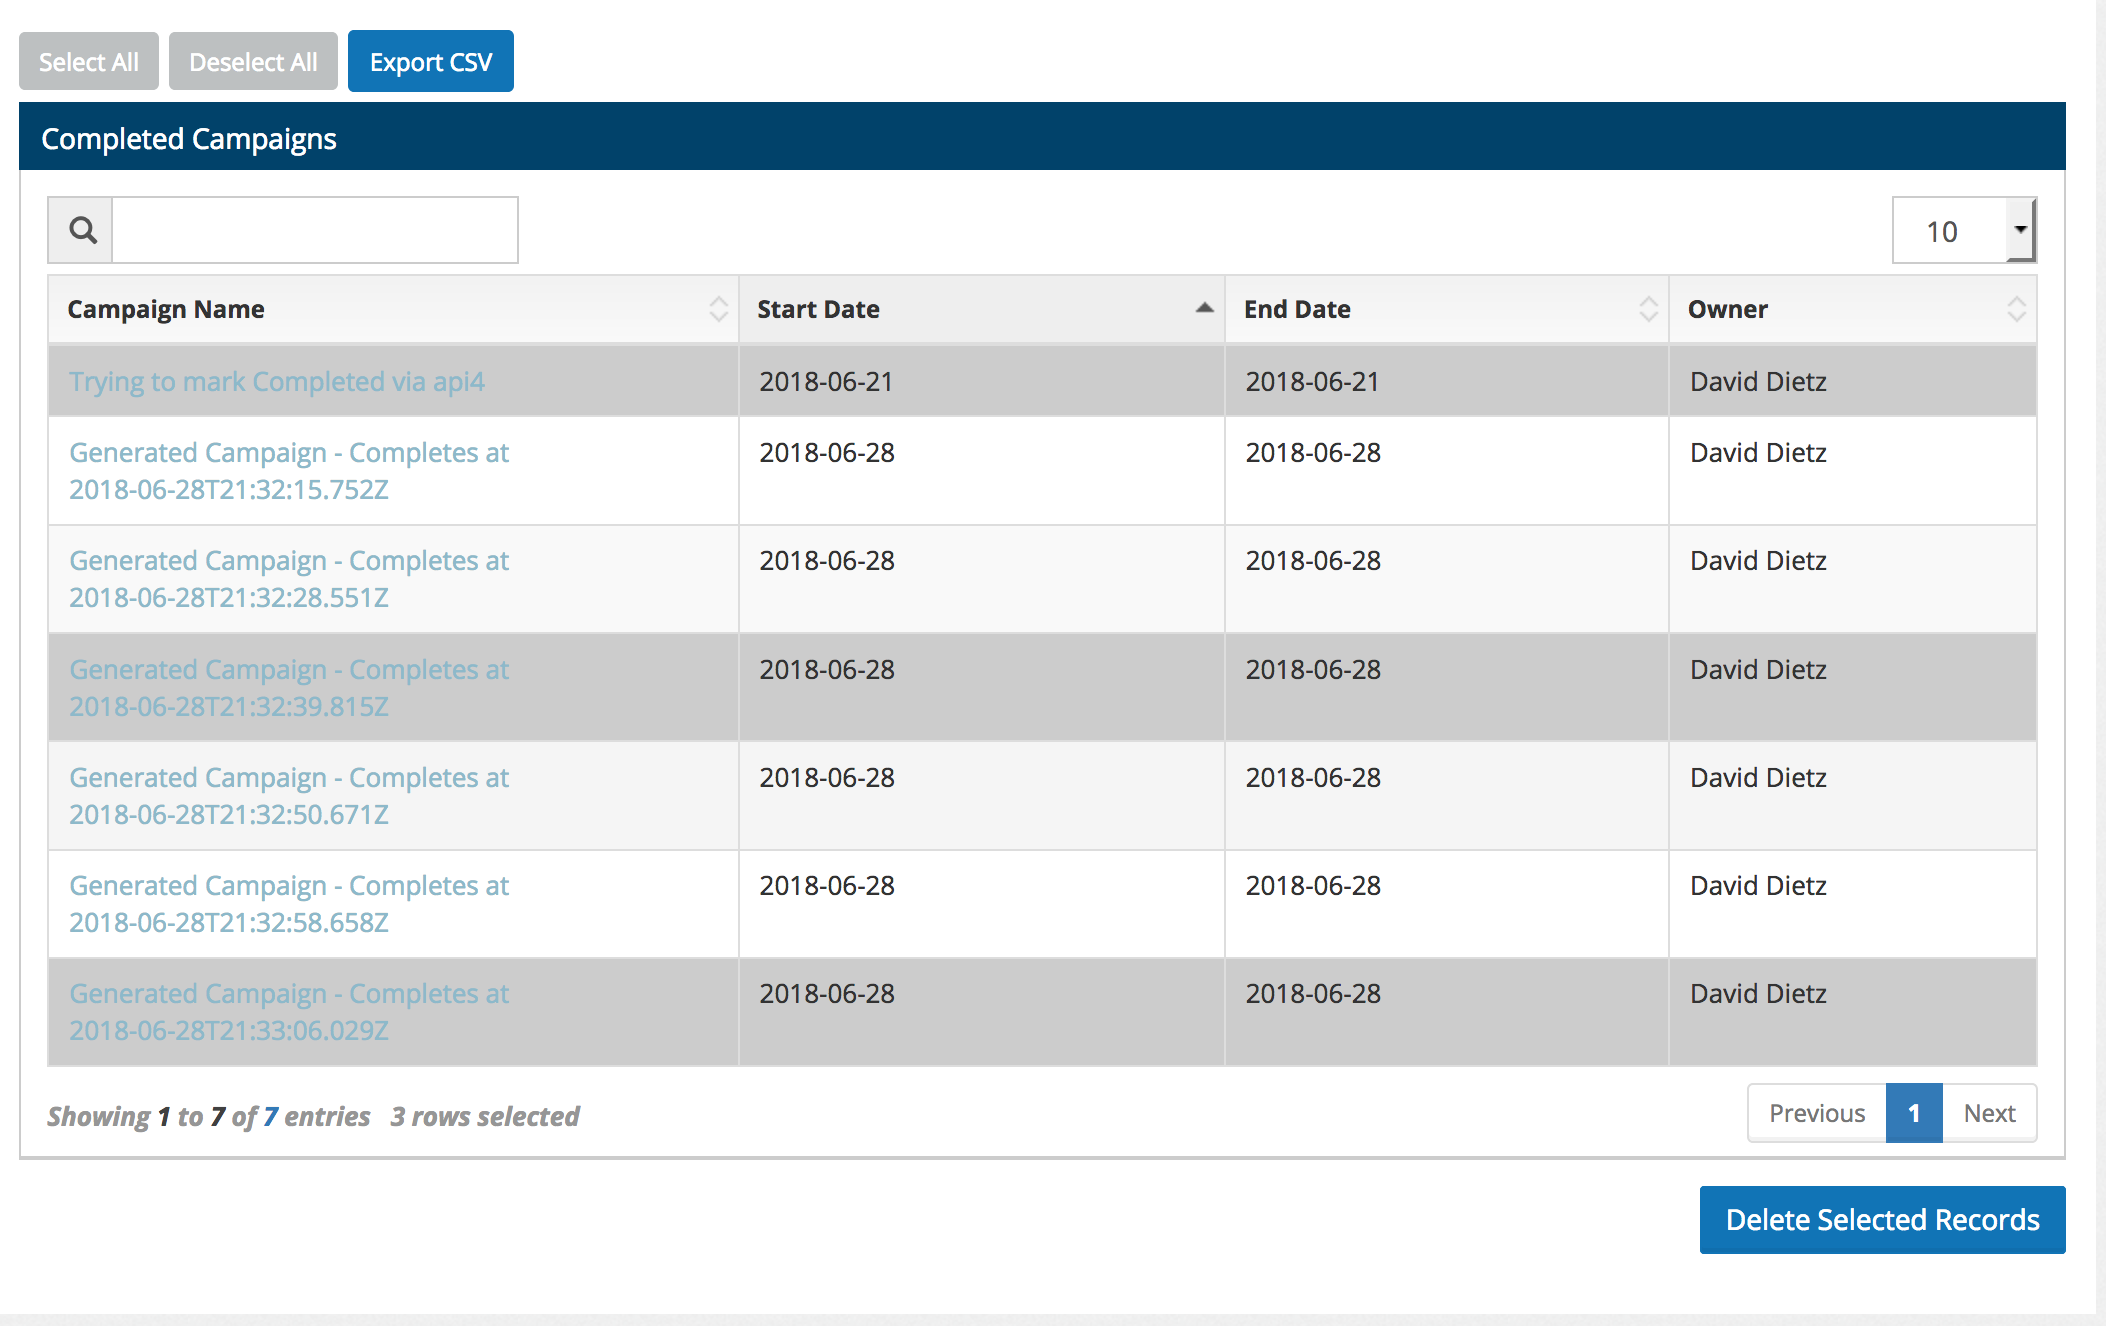
Once you've selected the campaigns to purge, click on Delete Selected Records for confirmation.
Step 3: Confirm Your Deletion
In order to prevent accidental deletion of records, users must confirm they are sure they want to delete the selected records by entering in the word "DELETE" into the provided text area, and checking the confirmation box.
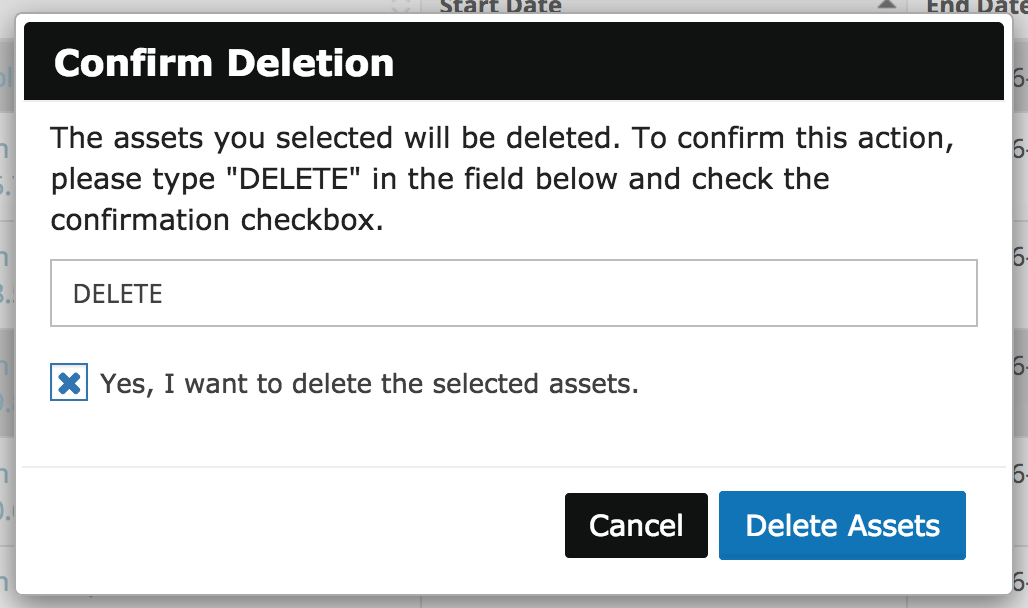
Clicking on Delete Assets will begin the purge process. Remember, once you select the Delete Assets button, campaigns and email assets will be deleted and can not be restored.
Once the purge process has completed, the installer will be notified of the deletion, and whether or not there were errors while attempting to purge all assets.
Updated 7 days ago
