
Cloud Decision for Salesforce.com
Oracle Marketing Cloud - Eloqua
Campaign Enhancer
Subscription RequiredThe Cloud Decision for Salesforce.com app is a premium app and requires a subscription. To see subscription options or to start a trial, visit our AppCloud. If you don't have an AppCloud account, you'll need to create one first...but no worries, this app may require a subscription but you can create an AppCloud account for free!
App Overview
The Cloud Decision for Salesforce.com app allows you to create simple or complex queries for Eloqua campaign and program Contacts to run real-time against a Salesforce.com instance. The app supports both Salesforce.com production and sandbox instances.
App Installation
To install the Relationship One Cloud Decision for Salesforce.com app:
- Click on the install URL below:
IP AllowlistingIf you have Eloqua IP allowlisting enabled, please add AppCloud IPs to your allowlist - 44.236.213.84 and 44.238.209.213.
Please note, the installation process must be done by a user with Eloqua Customer Administrator rights.
-
Log into Eloqua with your Eloqua Credentials, if required.
-
Click Accept and Install to add the app to your Eloqua instance.
-
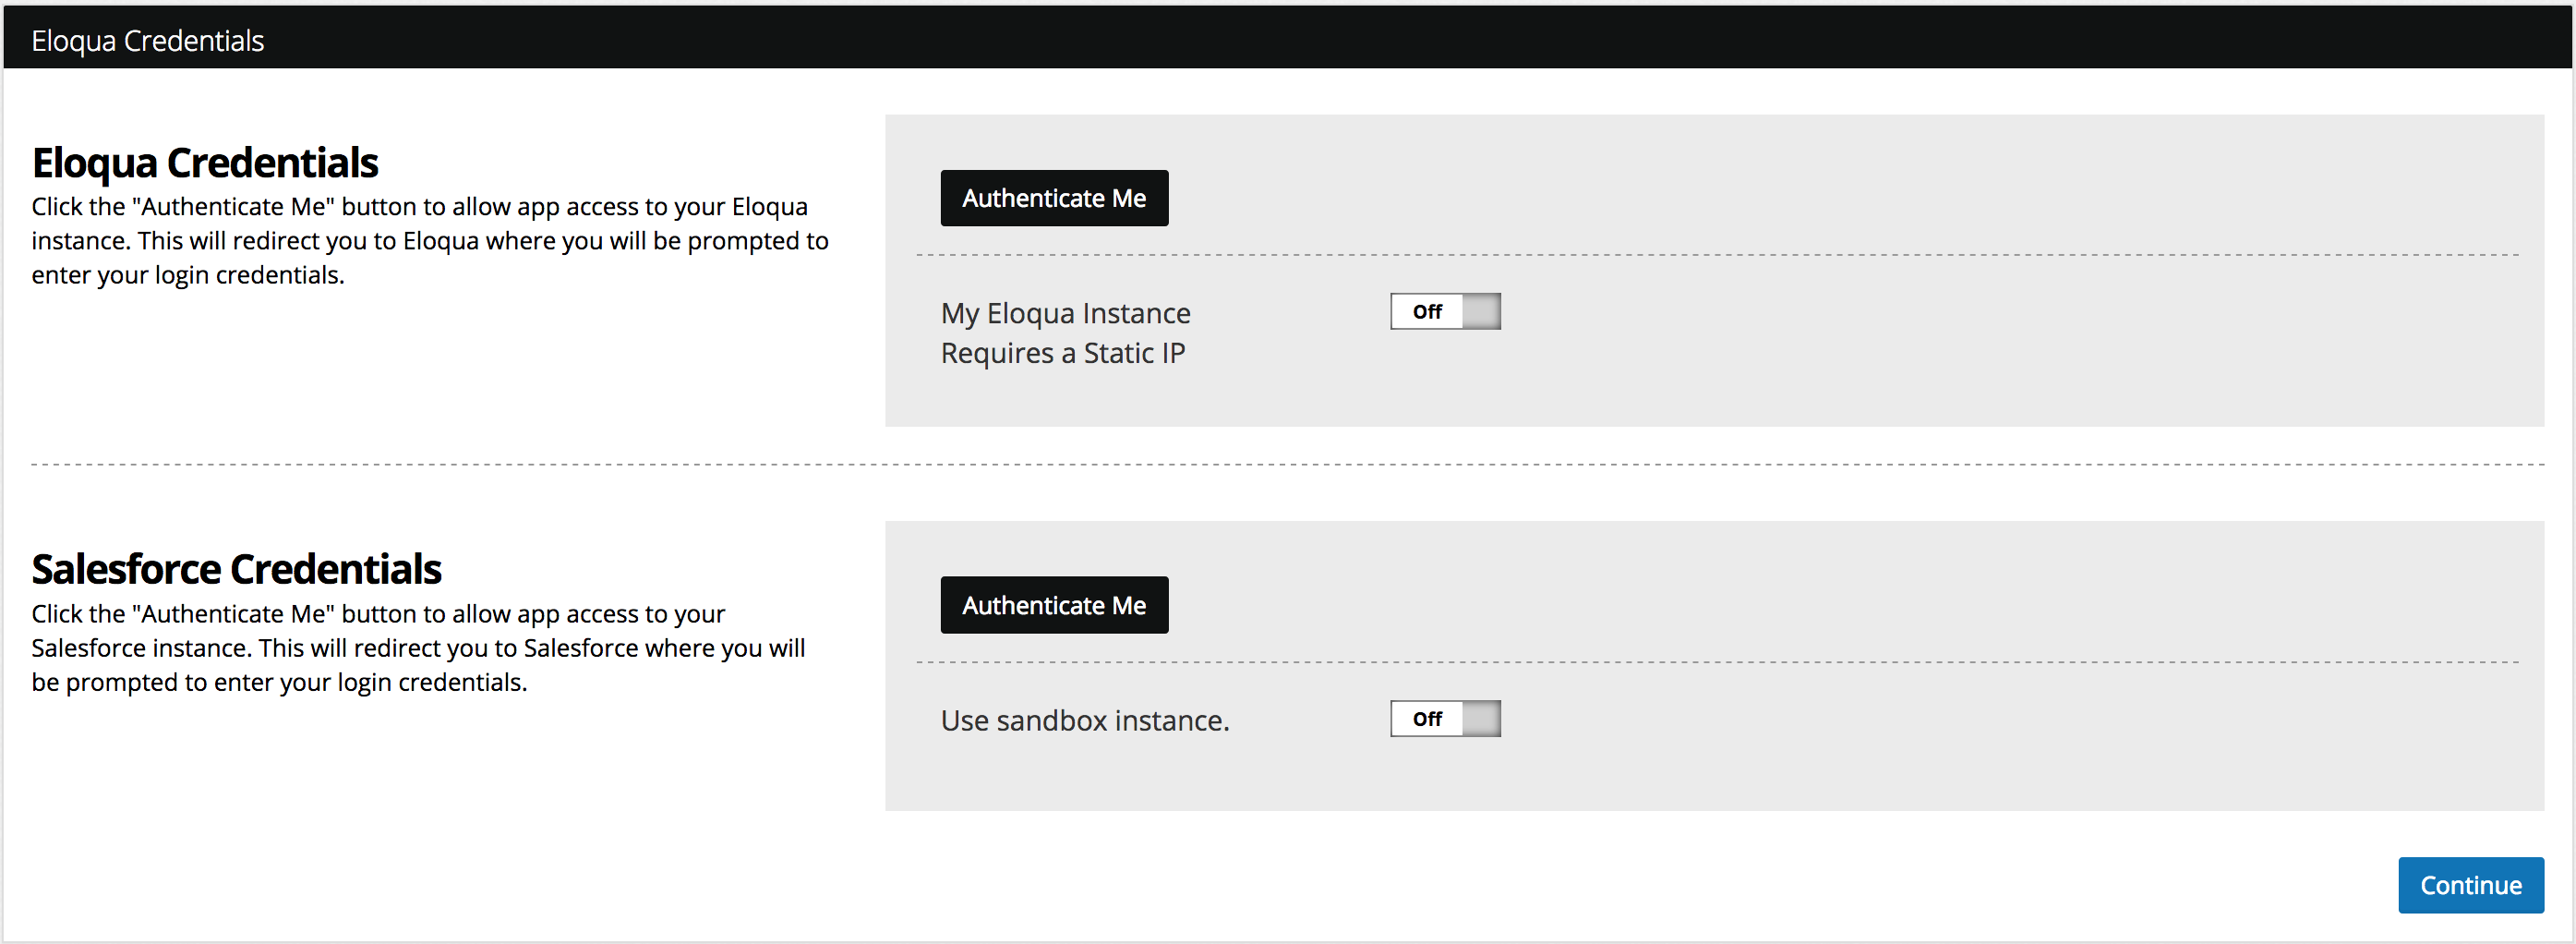
For your Eloqua credentials, click Authenticate Me to grant permission for the app to communicate with Eloqua on your behalf.
-
Click Accept or switch users to allow Eloqua to access the app.
-
For your Salesforce.com credentials, click Authenticate Me to grant permission for the app to communicate with Salesforce.com. You can choose to connect to either a production or sandbox instance.
-
Provide your Salesforce.com credentials and click Log In. Click Accept to allow the app to connect to Salesforce.com. Click Continue.
-
Select the Salesforce.com objects that can be used by the app. You can add as many standard and custom objects. To remove an object from the list, click the x.

- Click Save to finish the app installation process.
You will now see the Relationship One Cloud Decision for Salesforce.com app in the App Catalog inside of your Eloqua instance.
The Relationship One Cloud Decision for Salesforce.com app is now installed in the App Catalog inside of your Eloqua instance which can be found by clicking on Apps under the Settings menu in the Platform Extensions section. You can select the app to view the app description, modify the configuration settings, reinstall, or uninstall it. You can also check its status and dependencies.
App Configuration
Step 1: Add the Cloud Decision
Within the Campaign or Program Canvas, find the Cloud Decision for Salesforce.com Cloud Decision in the Decisions menu area. Double-click on or drag the Cloud Decision for Salesforce.com Cloud Decision onto your canvas workspace.
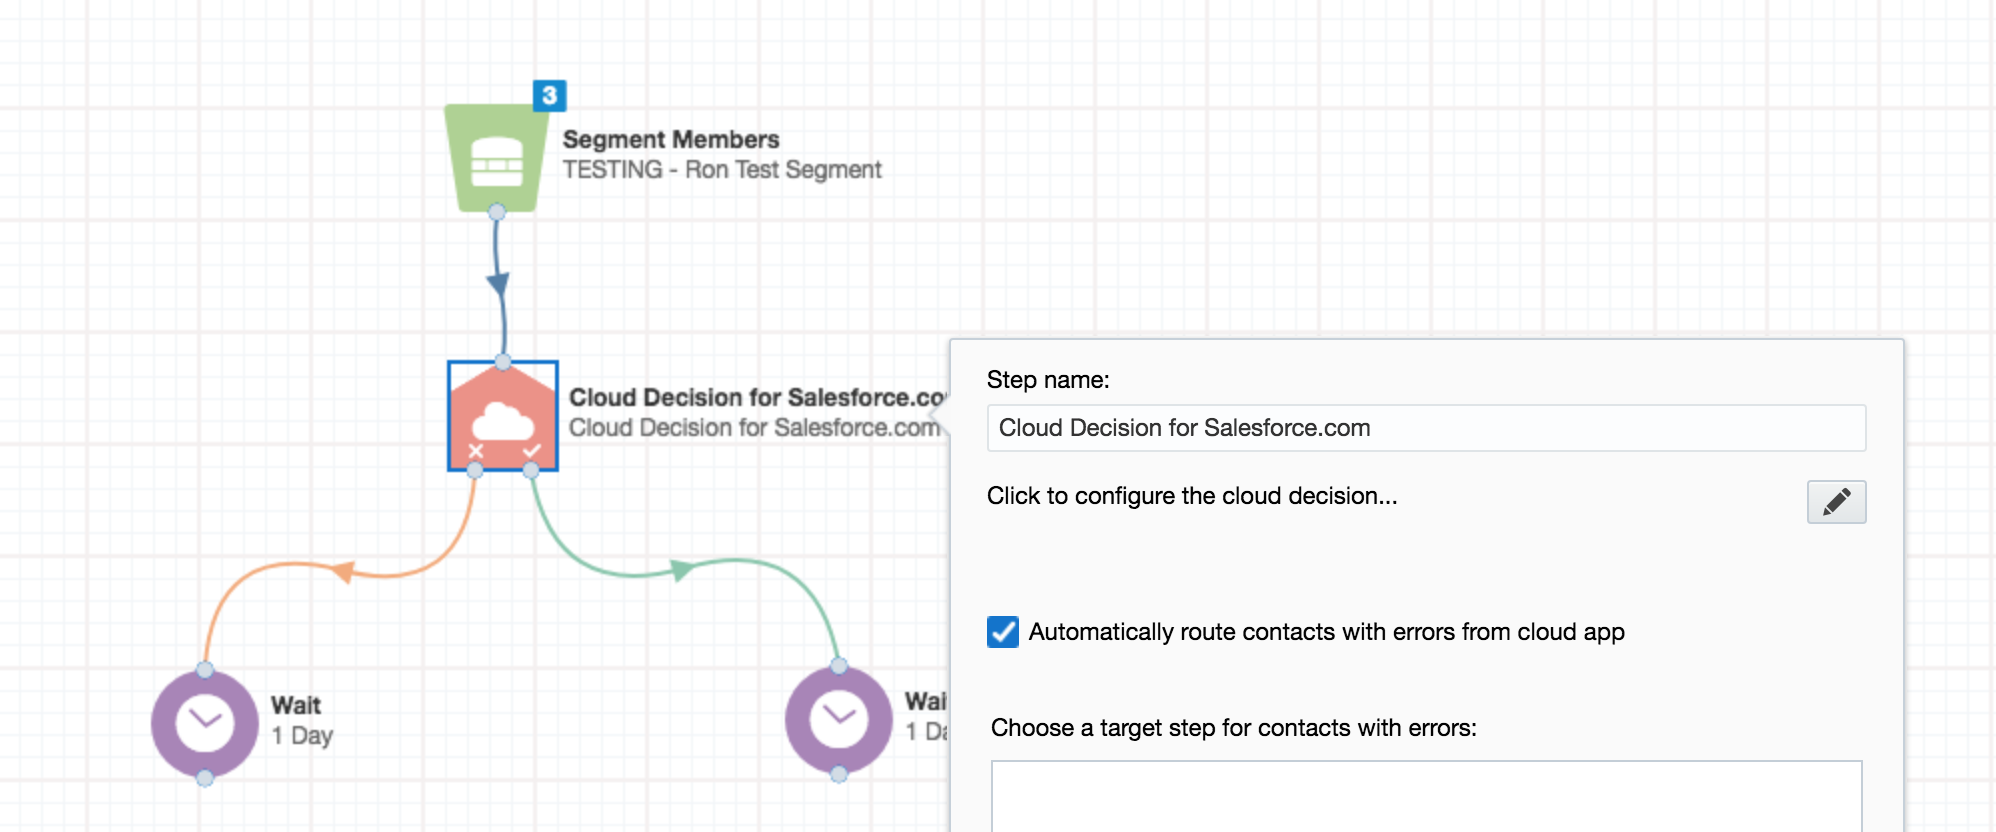
Double click on the cloud decision and click the configure button.
Step 2: Set a Salesforce.com Object
Select the “Salesforce.com Object” that will be used to match your Eloqua Contact records to a Salesforce.com record.

Click the Save button to continue.
Step 3: Set Decision Criteria
To add decision criteria, select the appropriate Salesforce.com field, the comparator, and Eloqua Contact field. (Note: You must select the comparator before choosing your Eloqua Contact field; available fields are context-sensitive) Alternatively, you can use static fields by clicking on the icon () next to the Eloqua field. To change it back, click on the icon once more. Keep in mind, the field options will be contextual to the Saleforce.com field type. The app supports the following field types:
- ID - Salesforce.com record ID of either 15 or 18 alphanumeric characters
- Reference - Salesforce.com reference record ID of either 15 or 18 alphanumeric characters
- Boolean - when using an Eloqua Contact field, provide the value that represents a "True" condition and a "False" condition. Click the () icon to manual set the desired value.
- Currency - Salesforce.com currency field type
field value - Date - allows multiple comparator options including single dates, between two date fields/values, or within a specific date range
- Double - a numeric field value
- Datetime - specifies both the date and timestamp value. If not timestamp is specified, the default will be 00:00:00. When specifying a static value, select the date and then click on the clock icon to specify the desired time.
- String - a text field value
- Text Area - a large format field value
- Integer - a numeric value
- Picklist - allows searching for records using field values and various wildcard options
- Multipicklist - allows searching for records that include, excludes or has exactly one or more
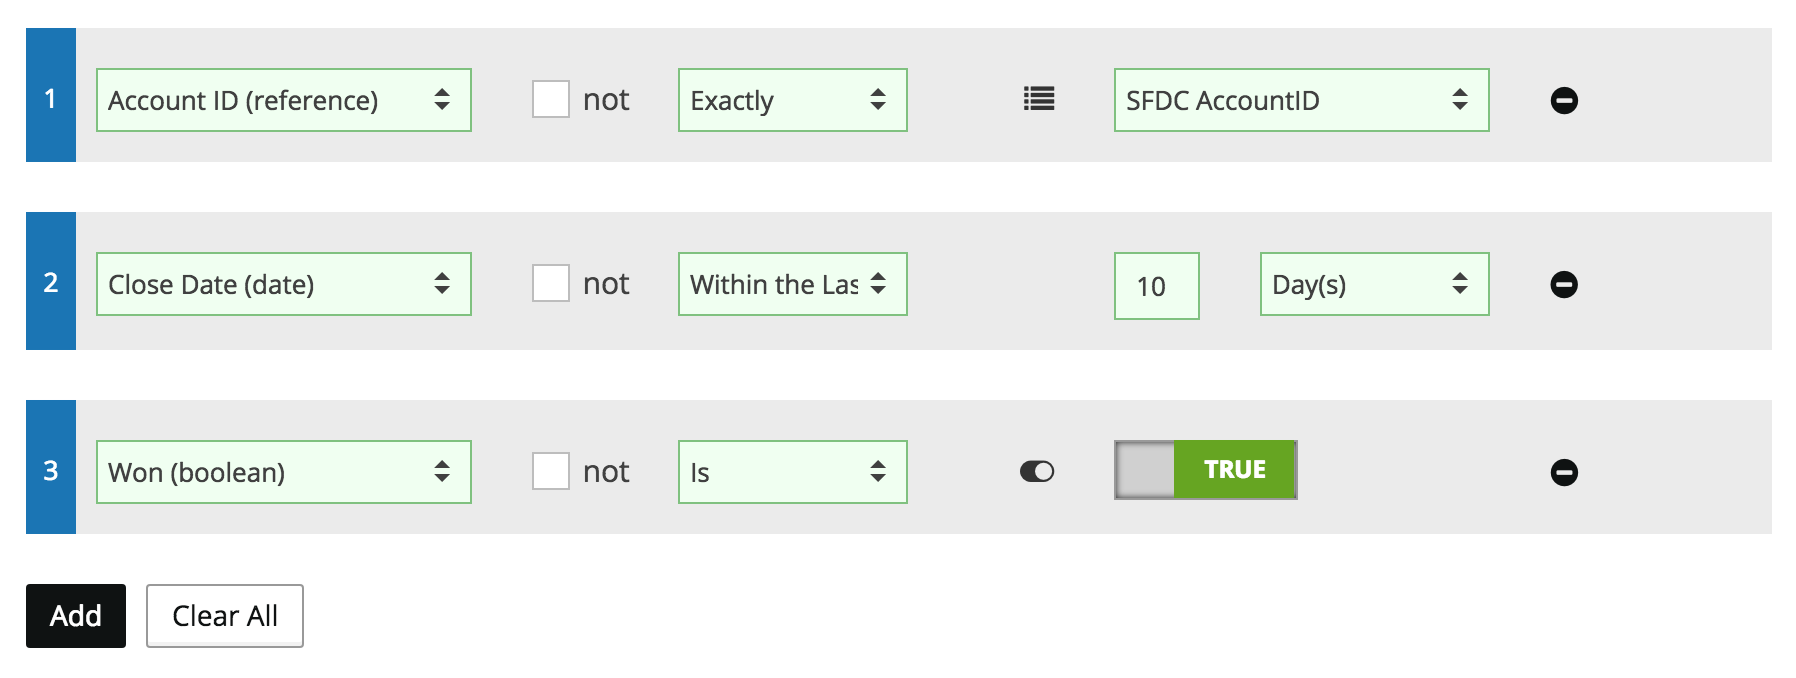
To add a new decision criteria, click on the Add button. To remove all of the existing criteria and start over, click on the Clear All button.
If you have more than a single decision criterion, set the desired grouping logic. You can use a simple AND or OR logic or complex logic with custom syntax.

Simple AND or OR grouping logic.

Complex grouping logic syntax.
Click the Save button to save your decision criteria.
Your Cloud Decision has now been configured and is ready for use. You can close the app configuration window by clicking the X in the upper right corner.
The Cloud Decision will automatically enable when you activate the Campaign or Program.
Updated over 1 year ago