
Hootsuite Lead Sync
Hootsuite App
Channel App
Check Your Hootsuite TrimThe Hootsuite Oracle Eloqua Lead Sync app is only available for certain Hootsuite license trims. If you don't see the app within the Hootsuite app catalog, contact your Hootsuite representative.
App Overview
With the Hootsuite Lead Sync app, you can easily add social postings as part of your Eloqua Campaign including:
- Create a new Eloqua lead record, stored as a Custom Object record, from a Stream interaction
- Create an Eloqua Contact from the newly created Lead record
- Optionally, Append Twitter information to the lead record such as Twitter Profile ID, Profile Name, Screen Name, User ID and Message ID.
To Install the Oracle Eloqua Lead Sync app within your Hootsuite instance, navigate to the Apps area, find or search for Oracle Eloqua and click on the Install button.
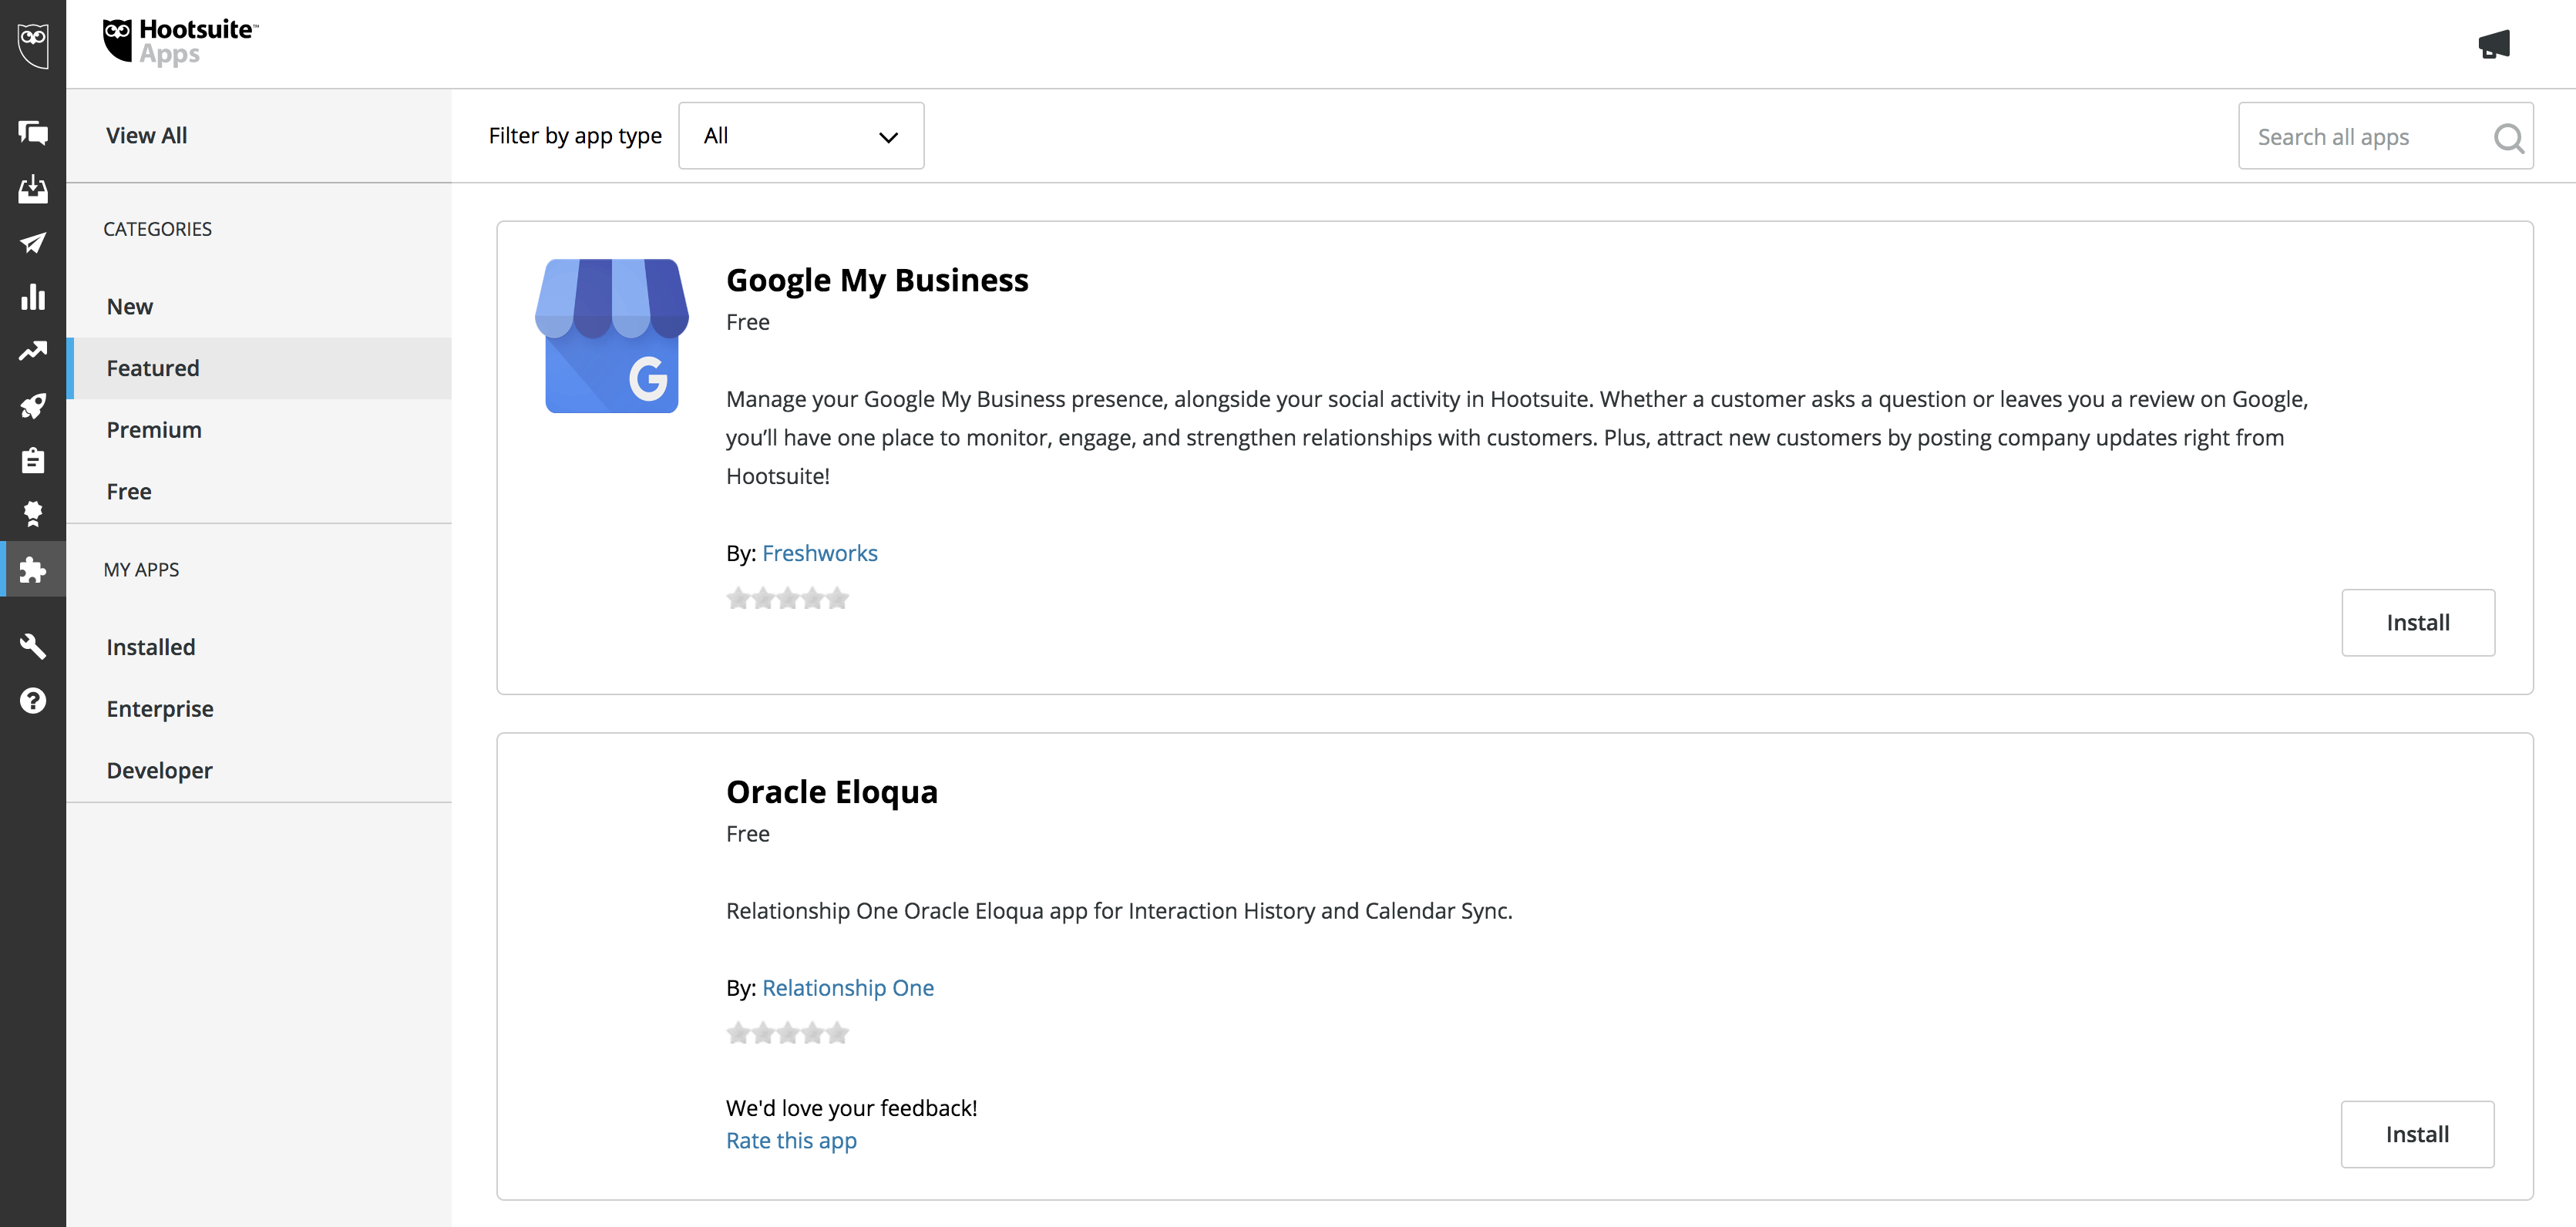
The app is now installed within your Hootsuite instance and ready for use.
Setting Up The Eloqua Integration
Before you can start creating Social Lead records within Eloqua, you need to complete a few additional setup tasks.
Step 1: Authorize Eloqua
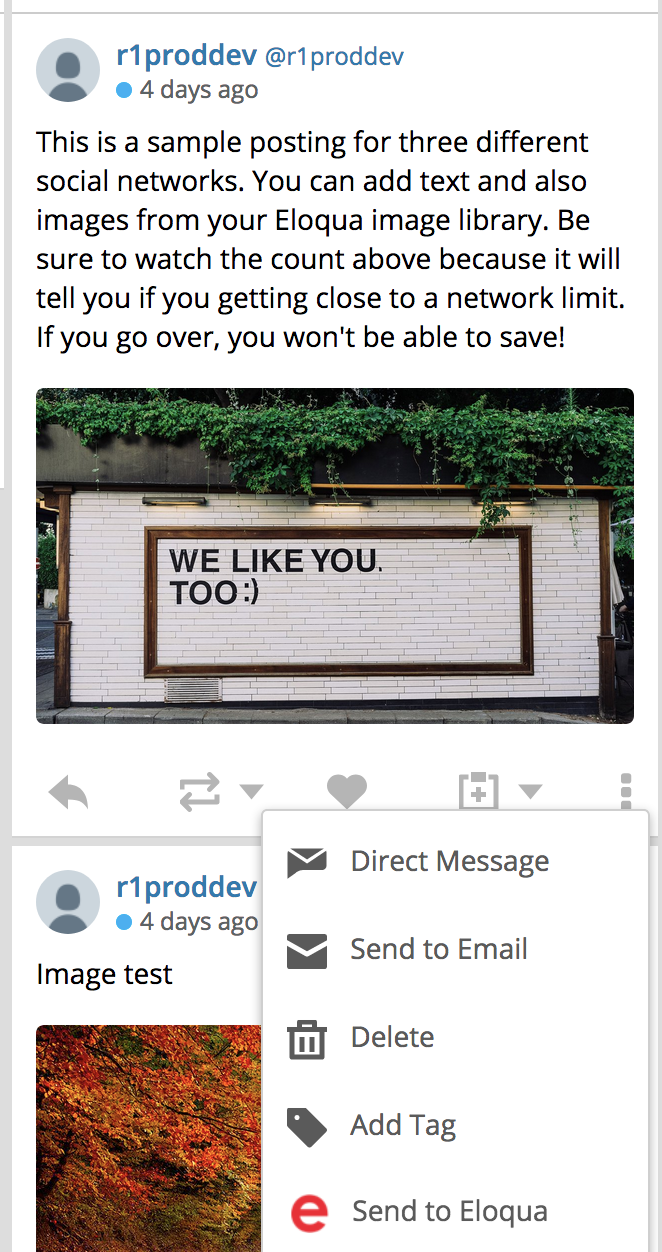
Navigate to the Streams and select an interaction you wish to create a Social Lead from, click on the menu options in the lower right, and select “Send to Eloqua."
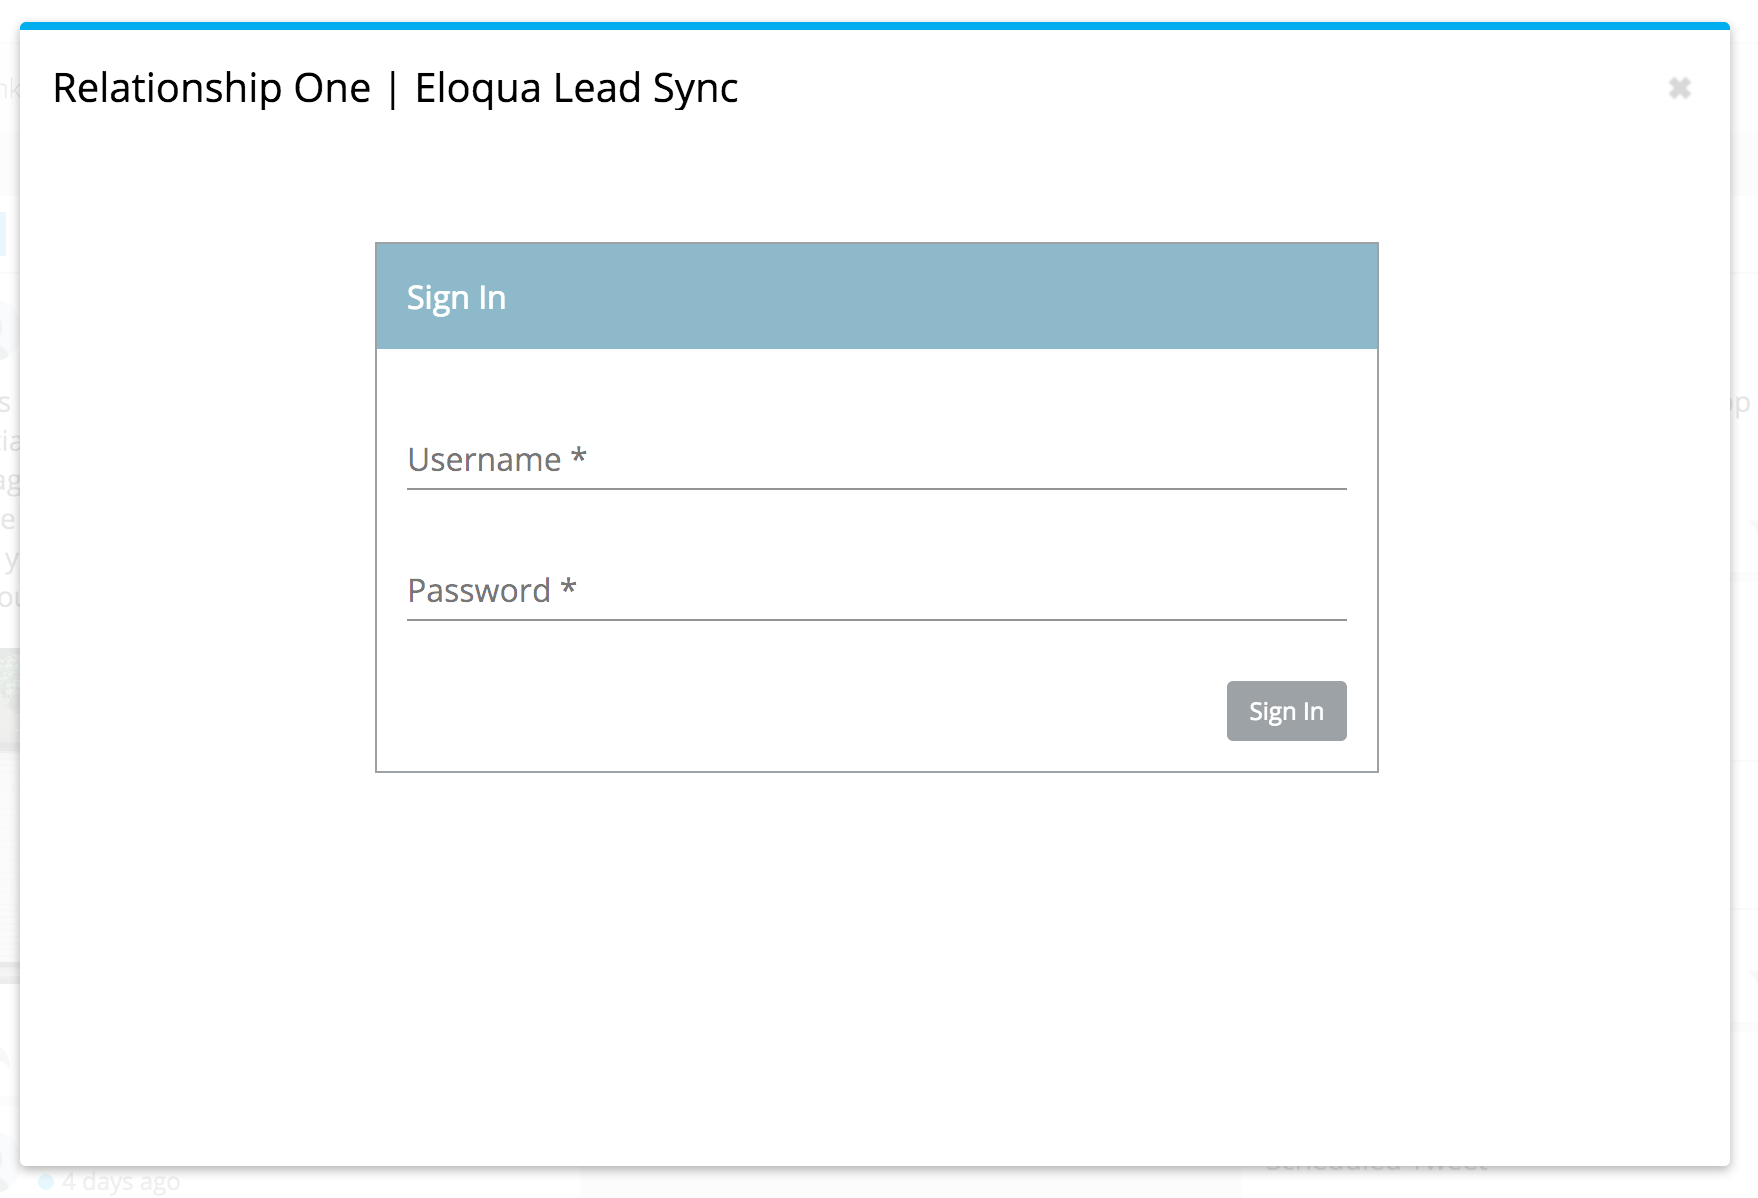
You will need to log in to the Relationship One AppCloud account with your credentials. If you do not have credentials, contact your Eloqua administrator (NOTE: see Adding a User to Your Account for more information).
On your initial app usage, you will need to authorize access to Eloqua for the app. Click on the Authorize button. Please note, the installation process must be done by a user with Eloqua Customer Administrator rights. Click Accept or switch users to allow Eloqua to access the app.

Once the app has been authenticated, you will see the following in your Eloqua App catalog:

Step 2: Review the Eloqua Custom Object
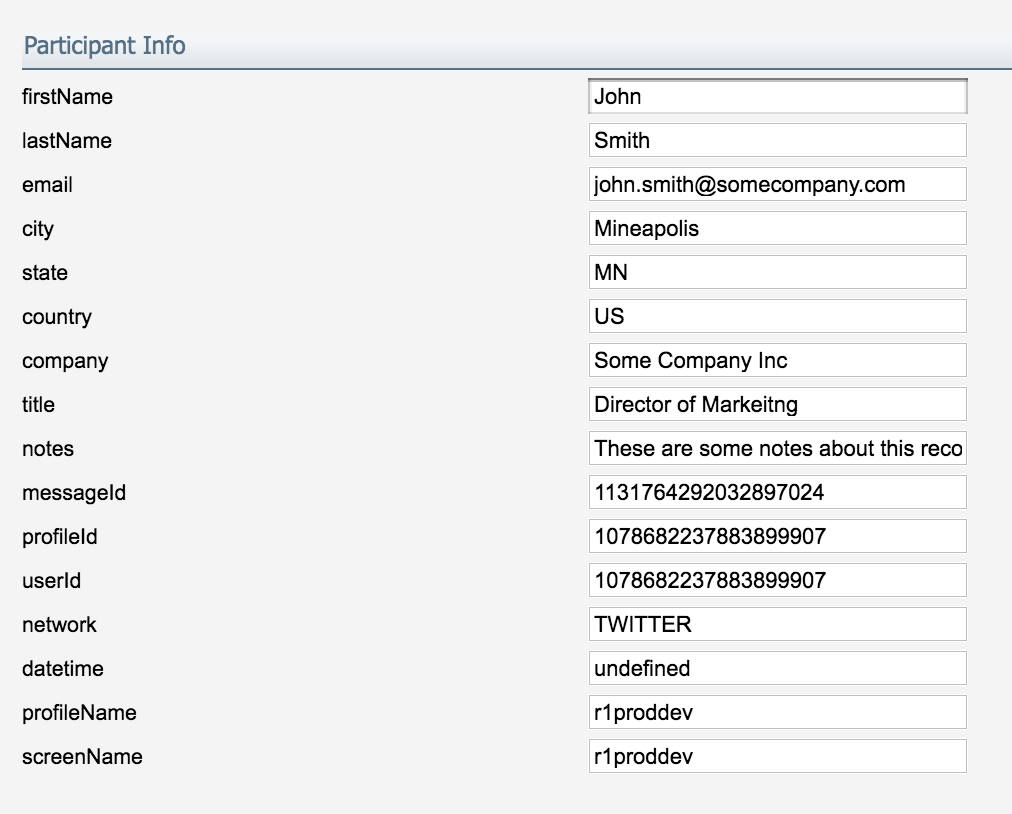
You will now see a new Eloqua Custom Object created called HootsuiteLead with the following fields:
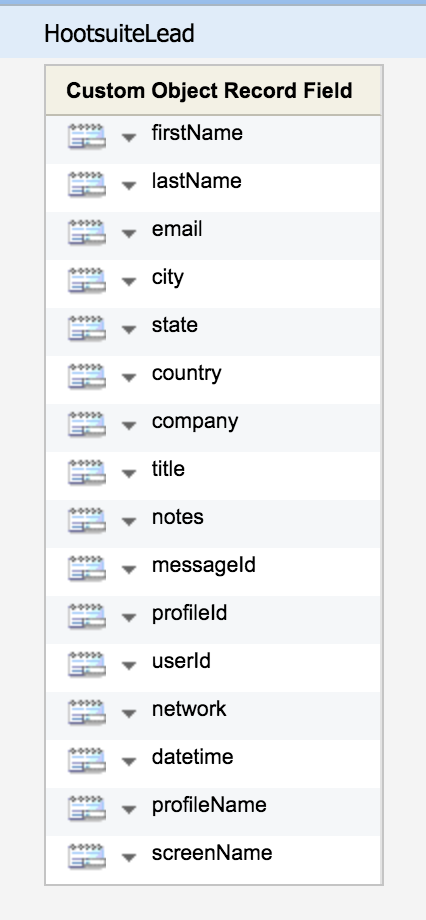
Optionally, you can set the Display Name field of your Eloqua Custom Object (e.g. using the screenName field) and Email Address Field (e.g., using the email field). You can also set the Entity Type to Contact and specify the Entity Field (e.g., Email Address).

When a lead is created, a new record will be added to this Custom Object. If the lead includes an Email Address, which is not an existing Eloqua Contact, a new Contact will be created.
Creating a Social Lead
To create a social lead, navigate to the Streams and select an interaction you wish to create a Social Lead from, click on the menu options in the lower right, and select “Send to Eloqua."

Complete the Social Lead form and click on Send to Eloqua to create a new lead within Eloqua.

You will see the new lead record created within Eloqua.
Appending Your Social Info to Eloqua Contact Record
When a new Social Lead record is created as an Eloqua Custom Object record, you can append information from the HootsuiteLead object to the Eloqua Contact. Most of this time, this would be the Social handle or screen name. To do this, you will need to set up some conditional Custom Object Record Services.

Unser the Custom Object menu, select Custom Object Record Services.

Click on the New Data option and then click on Add Processing Steps to add a new rule to append social activity data.

Select the Save to Contact Table option and click the Add button.

Next, create a conditional Processing Step with the following values:
- Email Address mapped to the Eloqua Custom Object email field
- Append your Eloqua Contact Twitter screen name field and map it to the screenName field
Lastly, you'll want to make this a Conditional Processing Step where:
- network value is = to Twitter
Click Save and Close.
Repeat the same process for Facebook with the following values:
- Email Address mapped to the Eloqua Custom Object email field
- Append your Eloqua Contact Facebook screen name field and map it to the screenName field
Conditional Processing Step where:
- network value is = to Facebook

Finally, you can either run a test using the Run Service option or enable Eloqua to process and append information every 15-minutes by clicking on Enable Custom Object Record Service.
Updated over 1 year ago