
Add Connection
Braze SFTP Importer App Feature
Add SFTP Connection
To add a new SFTP connection, click the + Add SFTP button. Give your import a name.

Next, provide your SFTP credentials (username and password), SFTP server url/endpoint, port (default is 22), file path, file name, and delimiter type (comma, pipe or tab). Please note, you can use an explicit filename (e.g., myfile.csv) or a wildcard (e.g., contacts*) for a .CSV file type. Click the Test Connection button to confirm access. If unsuccessful, double check your credentials and firewall settings.
Click Save.
Field Mapping
Next, to import data from the file, you'll need to map your file field headers to your desired Braze fields. To get started, specify a file on your SFTP location to get the header fields of your file. Then, specify the Braze target object you would like to import data into.
Braze Target ObjectsPresently, the SFTP Importer app for Braze supports importing User Attributes only. If your use case requires mapping data to other Braze objects such as Standard, Purchase, or Custom Events, please make a request by submitting a ticket in our support portal and our team will prioritize adding the functionality.
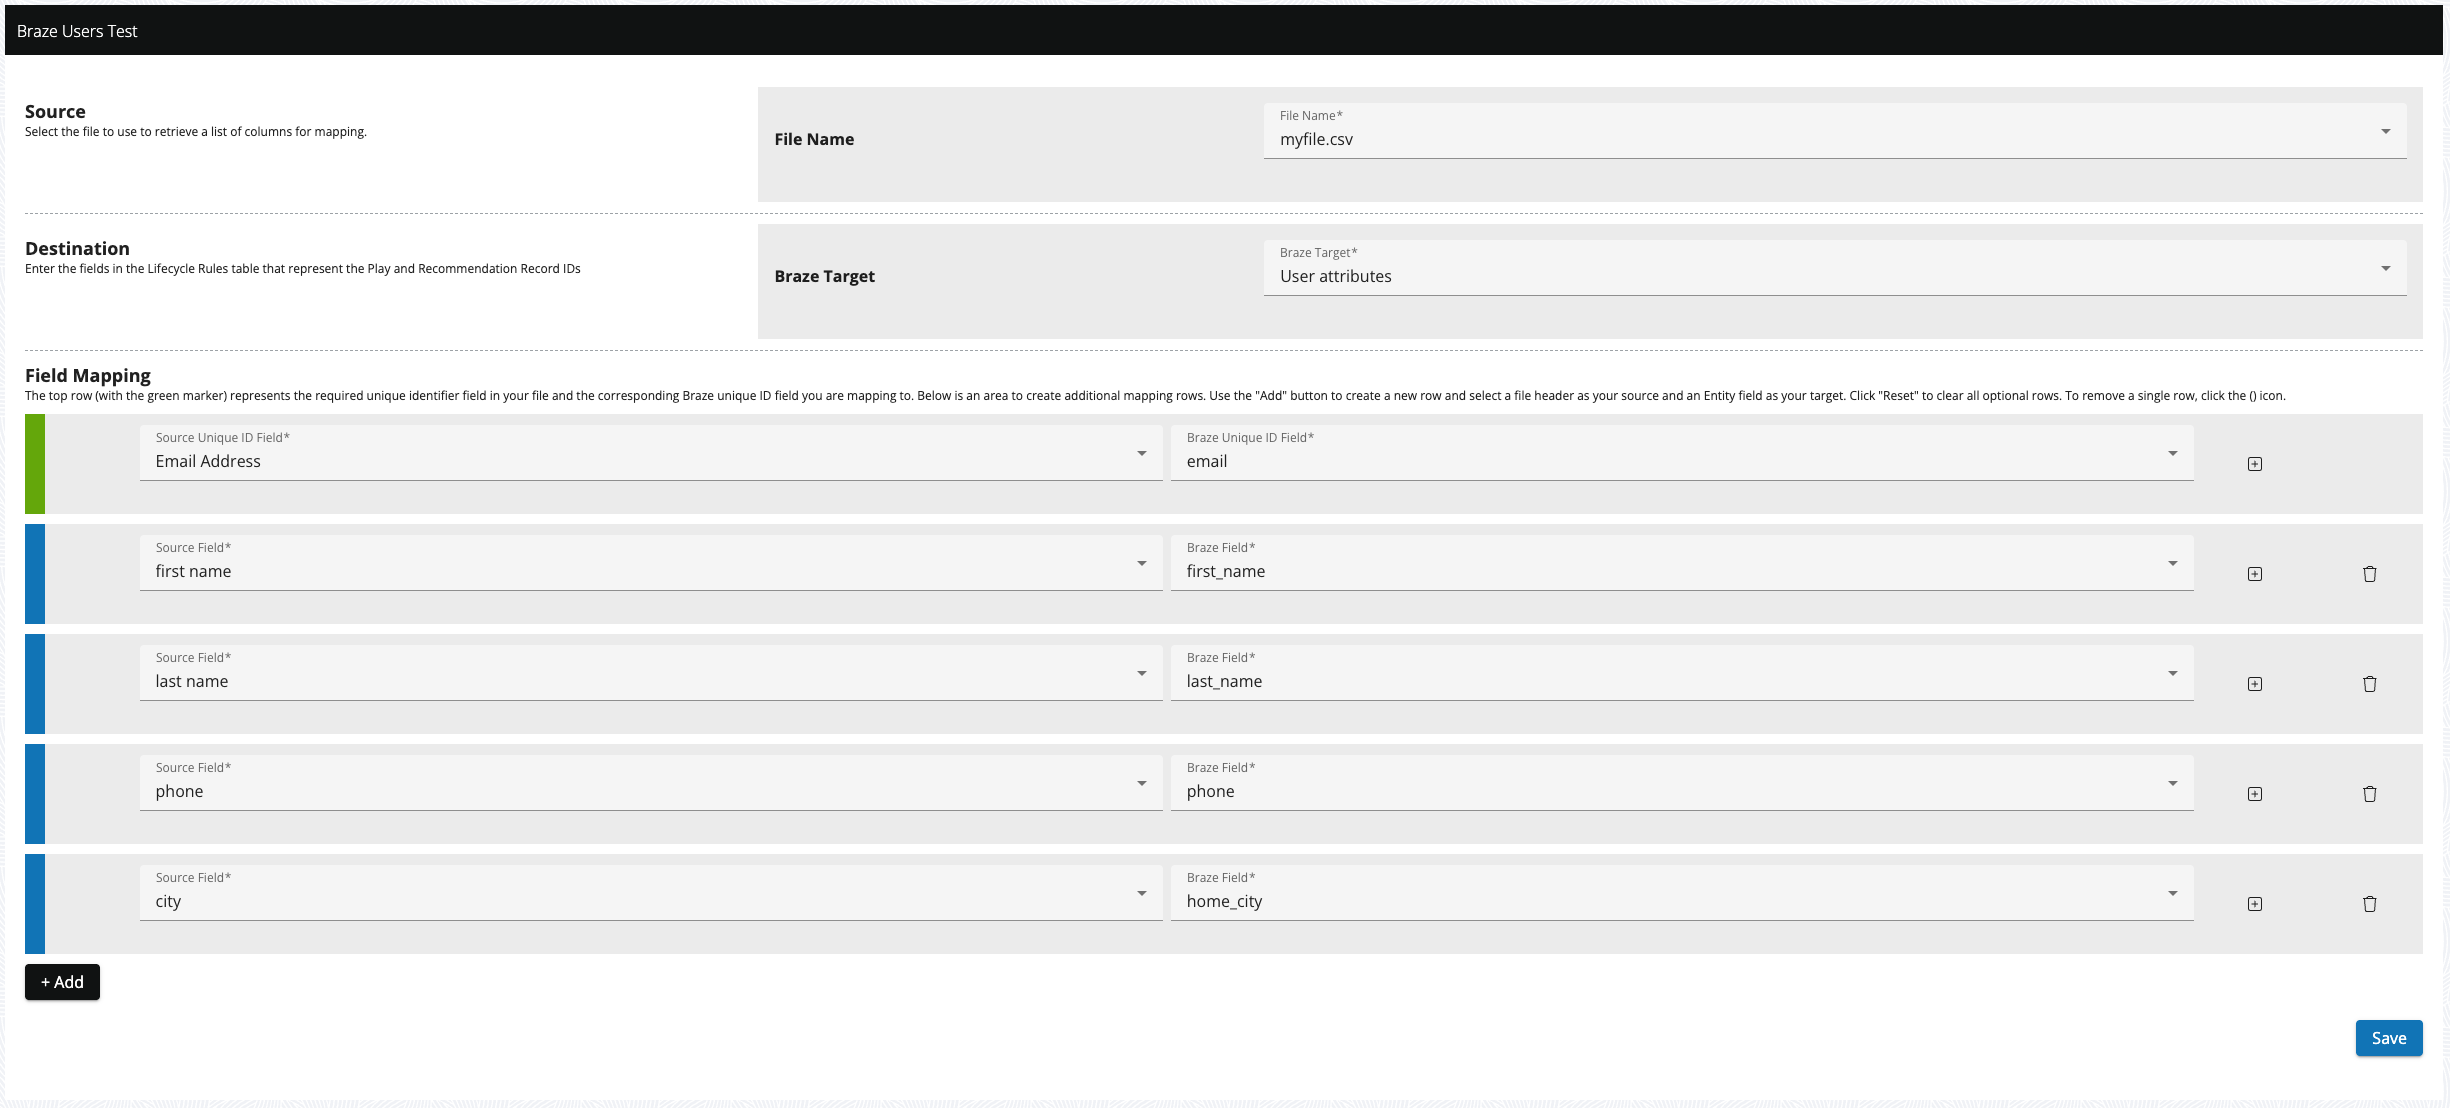
Next, map the desired fields from the SFTP file to the appropriate Braze field. At a minimum, you must map the unique identifier (the green row). Click the Add button to add additional mappings. When done, click Save.
Please note, you can map the same source (CSV) field to one or more Braze fields but once a Braze field has been mapped it will no longer be available for additional mapping. To remove a mapping, click on the .
Schedule Settings
You can run your import on demand by clicking the Run Now button or you can set up a scheduled import. For scheduled imports, set the import frequency, days of the week, start time/end time, and offset.
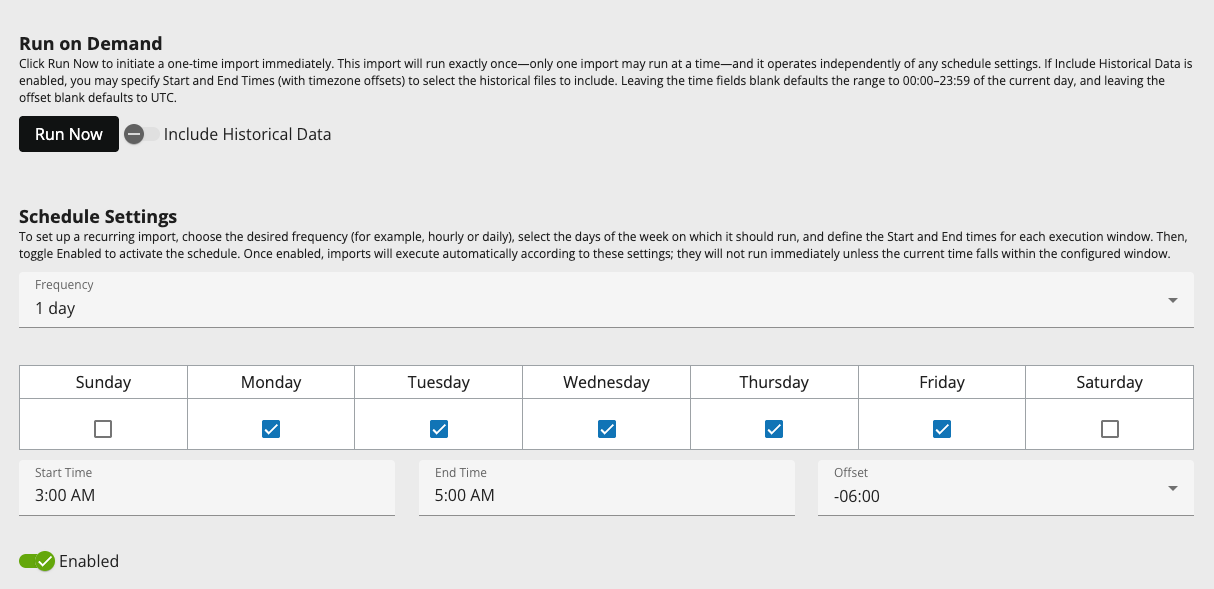
Allowed frequencies include:
- Every 5 minutes
- Every 10 minutes
- Every 30 minutes
- Every 1 hour
- Every 2 hours
- Every 4 hours
- Every 8 hours
- Every 12 hours
- Every 1 day
- Every 1 week
- Every 1 month
Click the Enable toggle to enable your scheduled import.
Notification Settings
Optionally, you can specify one or more email addresses (comma separated) to receive a notification on import success or import failure. Use the toggle to enable or disable notifications. You can add one or more email addresses, separated by a comma, to receive notifications.

Click Save to save your import settings.